Hi everyone I'm new to the world of Saltwater. I've had freshwater tanks now and then but never ventured into the world of fish that cost more than my first car. So now that I'm an Old Guy and supposedly have more time on my hands, I've decided to give it a try. I have a 45 gallon acrylic tank that measures 36"w x 24"h x 12"d. It came from a movie set that one of my neighbors built. That was his business.
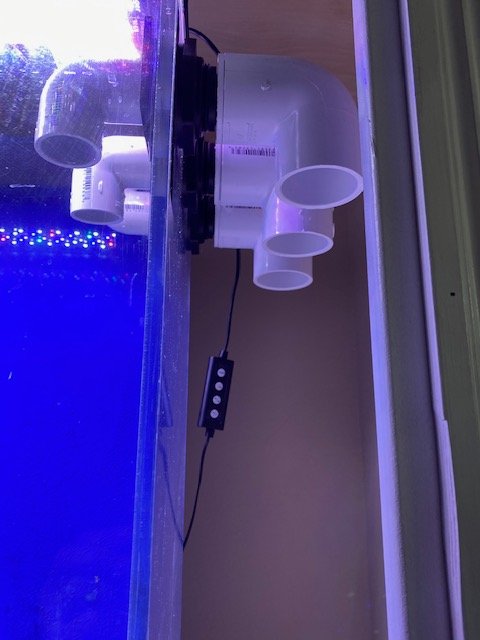
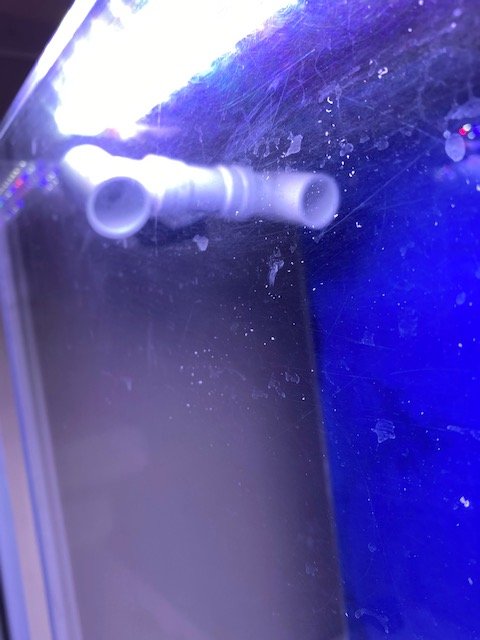
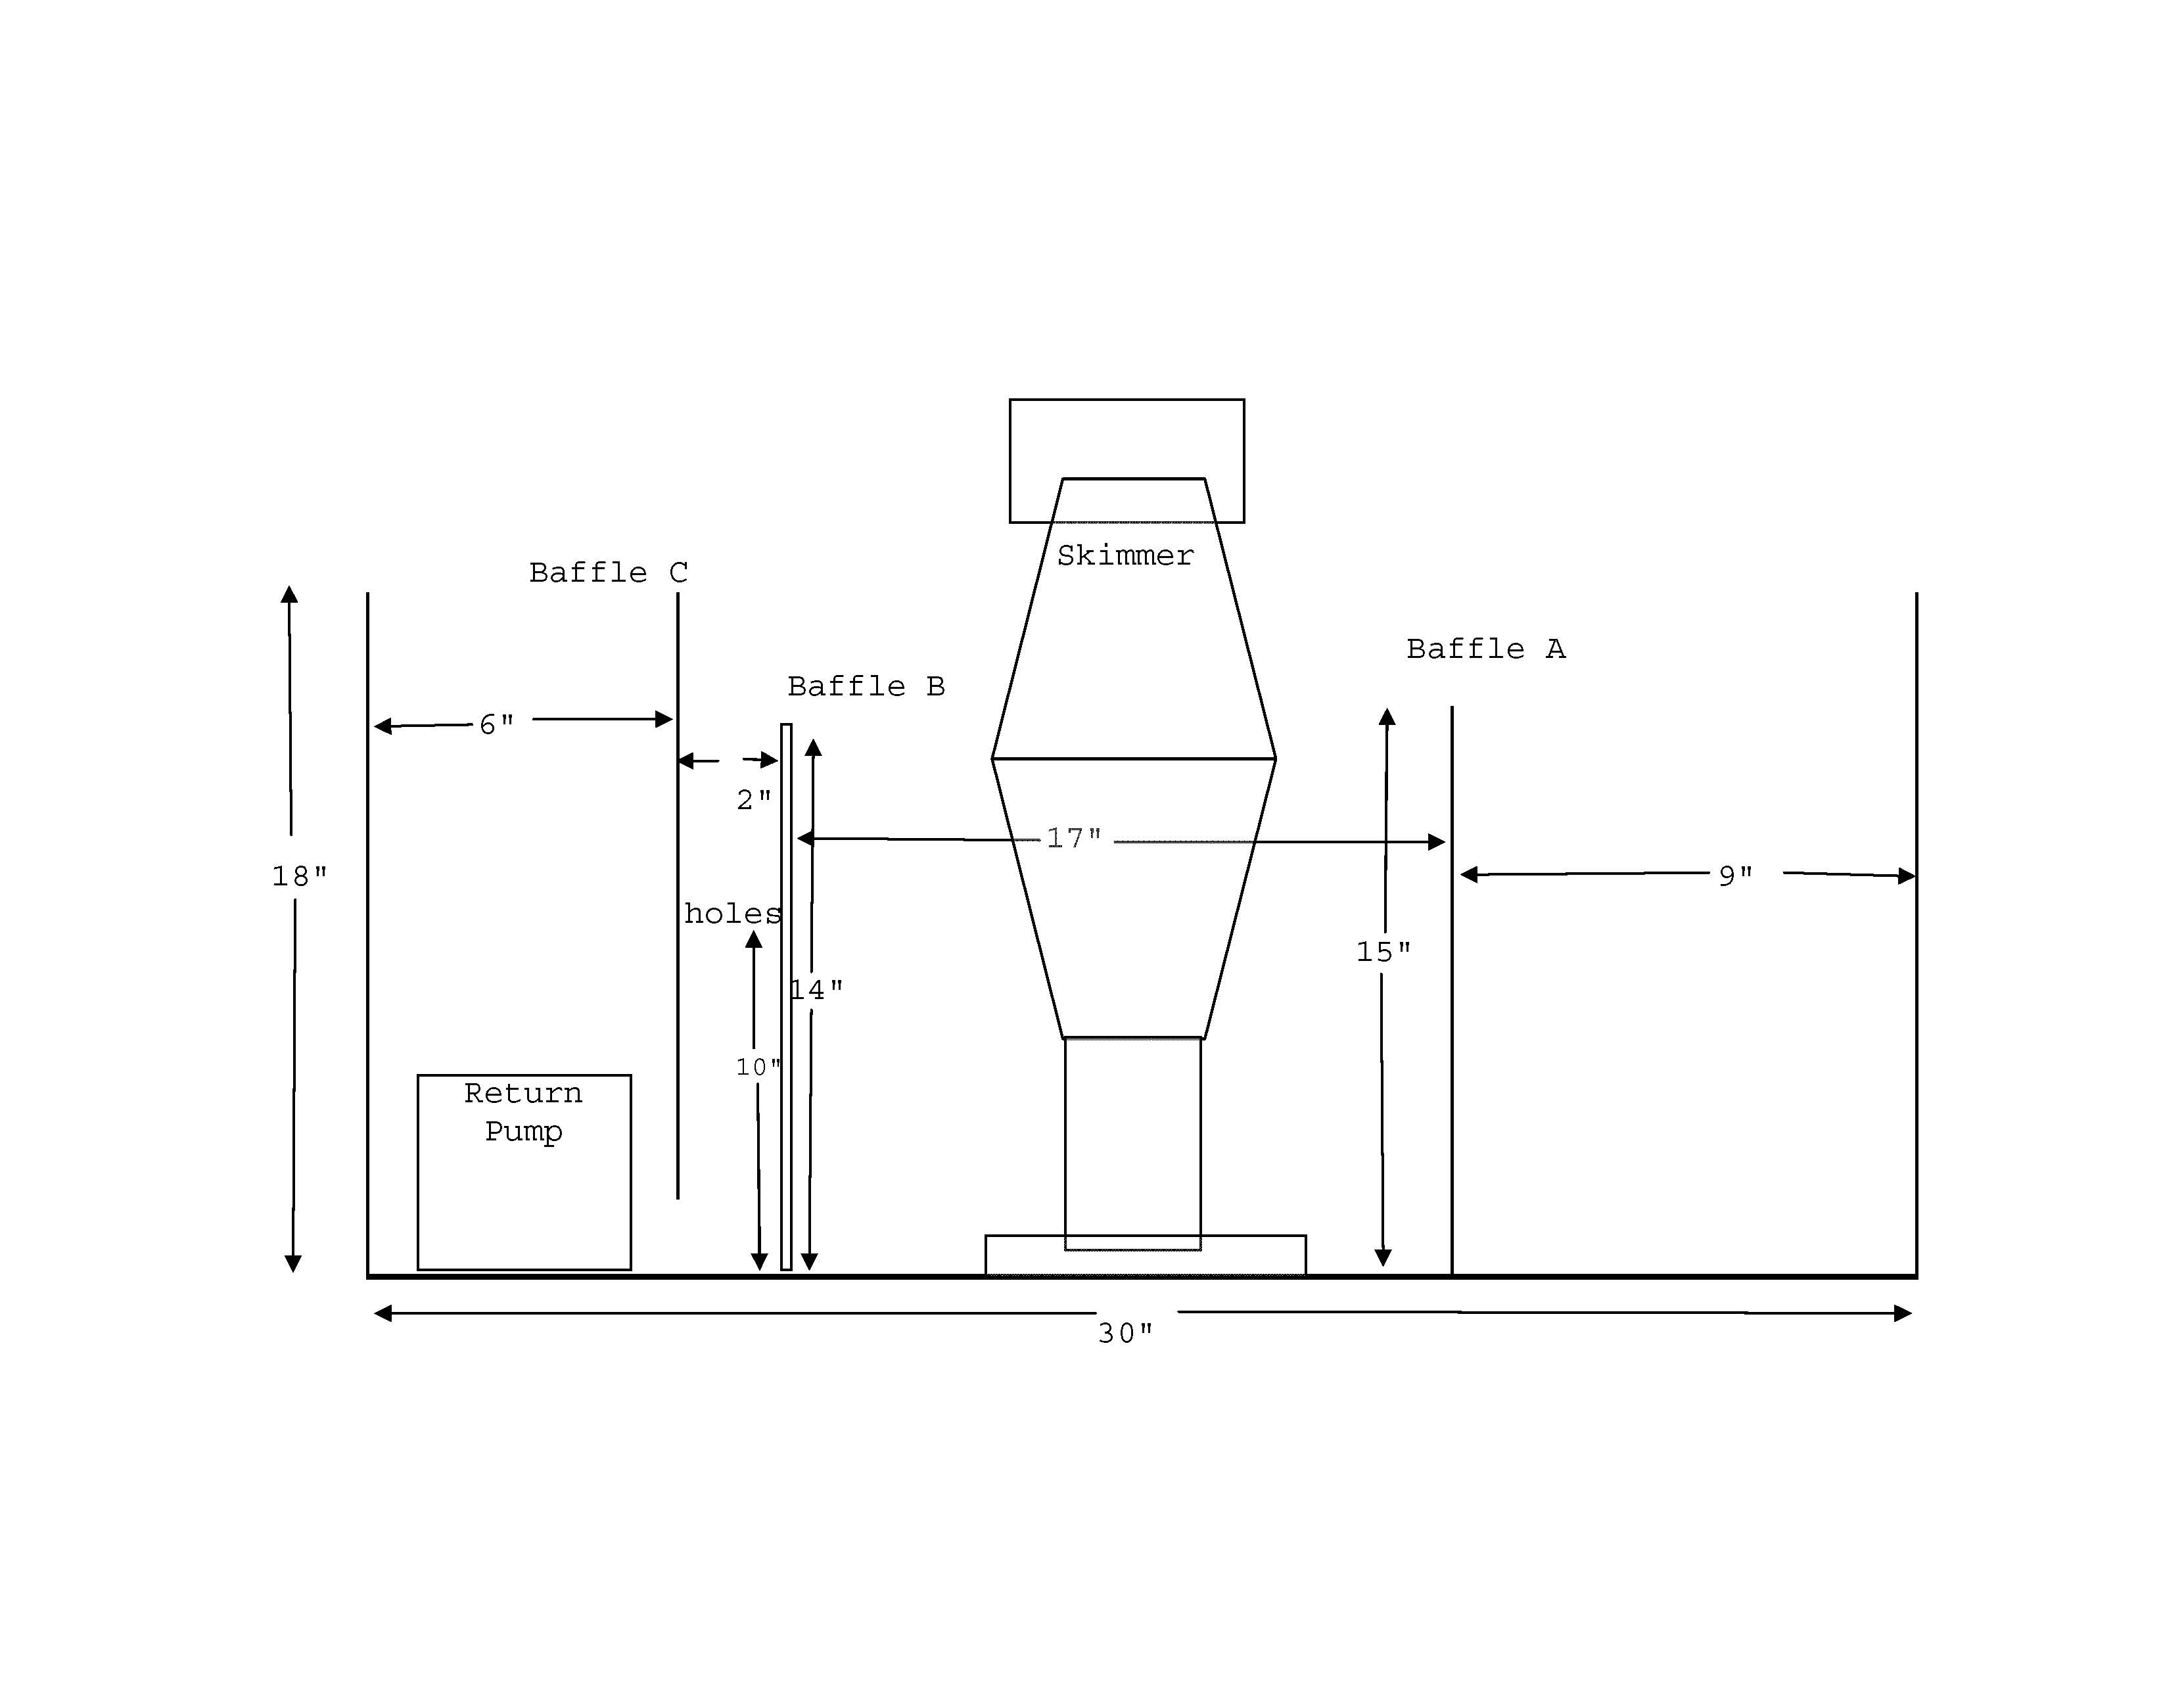
I plan on having both fish and invertebrates in the tank. I have it plumbed for what is referred to as a Bean Animal drain system (see photo). I picked up a 29 gallon glass tank that had been set up as a sump by the previous owner, although I'm not sure he knew what he was doing. As best I can tell he had a skimmer in the middle of 3 compartments and used one of the side compartments as a top off tank. The third compartment held the return pump. I'm not concerned with an automatic top off setup so I'm thinking of changing the compartments. I've attached a photo of the sump as it was. It had a bulkhead for the input in that center compartment. I'm going to plug that. This guy used at least 10 tubes of silicone to attach the walls for the compartments so I've been taking that stuff off for days.
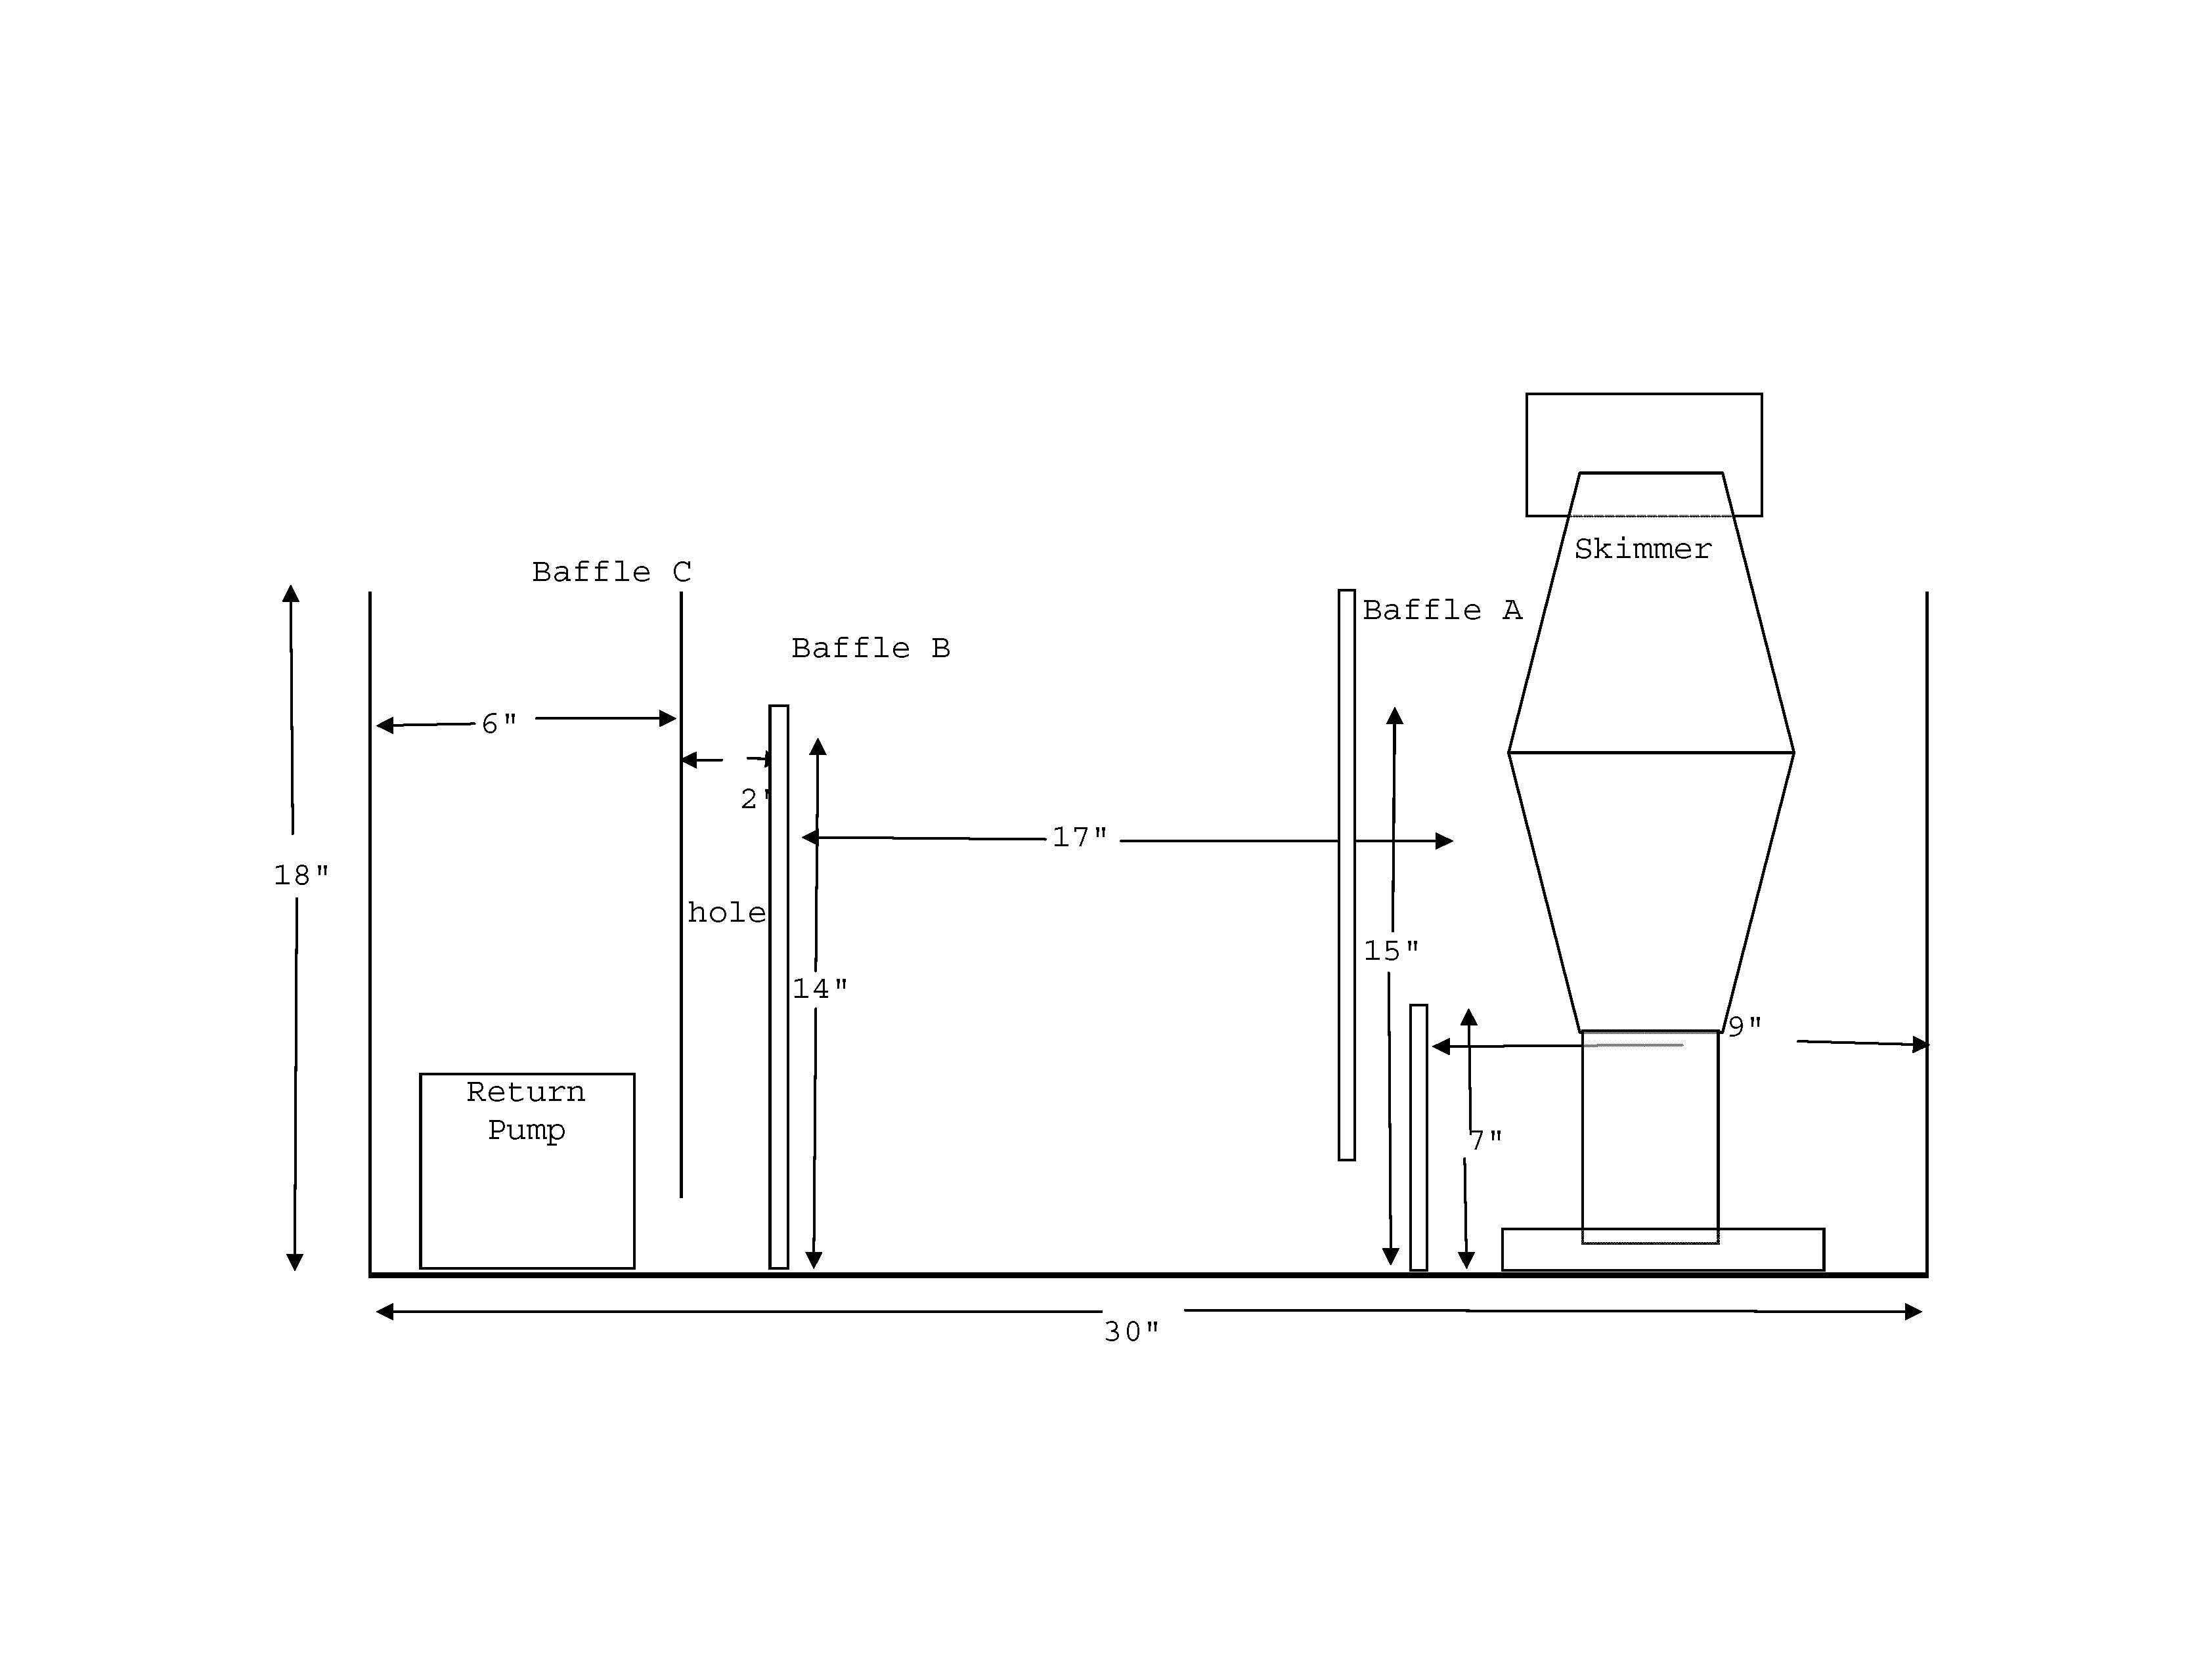
My plan is to make the right side compartment bigger by moving the wall so I can put the skimmer and heater in that compartment. I'm going to put an adjustable wall on that compartment so I can adjust the water height for the skimmer. (It's a somatic 60 that calls for a water height of between 6" and 9"). For now I'll leave the center compartment open for either additional live rock or algae. There is a bubble trap between the center and left side compartment which I'll leave and the return pump is in that compartment. There's a drawing of the way it was and the new design.
Does this sound like the proper way to set up a sump? If not any suggestions would be greatly appreciated.
I hope I've attached the pictures correctly.
Joe
I plan on having both fish and invertebrates in the tank. I have it plumbed for what is referred to as a Bean Animal drain system (see photo). I picked up a 29 gallon glass tank that had been set up as a sump by the previous owner, although I'm not sure he knew what he was doing. As best I can tell he had a skimmer in the middle of 3 compartments and used one of the side compartments as a top off tank. The third compartment held the return pump. I'm not concerned with an automatic top off setup so I'm thinking of changing the compartments. I've attached a photo of the sump as it was. It had a bulkhead for the input in that center compartment. I'm going to plug that. This guy used at least 10 tubes of silicone to attach the walls for the compartments so I've been taking that stuff off for days.
My plan is to make the right side compartment bigger by moving the wall so I can put the skimmer and heater in that compartment. I'm going to put an adjustable wall on that compartment so I can adjust the water height for the skimmer. (It's a somatic 60 that calls for a water height of between 6" and 9"). For now I'll leave the center compartment open for either additional live rock or algae. There is a bubble trap between the center and left side compartment which I'll leave and the return pump is in that compartment. There's a drawing of the way it was and the new design.
Does this sound like the proper way to set up a sump? If not any suggestions would be greatly appreciated.
I hope I've attached the pictures correctly.
Joe