I needed to redo my bathroom that was right above my fish tank.
This included removing the floor, walls, plumbing and electrical. and starting from scratch.
The problem this caused my current 150 tank is the debris that would get into the water.
The ceiling in my utility room where my tank is was never finished and caused a few interesting problems for my 150 tank.
The ceiling can never really be finished because in this room there is the Washer, dryer, central AC, Forced Hot air heater, Whole house HEPA Filter, air ducting, drainage stack, hot water heater and access to my second bathroom and garage entrance.
The ceiling has all of the plumbing running under through and around it including the air ducts and electrical wires for most of the house.
The only way to rebuild my upstairs bath was to remove my tank completely and replace it when i was done.
That meant it was time for an upgrade.
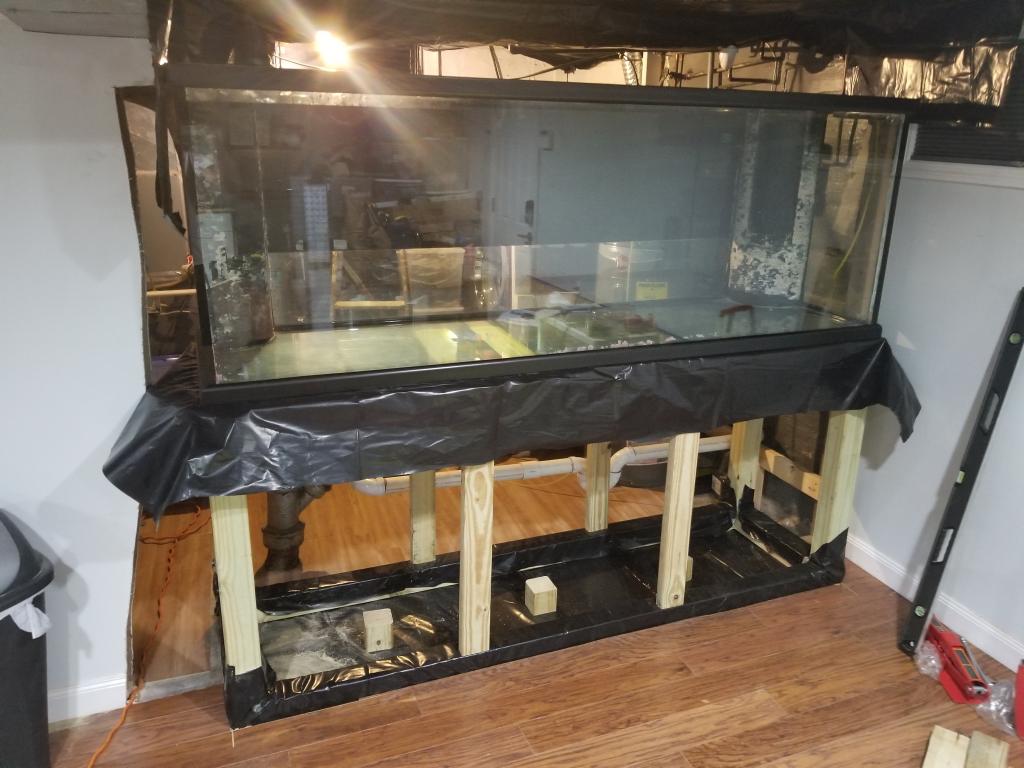
In comes the 265 marine land tank.
The previous stand was built by me and one of my friends.
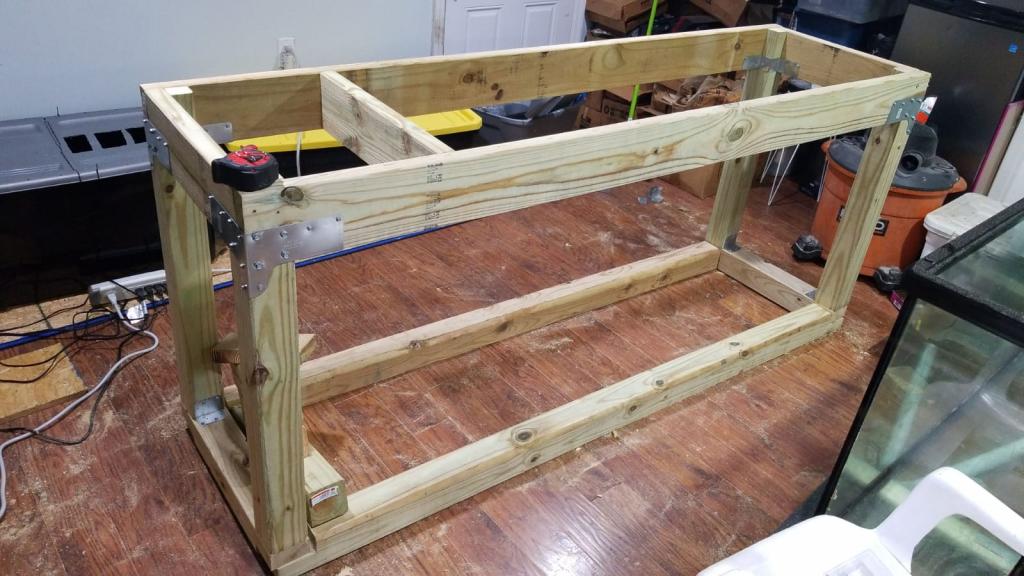
Since this tank was built into the wall and I wanted the new one to be *** well, I had to create a new stand from scratch.
Learning from my previous mistakes of building a stand I designed one that was stronger with less material.
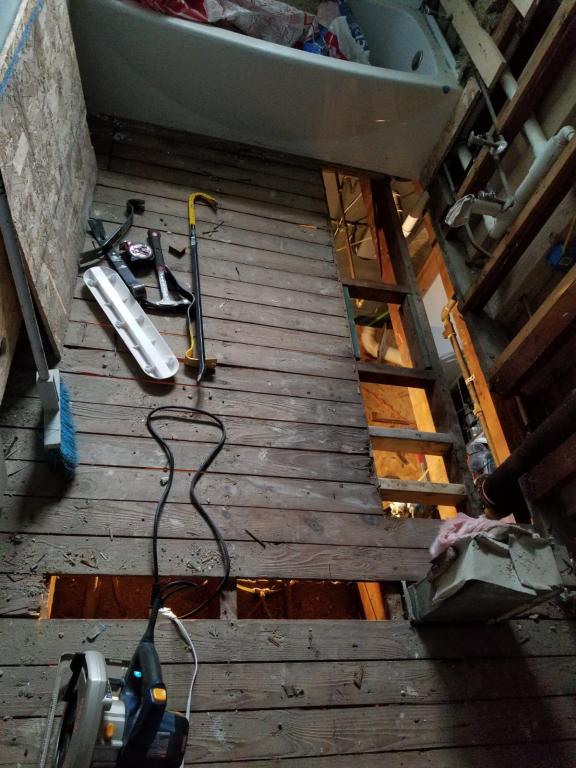
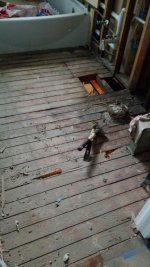
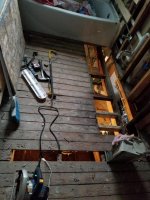
After Removing my tank and all of its livestock into tubs I began working on the bathroom upstairs.
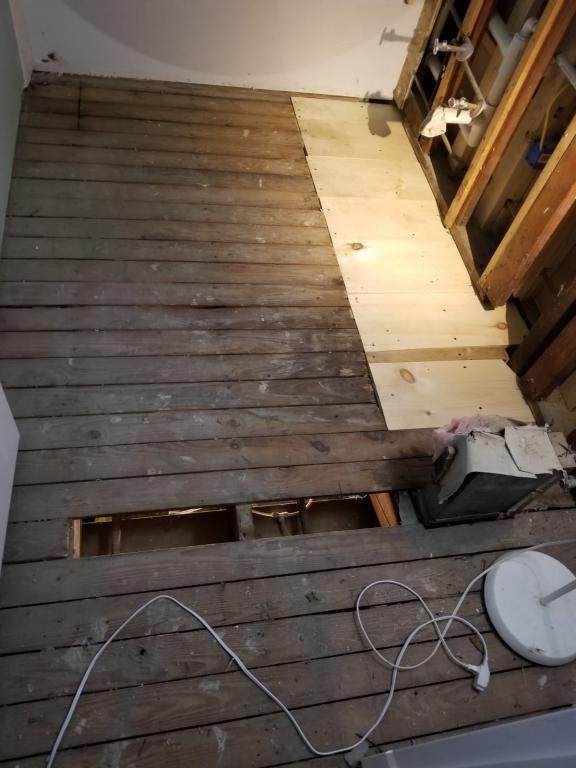
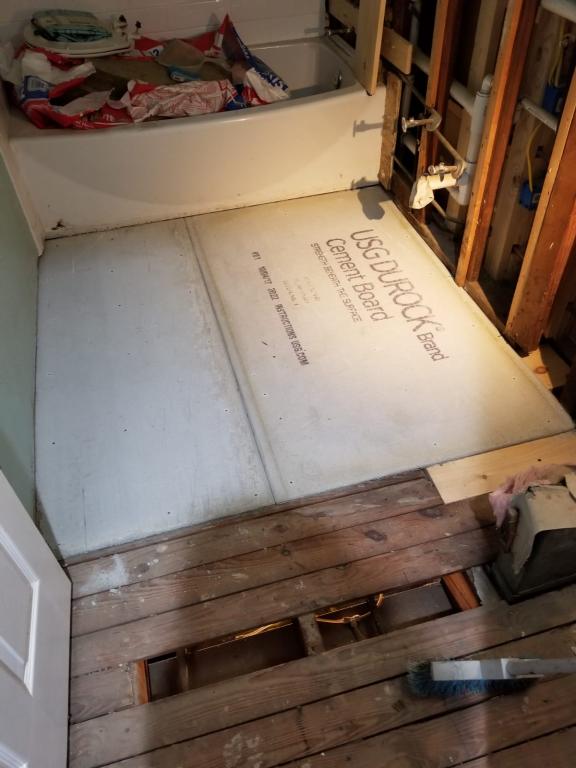
After removing the tile walls and one wall to expand my bathroom by 2 feet, I redid the floor, electrical, plumbing, walls and relocated the toilet and ac vent 2 feet to the right all so I could fit a double vanity.
After putting up the walls and calling my tiling guy I began working on the fish tank stand.
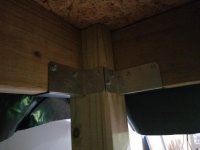
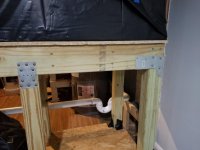
I used pressure treated wood all over since it is in a basement utility room that has a lot of moisture and will be sitting directly on the cement slab.
2x6 for the runners and cross beams
4x4 for the supports and floor box
2x4 for the middle supports
? sub floor board for the sump and for the tank
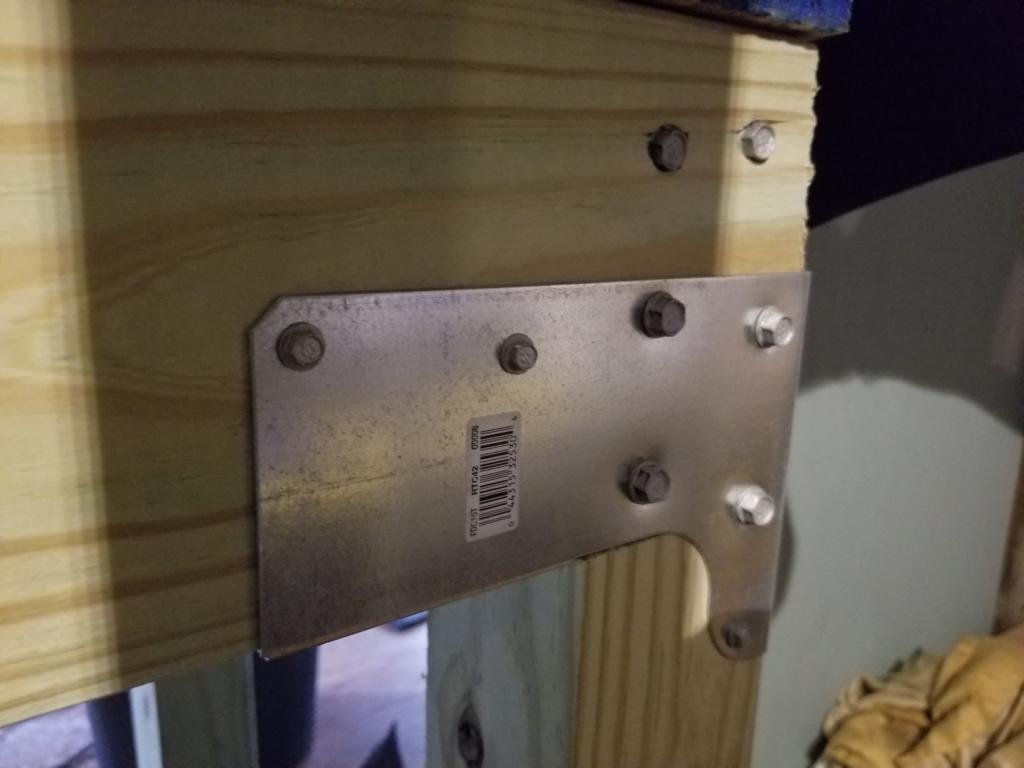
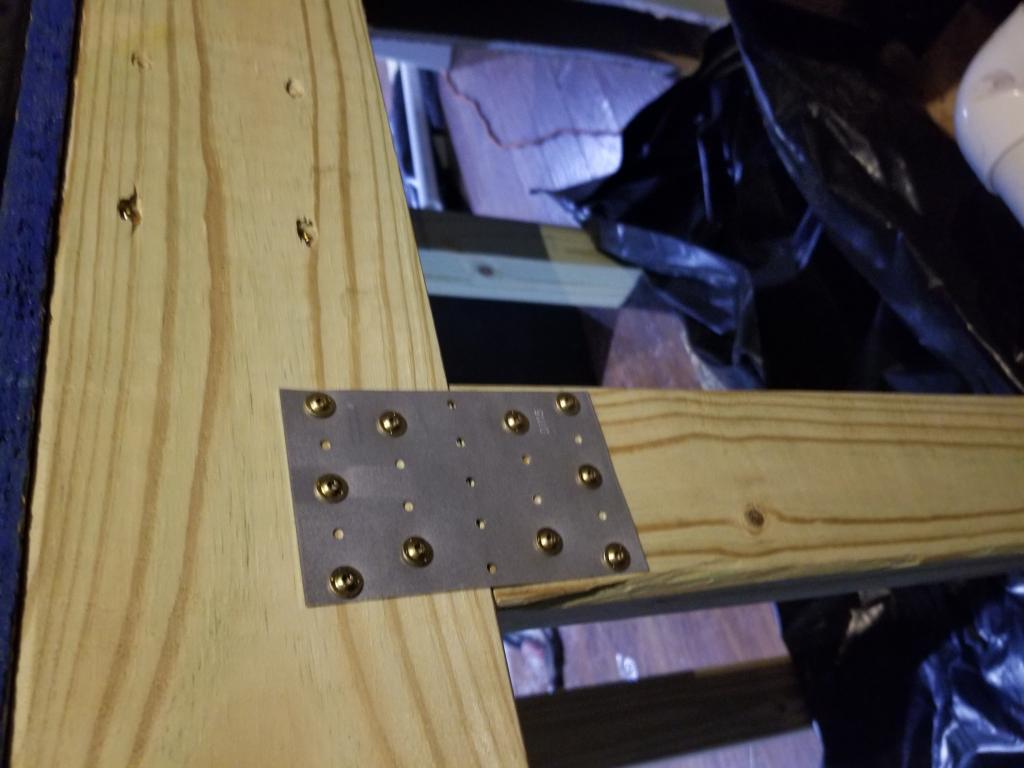
All held together with Simpson strong ties and lag bolts.
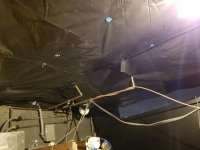
The ceiling now needed to be dealt with.
I removed as much debris as I could and installing soundproofing insulation, I nailed 9 mil plastic liner to the ceiling.
Because I may need access to the ceiling in that area and because removing finished drywall creates a lot of dust and debris plus it may not protect from a spill on the main floor I decided the plastic would be the best choice.
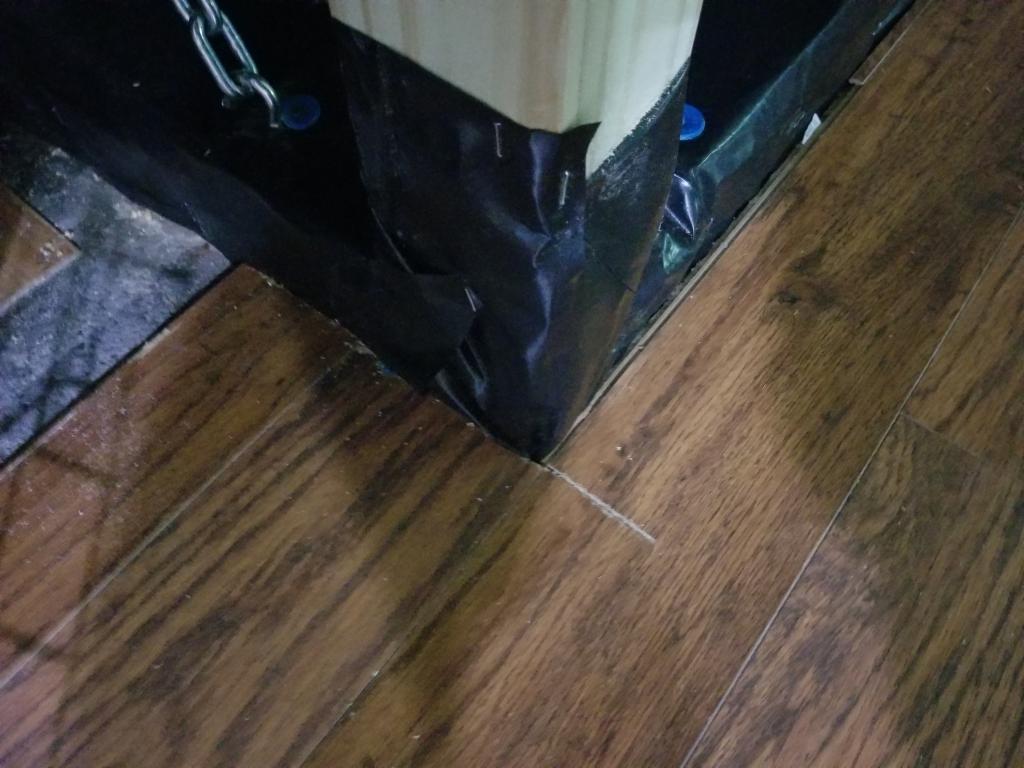
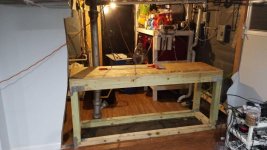
The location that I had my previous tank left approx ten inches of space between the stand and the drainage stack. Since this tank is wider and deeper I cut ten inches out of my floating floor to move the tank forward away from the stack.
This allows the weight of the tank to spread out more easily and not be concentrated by the stack.
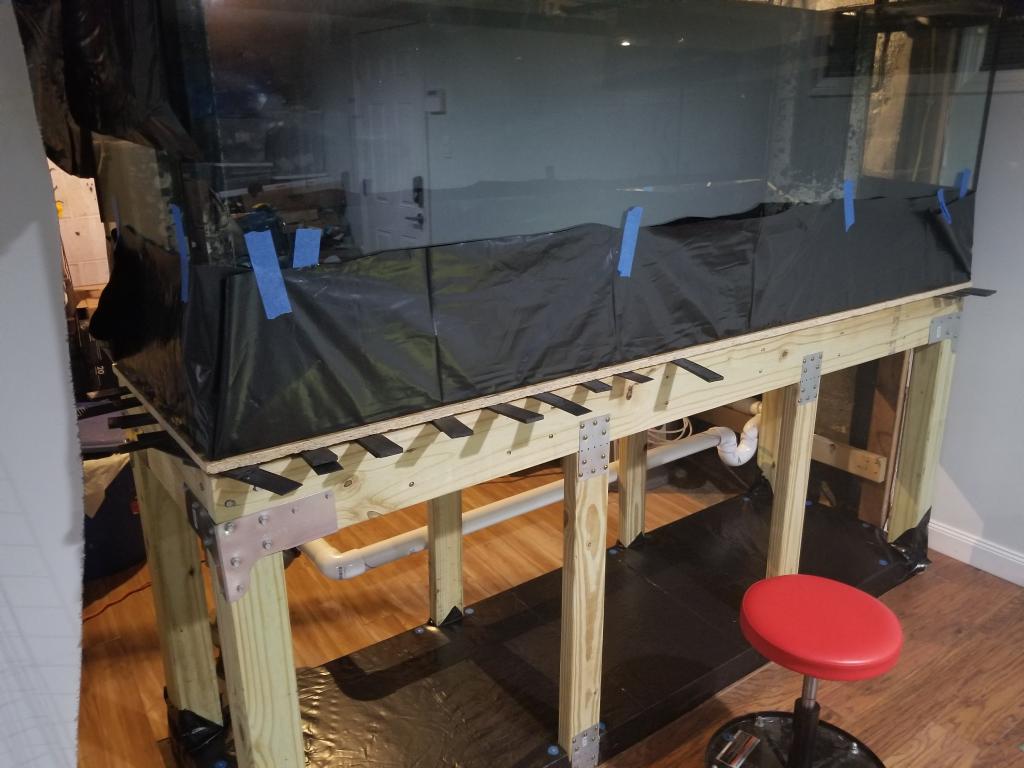
To protect it even more from the moisture on the floor I placed 9mil plastic liner on the floor and placed the stand on there.
Placed the sub floor plywood on the stand and then another layer of 9 mil plastic, followed by the tank.
Cut out the plywood for the sump area and the middle supports and put them in their places and covered it all with 9 mil plastic. In case of any spillage.
Leveled of the tank as best I could, then began my RO.
I placed a ruler on every corner of the tank on the inside and out then taped them into place. I will be using these to continue leveling the tank as it settles more.
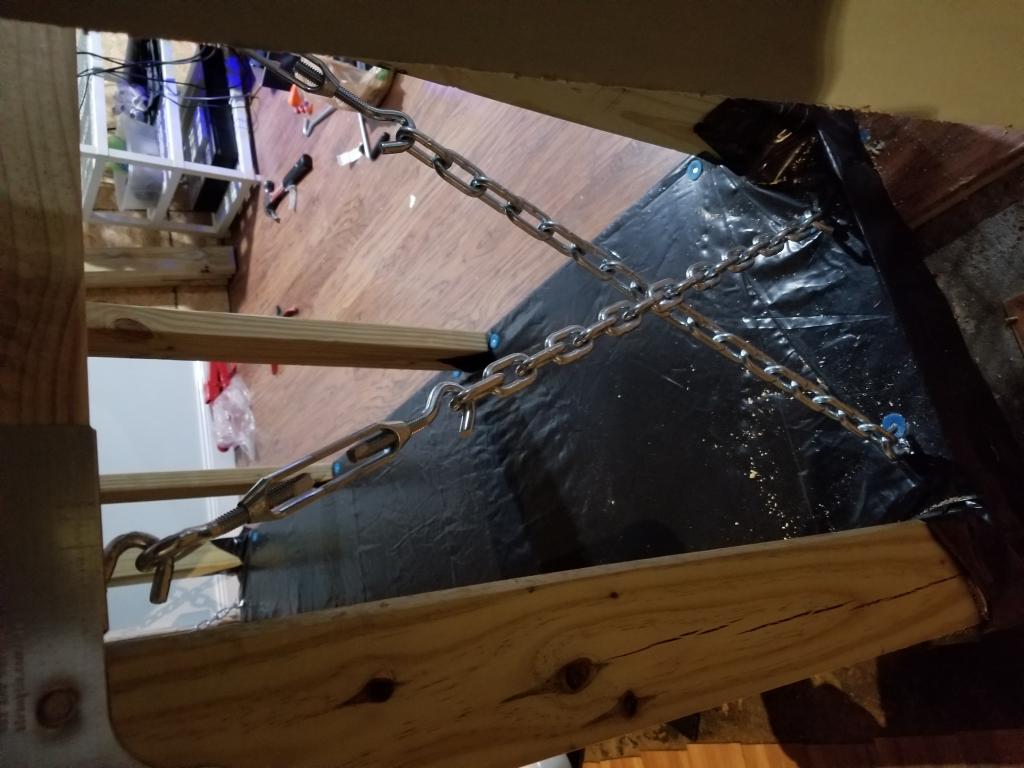
I noticed the tank had a wobble on its narrow side.
I solved this by adding two chains on either side with a turnbuckle for tension.
They were attached in an x pattern with lag hooks on every corner.
Yes this is overkill and I could have accomplished this with just a few pieces of wood but then it wouldn't look as cool and quite possibly not as sturdy. Though the stand looks nice it no where near as good as a what a proper craftsman can accomplish.
Prior to the chains it wobbled about half an inch in either direction. With the chains it doesn't move at all.
At this point the RO has filled the tank to about a inch and a quarter. Time to level off the tank.
With the use of plastic shims and the rulers I was able to level off the tank to within an eighth of an inch of water or one sixteenth of an inch difference from corner to corner on the tank itself.
While filling up the tank with RO I started to plumb it and that's where I am at now.
This included removing the floor, walls, plumbing and electrical. and starting from scratch.
The problem this caused my current 150 tank is the debris that would get into the water.
The ceiling in my utility room where my tank is was never finished and caused a few interesting problems for my 150 tank.
The ceiling can never really be finished because in this room there is the Washer, dryer, central AC, Forced Hot air heater, Whole house HEPA Filter, air ducting, drainage stack, hot water heater and access to my second bathroom and garage entrance.
The ceiling has all of the plumbing running under through and around it including the air ducts and electrical wires for most of the house.
The only way to rebuild my upstairs bath was to remove my tank completely and replace it when i was done.
That meant it was time for an upgrade.
In comes the 265 marine land tank.
The previous stand was built by me and one of my friends.
Since this tank was built into the wall and I wanted the new one to be *** well, I had to create a new stand from scratch.
Learning from my previous mistakes of building a stand I designed one that was stronger with less material.
After Removing my tank and all of its livestock into tubs I began working on the bathroom upstairs.
After removing the tile walls and one wall to expand my bathroom by 2 feet, I redid the floor, electrical, plumbing, walls and relocated the toilet and ac vent 2 feet to the right all so I could fit a double vanity.
After putting up the walls and calling my tiling guy I began working on the fish tank stand.
I used pressure treated wood all over since it is in a basement utility room that has a lot of moisture and will be sitting directly on the cement slab.
2x6 for the runners and cross beams
4x4 for the supports and floor box
2x4 for the middle supports
? sub floor board for the sump and for the tank
All held together with Simpson strong ties and lag bolts.
The ceiling now needed to be dealt with.
I removed as much debris as I could and installing soundproofing insulation, I nailed 9 mil plastic liner to the ceiling.
Because I may need access to the ceiling in that area and because removing finished drywall creates a lot of dust and debris plus it may not protect from a spill on the main floor I decided the plastic would be the best choice.
The location that I had my previous tank left approx ten inches of space between the stand and the drainage stack. Since this tank is wider and deeper I cut ten inches out of my floating floor to move the tank forward away from the stack.
This allows the weight of the tank to spread out more easily and not be concentrated by the stack.
To protect it even more from the moisture on the floor I placed 9mil plastic liner on the floor and placed the stand on there.
Placed the sub floor plywood on the stand and then another layer of 9 mil plastic, followed by the tank.
Cut out the plywood for the sump area and the middle supports and put them in their places and covered it all with 9 mil plastic. In case of any spillage.
Leveled of the tank as best I could, then began my RO.
I placed a ruler on every corner of the tank on the inside and out then taped them into place. I will be using these to continue leveling the tank as it settles more.
I noticed the tank had a wobble on its narrow side.
I solved this by adding two chains on either side with a turnbuckle for tension.
They were attached in an x pattern with lag hooks on every corner.
Yes this is overkill and I could have accomplished this with just a few pieces of wood but then it wouldn't look as cool and quite possibly not as sturdy. Though the stand looks nice it no where near as good as a what a proper craftsman can accomplish.
Prior to the chains it wobbled about half an inch in either direction. With the chains it doesn't move at all.
At this point the RO has filled the tank to about a inch and a quarter. Time to level off the tank.
With the use of plastic shims and the rulers I was able to level off the tank to within an eighth of an inch of water or one sixteenth of an inch difference from corner to corner on the tank itself.
While filling up the tank with RO I started to plumb it and that's where I am at now.
Attachments
-
 IMG-20180605-WA0001.jpg53.5 KB · Views: 217
 -
 IMG-20180610-WA0003.jpg73.7 KB · Views: 213
 -
 IMG-20180610-WA0004.jpg54.8 KB · Views: 214
 -
 IMG-20180610-WA0005.jpg50 KB · Views: 212
 -
 IMG-20180527-WA0002.jpg91.2 KB · Views: 212
 -
 20180730_145618.jpg50 KB · Views: 214
 -
 20180730_145637.jpg56.6 KB · Views: 216
 -
 20180730_145607.jpg64.2 KB · Views: 206
 -
 20180730_153907.jpg67.1 KB · Views: 211
 -
 20180730_213401.jpg80.3 KB · Views: 212
 -
 IMG-20180608-WA0003.jpg73.2 KB · Views: 210
 -
 20180801_211957.jpg68.1 KB · Views: 206
 -
 20180801_152302.jpg77.3 KB · Views: 210
 -
 20180730_165444.jpg80.3 KB · Views: 208
 -
 20180729_161227.jpg91.3 KB · Views: 211
 -
 20180731_214355.jpg82.8 KB · Views: 206