


You are using an out of date browser. It may not display this or other websites correctly.
You should upgrade or use an alternative browser.
You should upgrade or use an alternative browser.
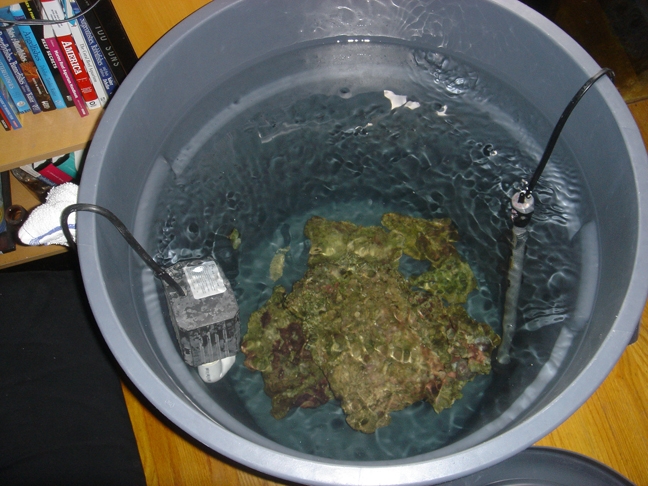
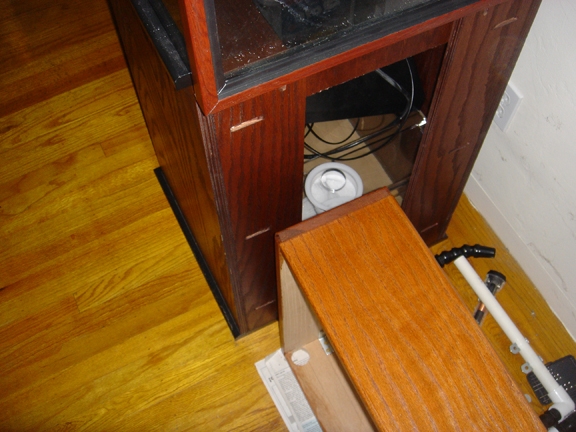
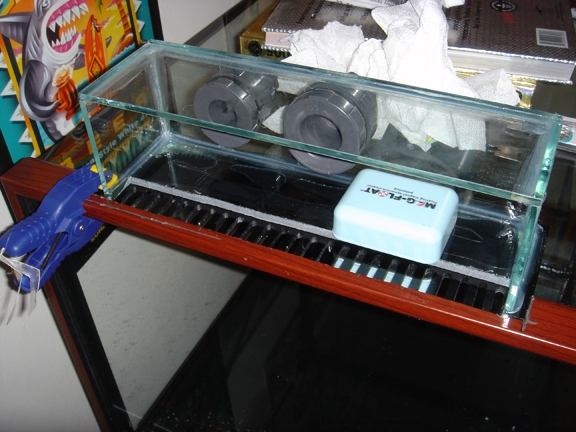
Project for Tuesday! Well, actually a trip for Tuesday. Picked up my sump and overflow teeth from TruVu, and removed the door to the stand to fit it in there. I'm stoked because the sump creates a little mini shelf for me to place a top off jug. 
Also picked up some year old live rock from a fellow reefer. It looks great!
Also picked up some year old live rock from a fellow reefer. It looks great!
Attachments


Looking good. You didn't answer part of my PM, though. Do you think I would be able to pull off an external overflow (much like what you just did, but much bigger scale) on a brand new 180G, considering I've never used a 'dremel' to cut glass and have never siliconed anything besides sump baffles? Let me know what your pointers would be, if you suggest I go ahead.
Do you think I would be able to pull off an external overflow (much like what you just did, but much bigger scale) on a brand new 180G, considering I've never used a 'dremel' to cut glass and have never siliconed anything besides sump baffles? Let me know what your pointers would be, if you suggest I go ahead. bleedingthought":3j5odu2p said:Looking good. You didn't answer part of my PM, though.
It's definitely doable. It'll end up being expensive and very time consuming though. That little piece of black acrylic was $50, for instance. And that's my cost! A LFS might charge you $80, just for the trouble. Add up the cost of the dremel tool, the diamond bits and collet, the cut glass, silicone, etc. and you're almost better off just buying a reef ready set up. If you want to save money, I think you should check your local prices on some of these items and see what it will all add up to.
Having said all that, if you decide to go for it I can walk you through each step!
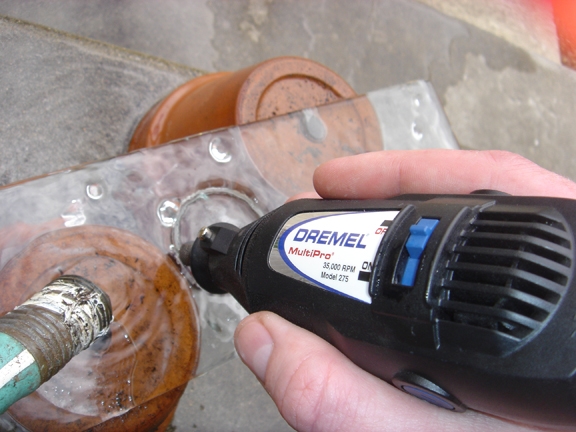
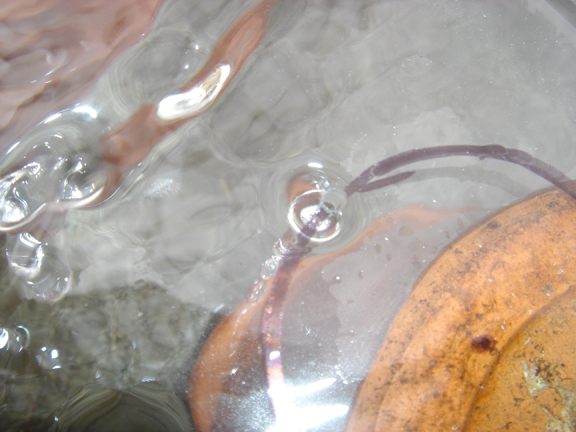
Here are the steps for drilling glass. The first picture is the pilot hole. You do this by using dremel part 7103 (the one with the little ball at the end--make sure to buy the special collet for diamond bits, dremels don't come with them). You want to make a tiny little swirling motion as you're cutting through, so that the hole you make is bigger than the bit. You'll know you're through when the water drips out! Go up and down a few times to really make sure you've got a good opening. When I do this step I hold the dremel tool much like you would hold an ice cream cone or a baseball batt. The force is all going down into the glass.
Okay, next pictures. Switch the bit to dremel part 7134 (this one looks like a sharp spear) and start carving out your hole. Ever carve a pumpkin with one of those silly little knives? It's pretty much the same but much slower. Hold the tool much like you would a pencil, and keep it going in an up and down motion. Just pressing the bit against the glass won't get you anywhere. Think of a movement like a sewing machine. It takes a while to train your hand to do it fast and fluidly. I find it's easiest to position the glass straight in front of me, and slowly pull the dremel towards me to create the line. Then, rotate the glass as it's needed to curve the line into a circle. Voila!
Other tips--always use lots and lots of water. Water should be touching the bit at all times. If the bit feels hot, ever, put more water on it. I just keep a hose trickling on it. When you mark the hole with a sharpie, make sure it's big enough! It's tricky to mark for a bulkhead. Just make sure the bulkhead will fit inside the line you're cutting.
Attachments

the panel is a great idea. It's just a power conditioner used for sound gear. I should have thought of this before now being a musician.
Here is a link to alllllll sorts of them!!!!
http://www.musiciansfriend.com/home/nav ... onditioner
b
Here is a link to alllllll sorts of them!!!!
http://www.musiciansfriend.com/home/nav ... onditioner
b
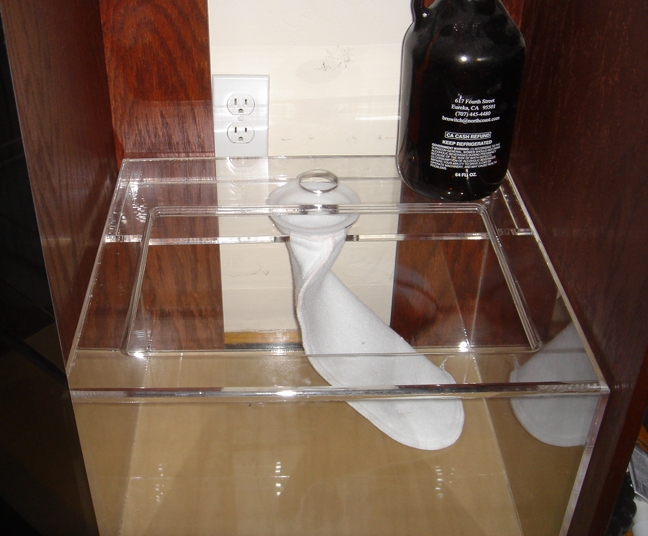
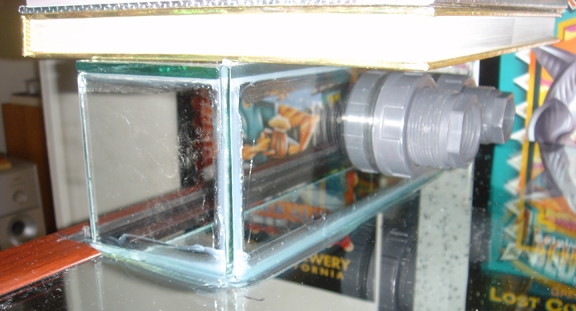
More stuff done today. I had to sneak into the art dept. here to use their paper cutter to cut the vinyl hose at an angle. :lol: The canopy needs a few more coats of stain to match the stand and tank. I also siliconed on the overflow teeth.
Attachments

browncj7":3t794hbq said:Why place hose at the end of the locline return?
It'll just go into the water by a fraction of an inch--hides the return. Imagine the water line as just above the very bottom of the frame. I got the idea from seeing it at several public aquariums. Keeps man-made looking stuff out of the tank.
Matt, with your encouragement and Calfo's on RC, I think I'm going ahead with the external overflow. I hope I will save a little of money (I have a gift certificate to Amazon so that'll go towards the dremel or maybe a rotozip; I won't be using the acrylic since I'm just going with a 1/4"-1/2" slot for the water drain and I'll just keep that open with possibly gutter guard over it but probably nothing at all; After that, the cut glass, silicone, and bits won't add up as much) but the overall idea is that I'll have an external overflow which is much better, in my opinion (for various reasons that you're obviously aware of ) and as it's nervous as it makes me right now, it seems like a fun and educational job!
Thanks for the first lesson, by the way! I hope there will be more, as I'll need them!!!
What did you use to cut through the tank frame in the first page? Same bit?
One thing though, is how I'm going to make the slot because of the tank braces. AGA's 180Gs have 2 braces, although I'm not sure how big they are and how far apart (don't have the tank yet). What do you think, suggest? I was thinking to have the overflow be at least 4 feet on the back of the 6 foot tank and the slot for the water to flow through to be almost 4 feet. But still, don't know how I would that without interfering with the braces. :?
Again, thanks, Matt! I'll be starting a build thread soon.
) and as it's nervous as it makes me right now, it seems like a fun and educational job! Thanks for the first lesson, by the way!
I hope there will be more, as I'll need them!!!What did you use to cut through the tank frame in the first page? Same bit?
One thing though, is how I'm going to make the slot because of the tank braces. AGA's 180Gs have 2 braces, although I'm not sure how big they are and how far apart (don't have the tank yet). What do you think, suggest? I was thinking to have the overflow be at least 4 feet on the back of the 6 foot tank and the slot for the water to flow through to be almost 4 feet. But still, don't know how I would that without interfering with the braces. :?
Again, thanks, Matt!
I'll be starting a build thread soon. Matt_Wandell":30mbckys said:browncj7":30mbckys said:Why place hose at the end of the locline return?
It'll just go into the water by a fraction of an inch--hides the return. Imagine the water line as just above the very bottom of the frame. I got the idea from seeing it at several public aquariums. Keeps man-made looking stuff out of the tank.
Great stuff Matt! I may have to do the same to my loc line!
bleedingthought":2ucsbtmf said:Matt, with your encouragement and Calfo's on RC, I think I'm going ahead with the external overflow. I hope I will save a little of money (I have a gift certificate to Amazon so that'll go towards the dremel or maybe a rotozip; I won't be using the acrylic since I'm just going with a 1/4"-1/2" slot for the water drain and I'll just keep that open with possibly gutter guard over it but probably nothing at all; After that, the cut glass, silicone, and bits won't add up as much) but the overall idea is that I'll have an external overflow which is much better, in my opinion (for various reasons that you're obviously aware of
Thanks for the first lesson, by the way!
What did you use to cut through the tank frame in the first page? Same bit?
One thing though, is how I'm going to make the slot because of the tank braces. AGA's 180Gs have 2 braces, although I'm not sure how big they are and how far apart (don't have the tank yet). What do you think, suggest? I was thinking to have the overflow be at least 4 feet on the back of the 6 foot tank and the slot for the water to flow through to be almost 4 feet. But still, don't know how I would that without interfering with the braces. :?
Again, thanks, Matt!
Sweet! 2 braces eh? Is it an 8' tank? I don't know enough about the 180 to inform ya. However, I would be really really careful around the braces. Maybe do the slots between them, if that's doable.
What did you use to cut through the tank frame in the first page? Same bit?
To cut the plastic brace I used a tool that comes with most dremels. It looks like a little wheel.

6 foot tank.
Now, if I can just keep saying to myself, "I can do this!" 8)
I think I'm going to start on the stand tomorrow. 3"x6" top frame (except for the front, which will be doubled (3.25") 6" laminated beams so I won't need a center brace/leg. 60" opening! 8) ) and 3"x6" legs also. Should be pretty solid.
Now, if I can just keep saying to myself, "I can do this!" 8)
I think I'm going to start on the stand tomorrow. 3"x6" top frame (except for the front, which will be doubled (3.25") 6" laminated beams so I won't need a center brace/leg. 60" opening! 8) ) and 3"x6" legs also. Should be pretty solid.
Matt_Wandell":3pypjb8x said:to cut the vinyl hose at an angle. .
Edit. Very good idea. I could use my wifes paper cutter to hide about a dozen of those suckers.
I bet she'll get mad if she catches me. It was big trouble when I made Nori strips a few months back. :lol:Matt_Wandell":1c1f5mgk said:browncj7":1c1f5mgk said:Why place hose at the end of the locline return?
It'll just go into the water by a fraction of an inch--hides the return. Imagine the water line as just above the very bottom of the frame. I got the idea from seeing it at several public aquariums. Keeps man-made looking stuff out of the tank.
Makes space in brain so that he remmbers this on his next build
Sponsor Reefs
We're a FREE website, and we exist because of hobbyists like YOU who help us run this community.
Click here to sponsor $10:
