Hey everyone,
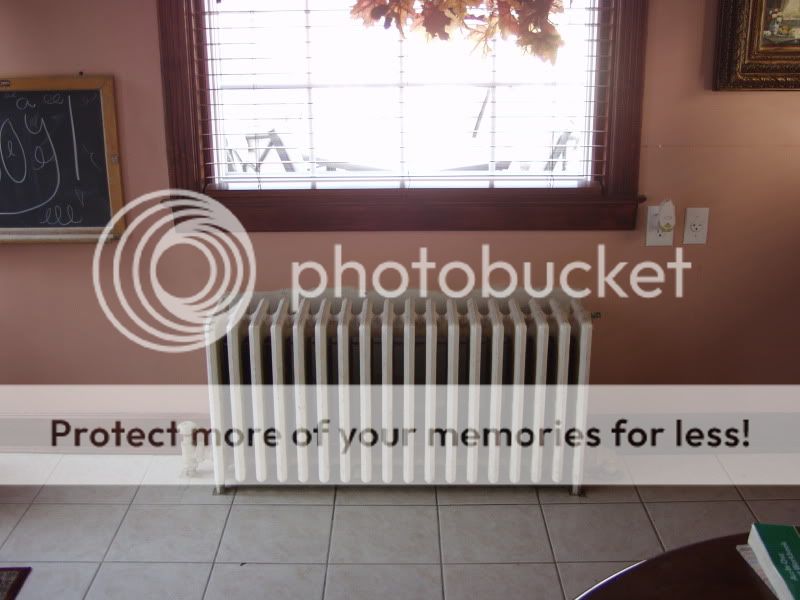
Didn't know if I should list this under DIY or Nudibar because it isn't fish related... Well... Kinda, it is kinda the same method I use to build Fish tank stands..well anyway. For All of us that have those Old Cast Iron Radiators [ which I love ] and want to cover them up..well here's a Thread for ya...")
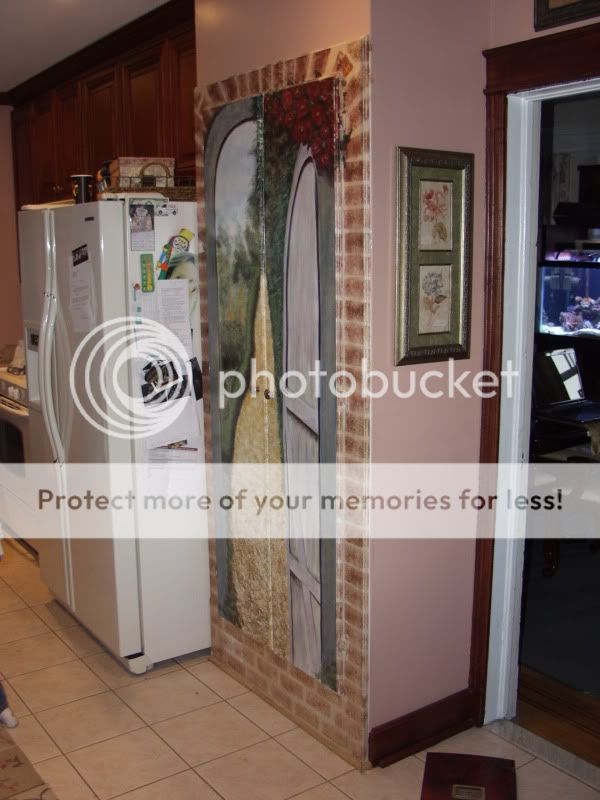
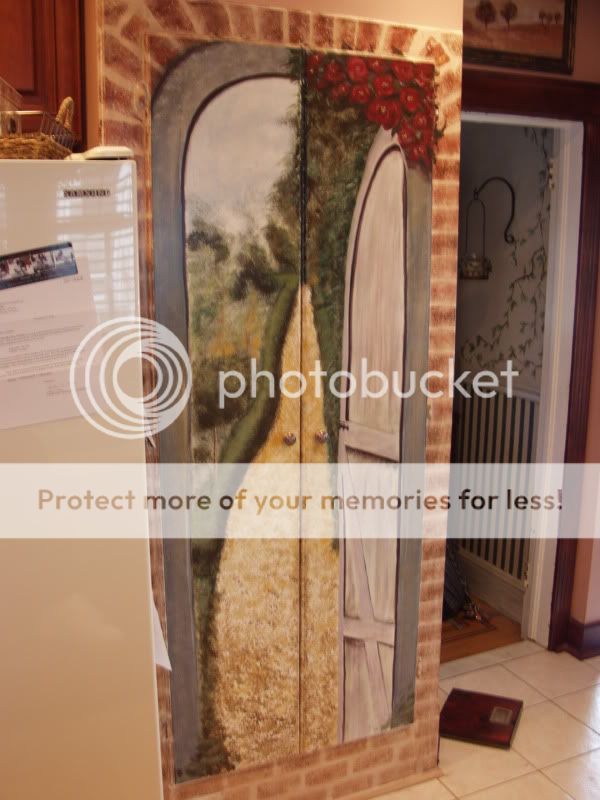
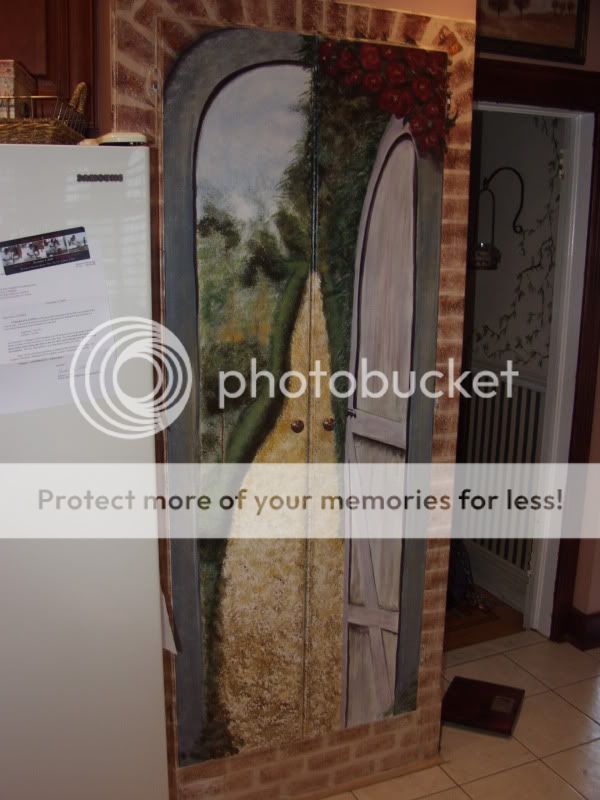
I recently Just did my kitchen over and this is the last thing that needed to get done...well, My wife has been busting on me to do something about it...LOL
After looking online into custom Radiator covers for my home and seeing the Prices :Yikes: I decided to build one myself and had the camera with me so I thought I would document it so if anyone else wanted to do the same they can check out the thread....Trust me after you go searching for covers and see the prices..you will be willing to try it yourself..
O.K ...Here we go.
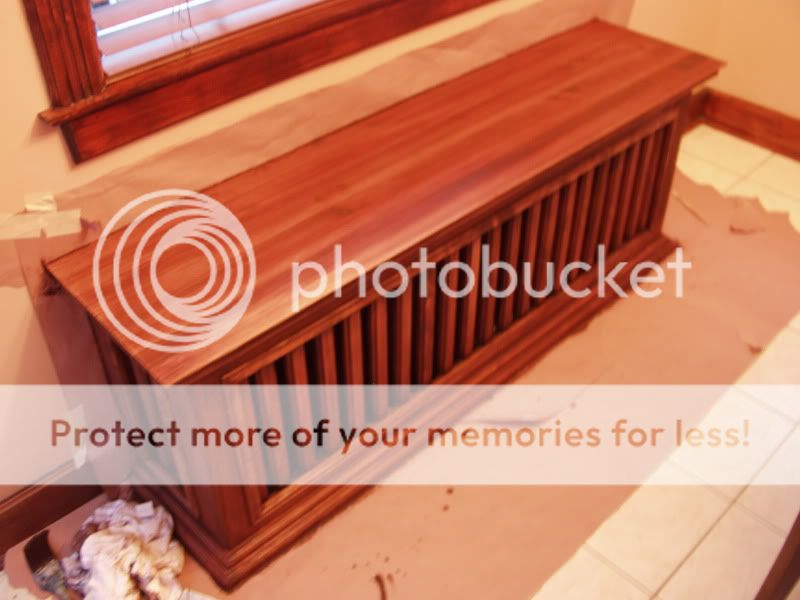
I needed to build an opening for 57 in wide[ inside ] , 22 in high, 13 1/2 deep.
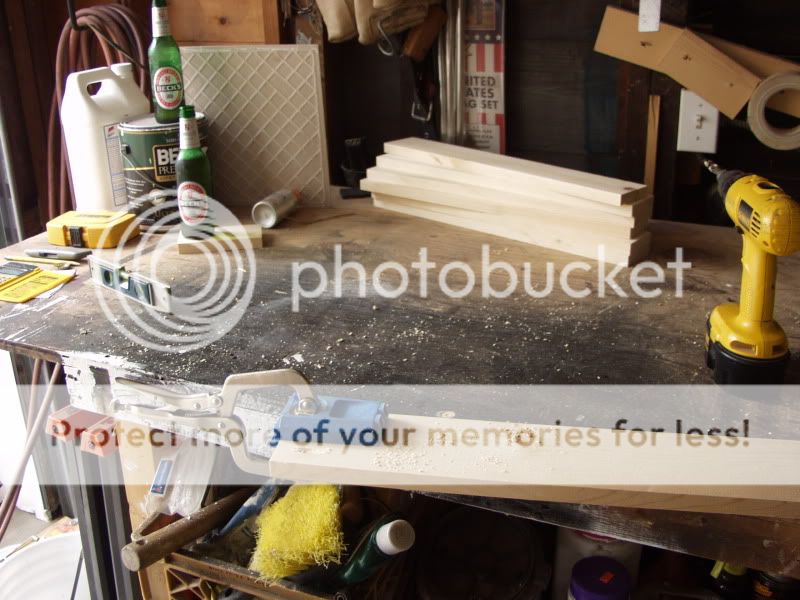
I used up all the scrap wood I had laying around to get where I am so far:tongueani which was great on the pocket!!
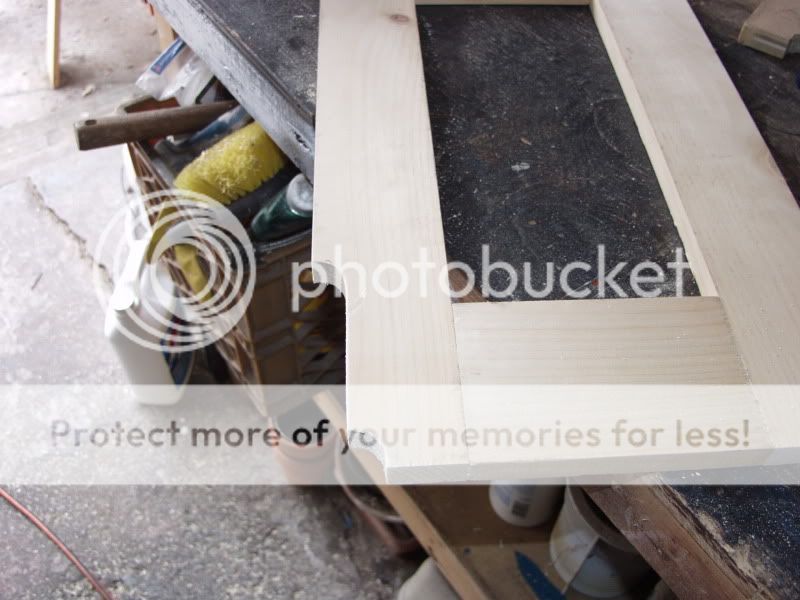
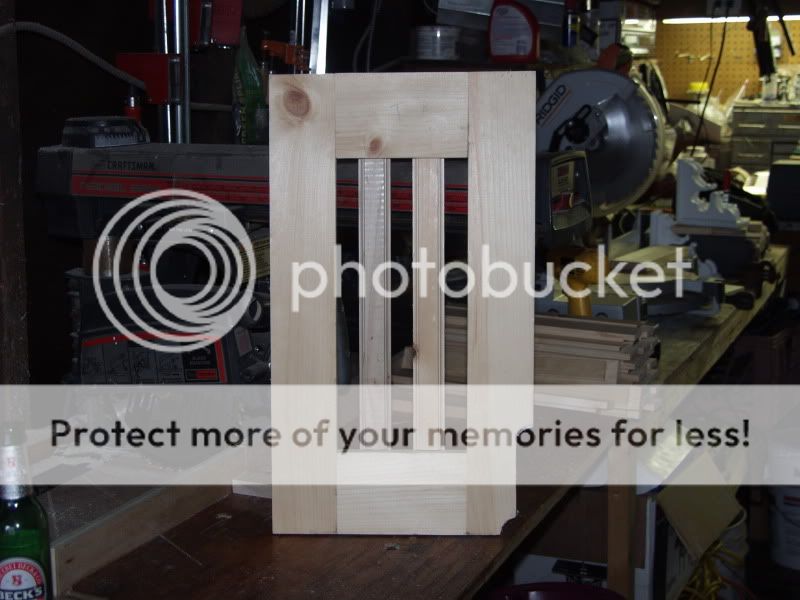
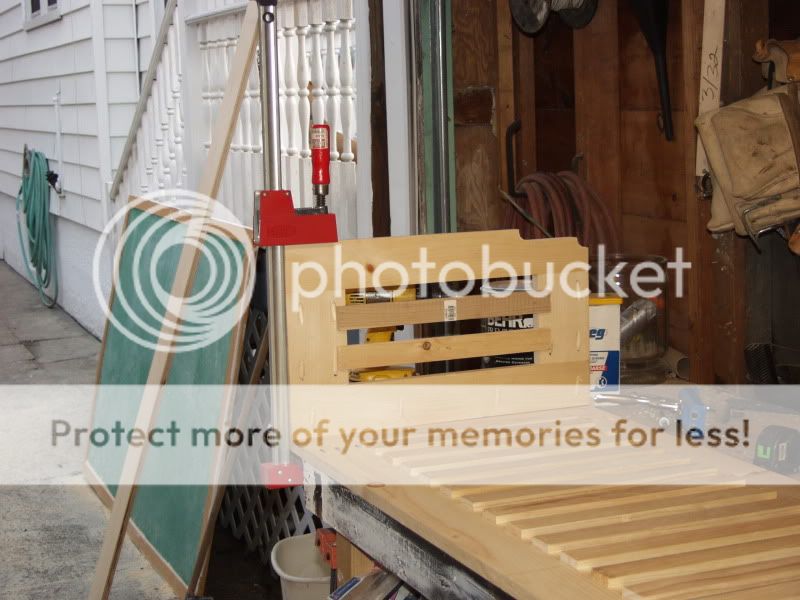
I ripped a 1x8x8 pine to 4 inches for the top & bottom { STILE } of the face frames and 3 inches for the sides { RAIL } and Kreg them all together:


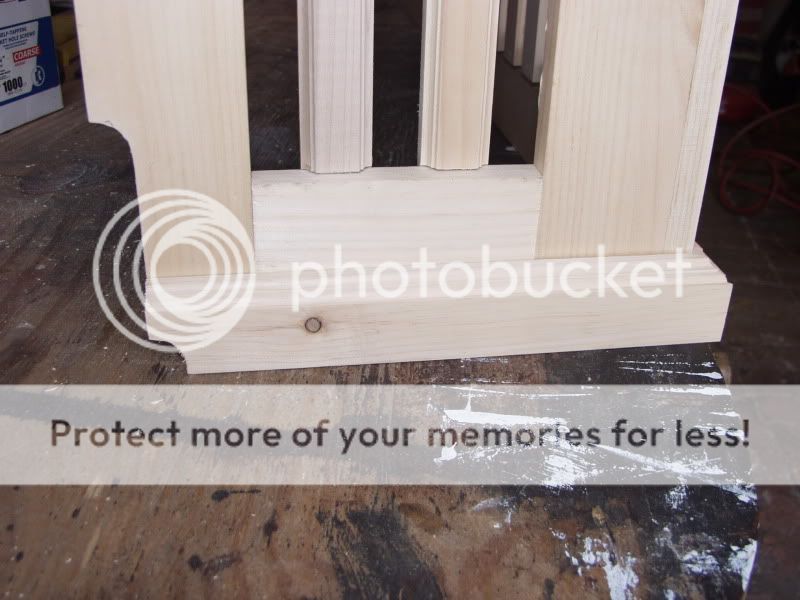
Here is the Front face frame all together:

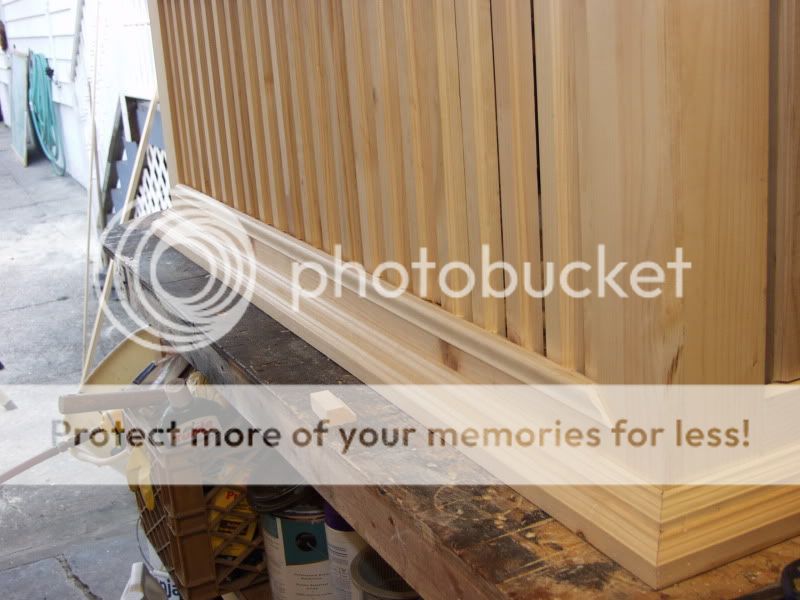
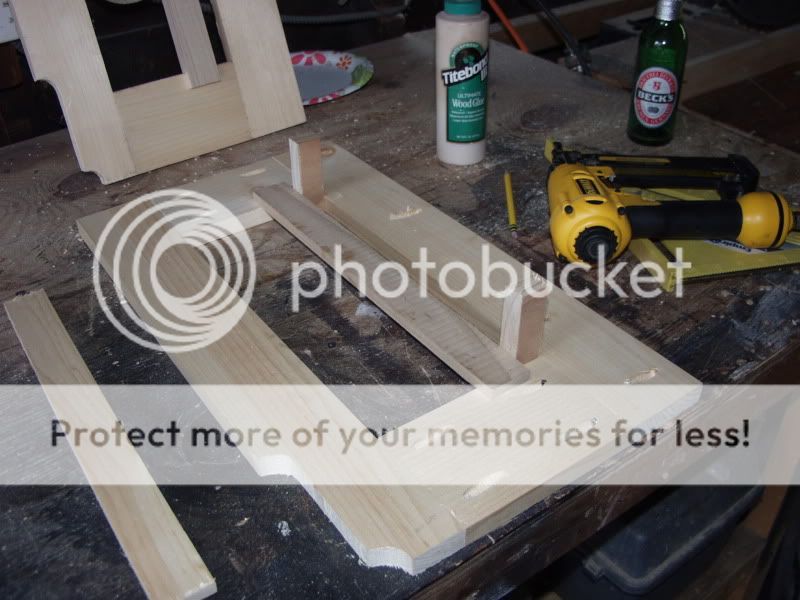
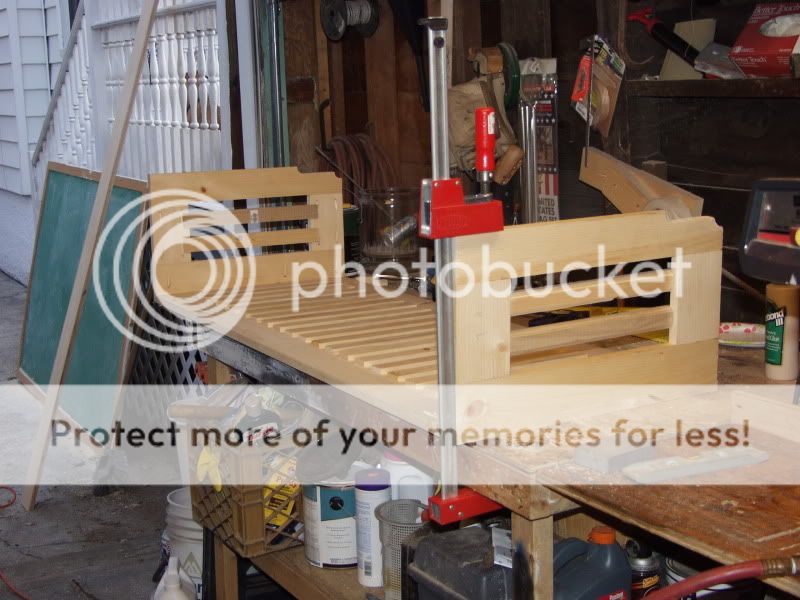
I did the same thing to the sides of the cover * NOTE * don't forget to add the 3/4 thickness of the front face frame when you make up your sides for your total depth. My total Depth was 13 1/2 so I made the the sides 12 3/4


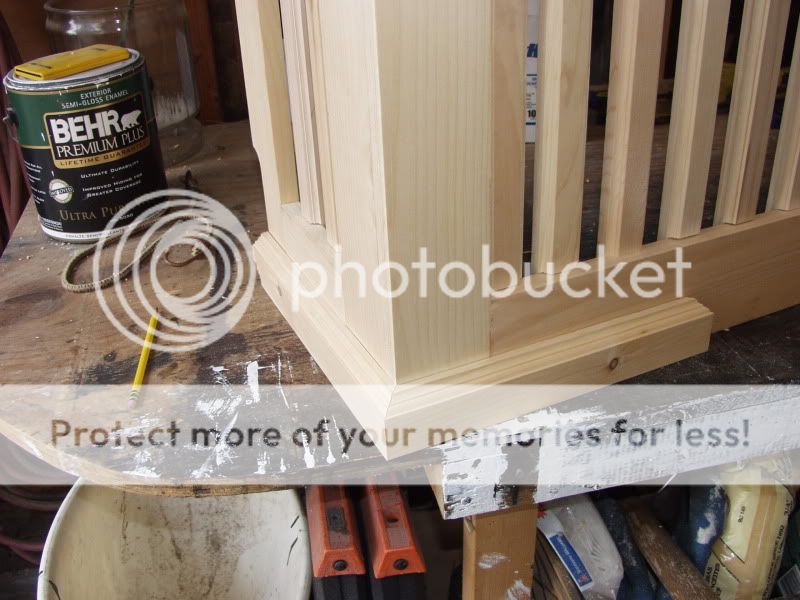
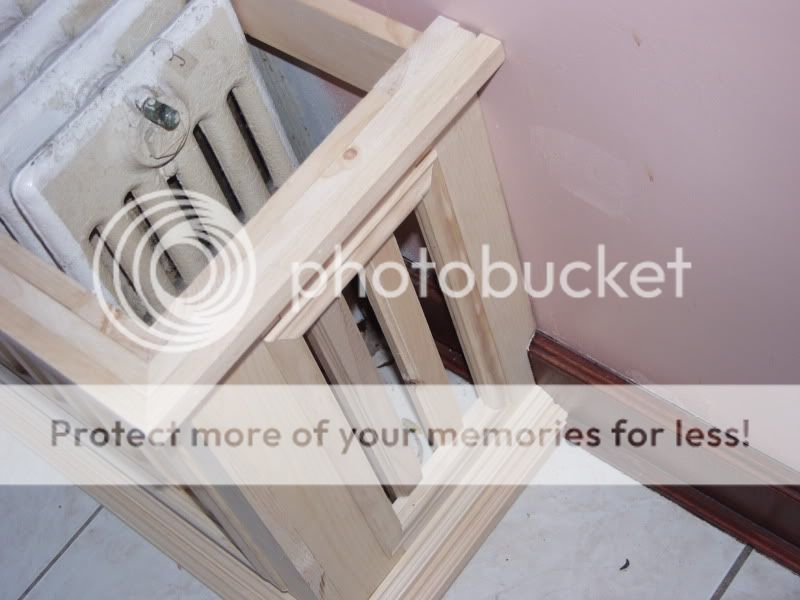
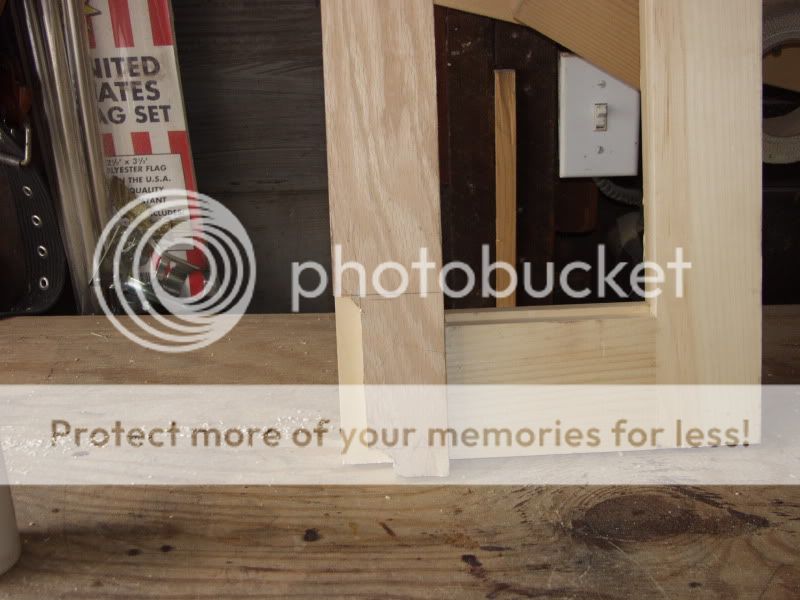
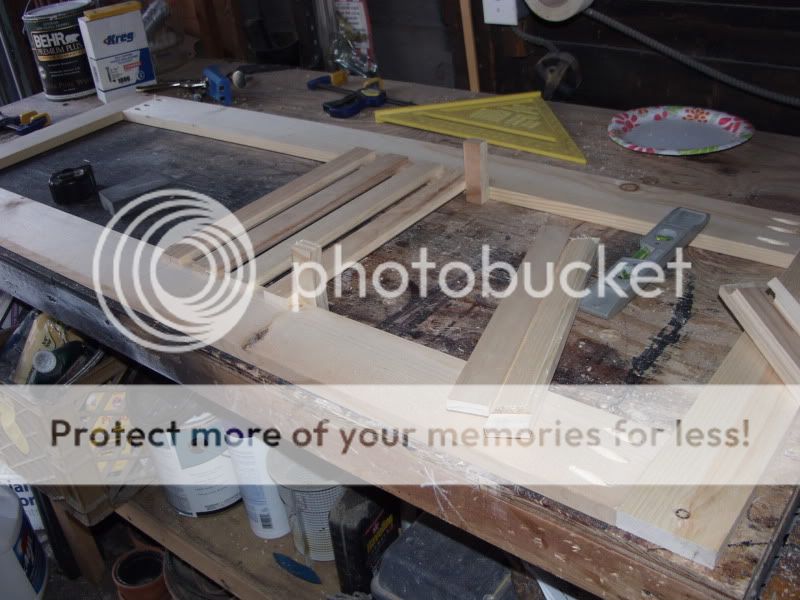
Next I had to make a jig to cut the sides so that they would go flush to the wall from the floor molding..here's a picture..You'll get the idea:


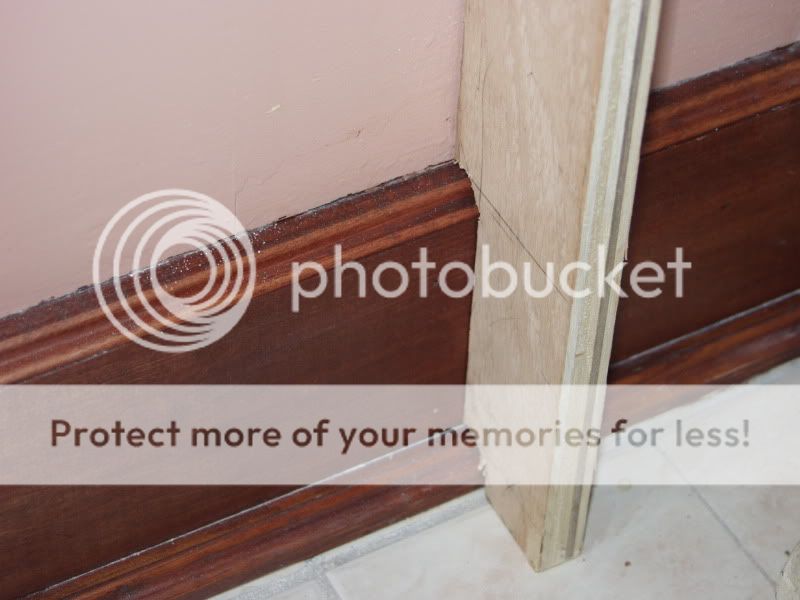

SWEET!!! Nice fit!
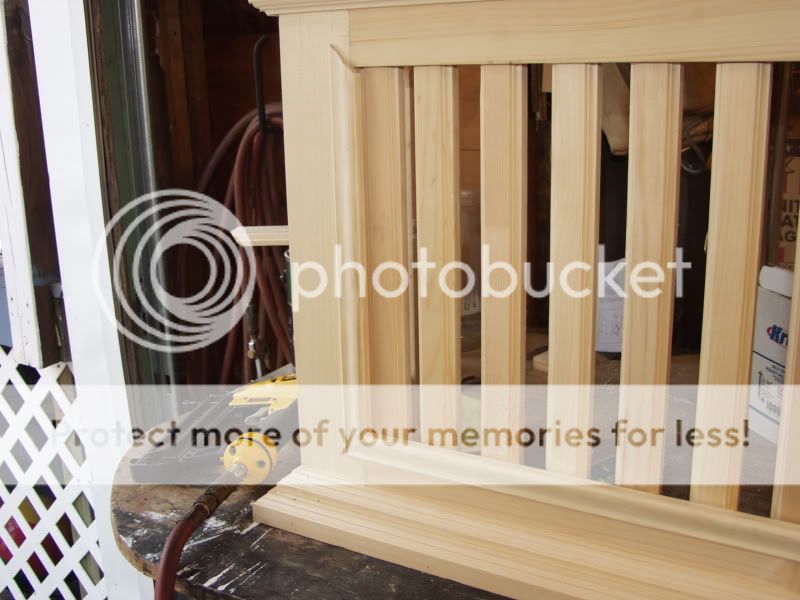
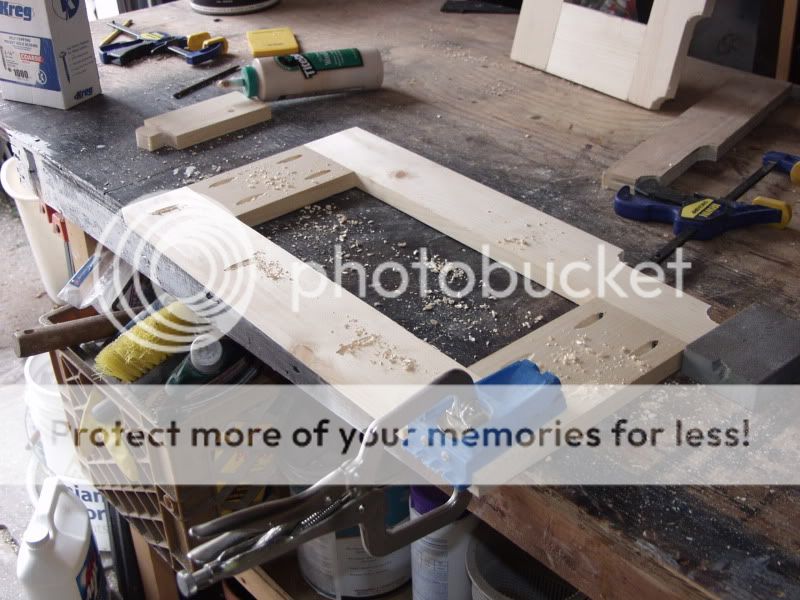
Next i kreg the sides so I can attach them to the front face frame, Kinda like I would do for a fish tank stand:

NEXT:
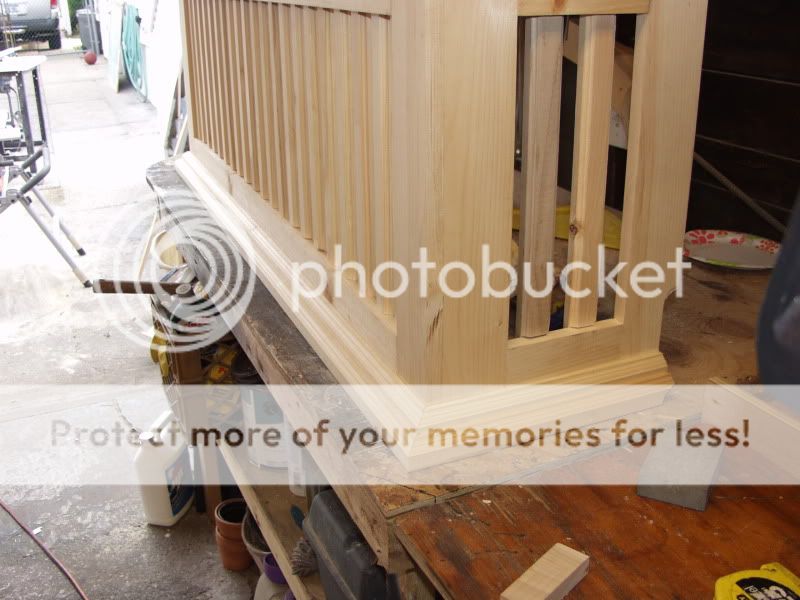
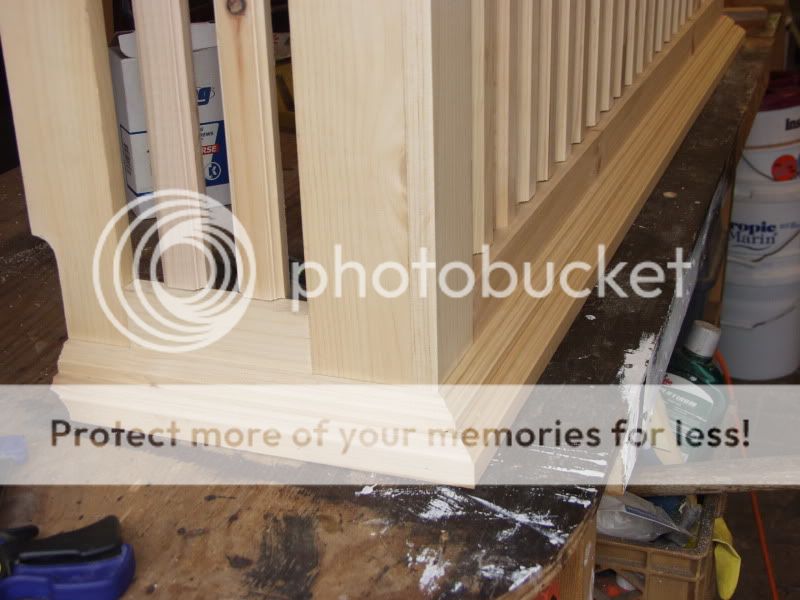
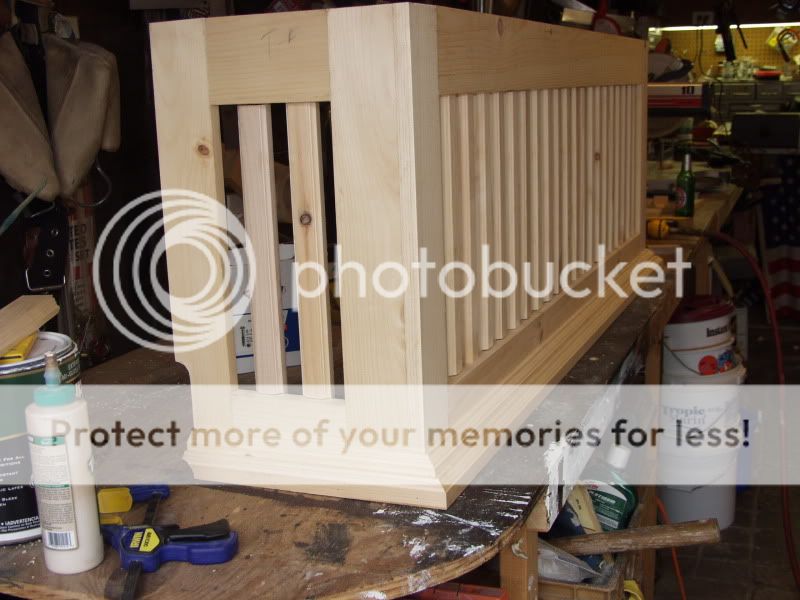
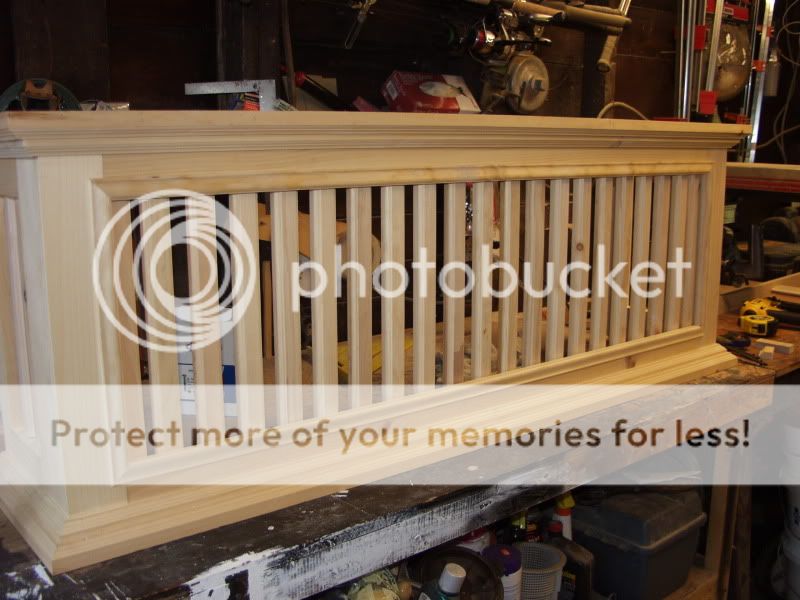
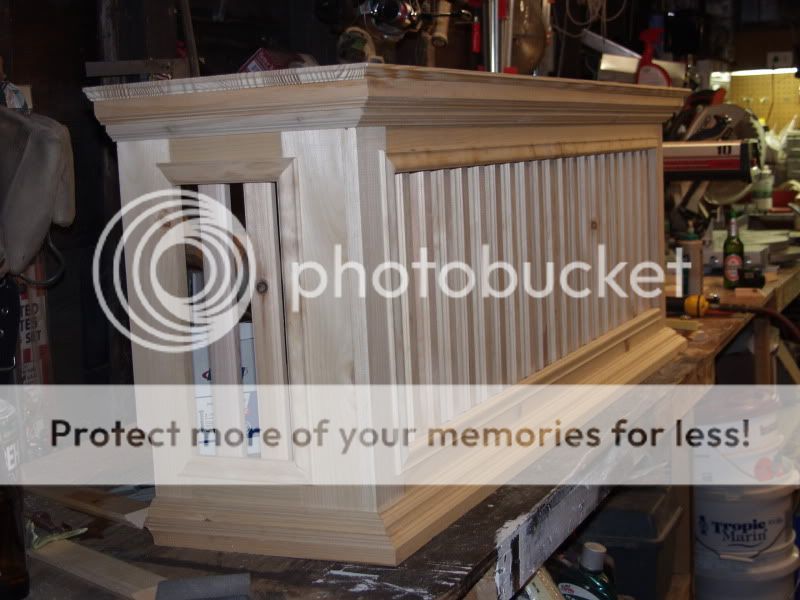
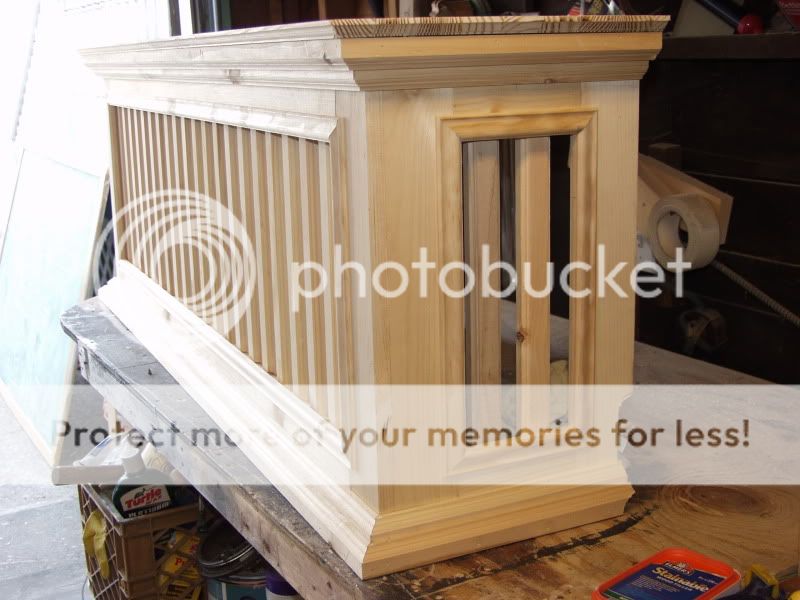
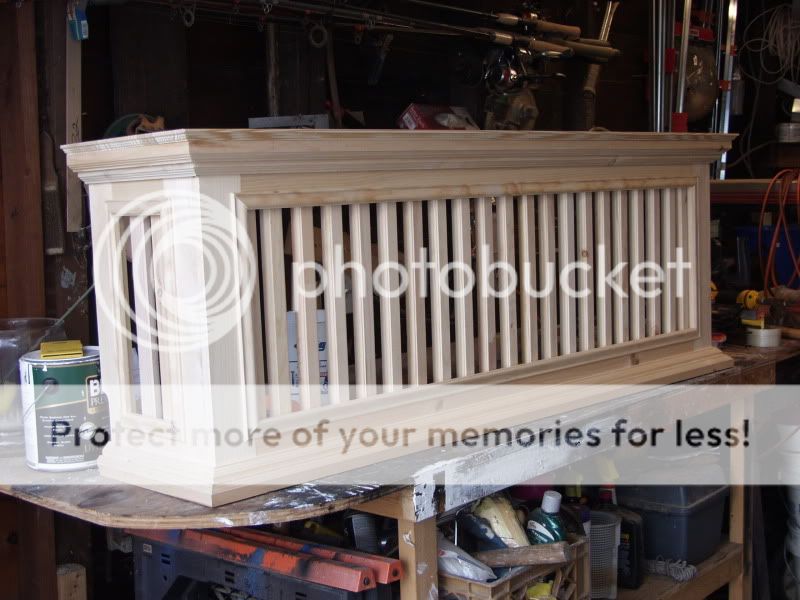
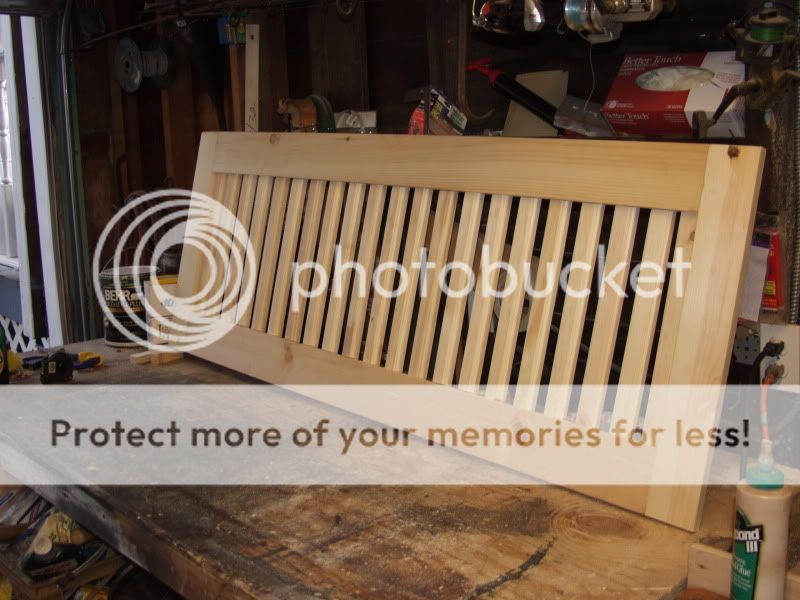
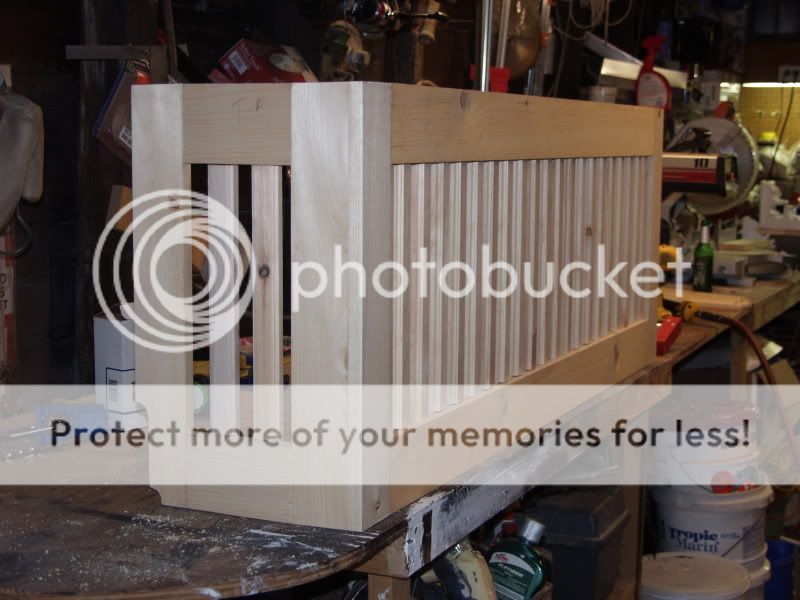
I am going for that classic colonial look so I will be going with stright lines. I decided to go with 1 1/2 strips of pine for the face grill...NICE with an ogee style accent on the face, I am going to router out 3/4 of meat by 1/4 deep top and bottom leaving a total of 14 inches for inside the face frame... Here's a few pictures


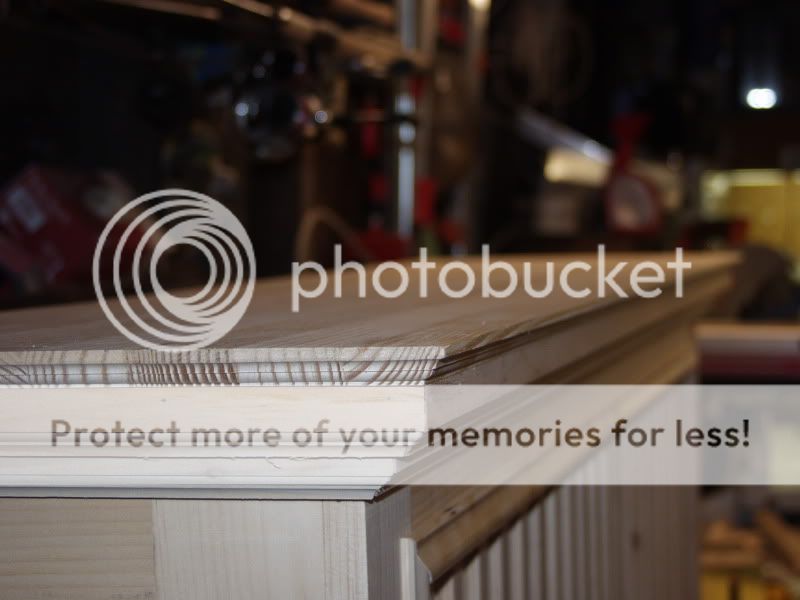
then I put the ogee classic profile on the edge:


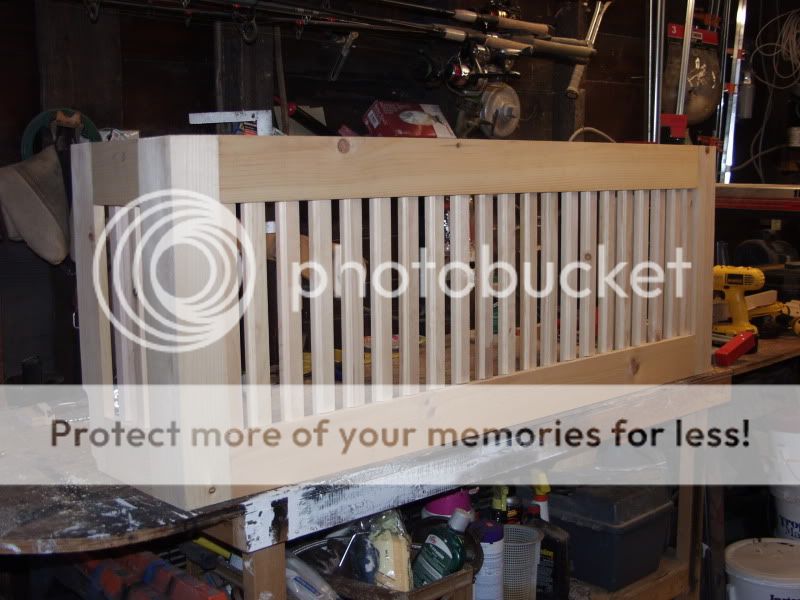
Looking SWEET to Me..The Mrs is Happy as well & and That's a good thing
NEXT:
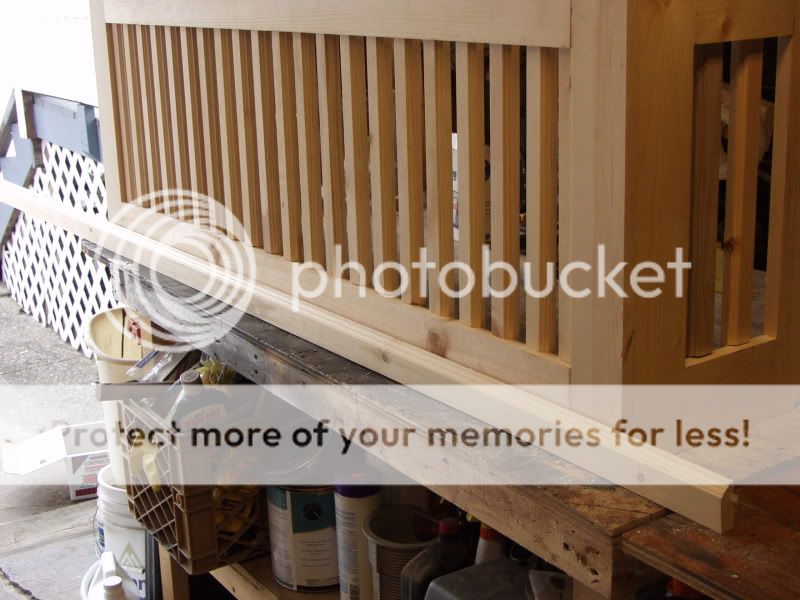
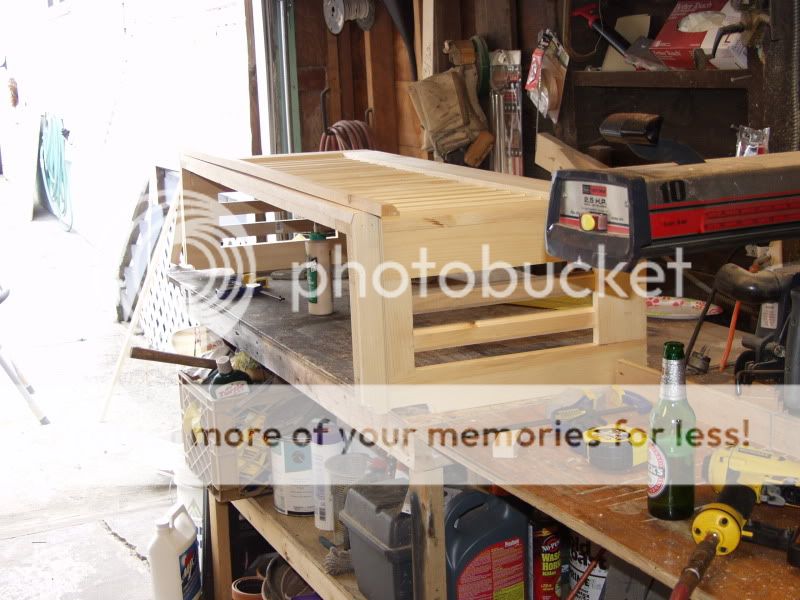
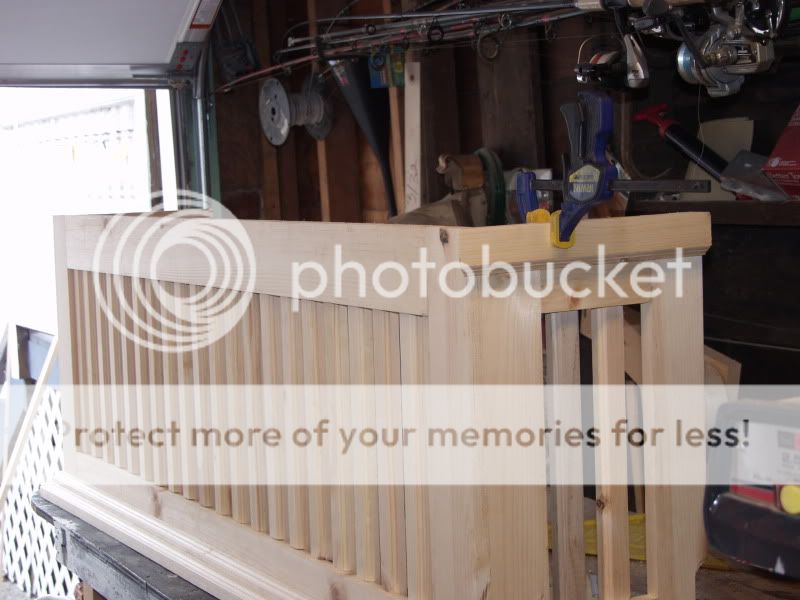
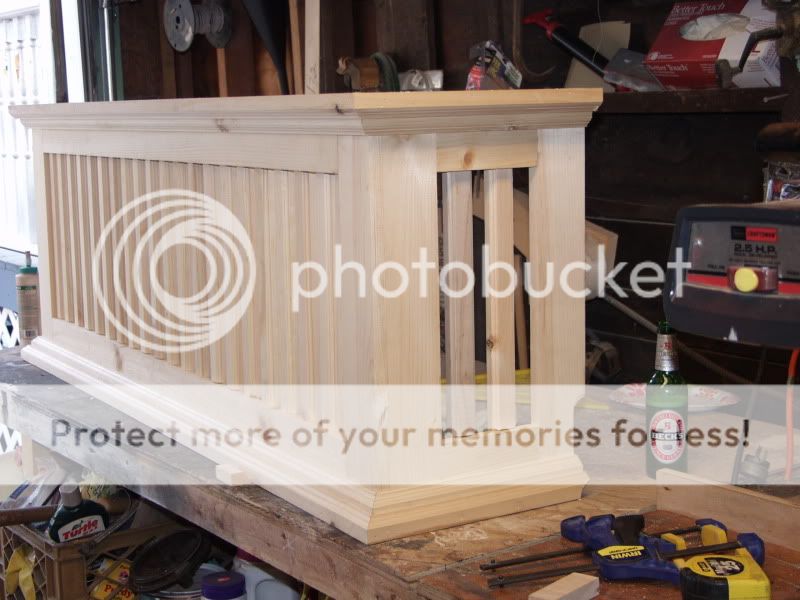
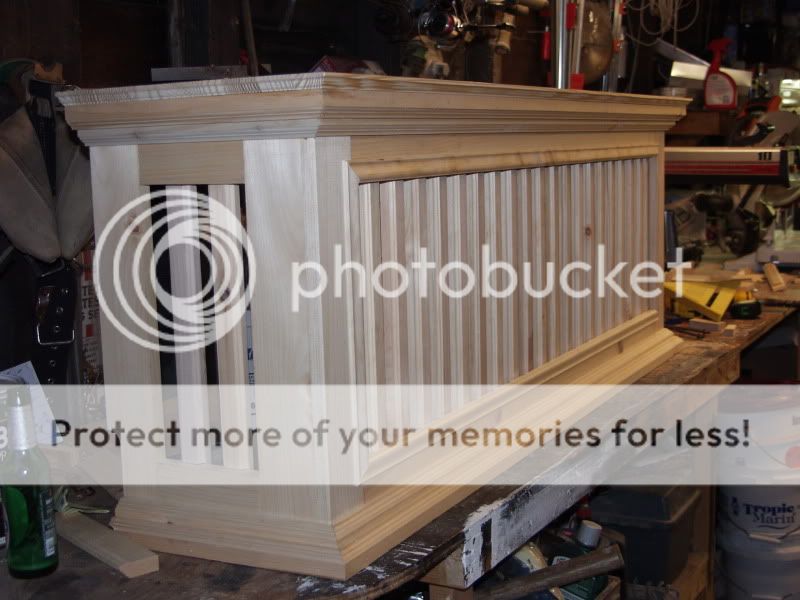
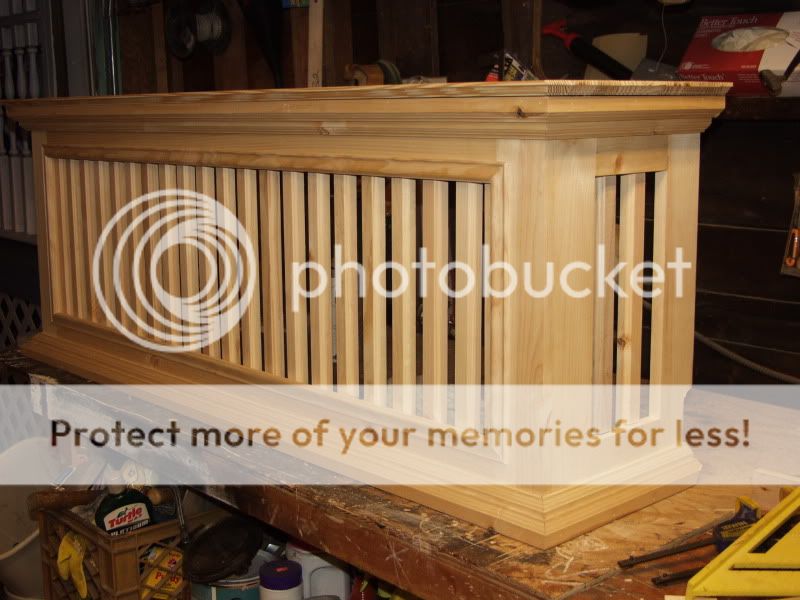
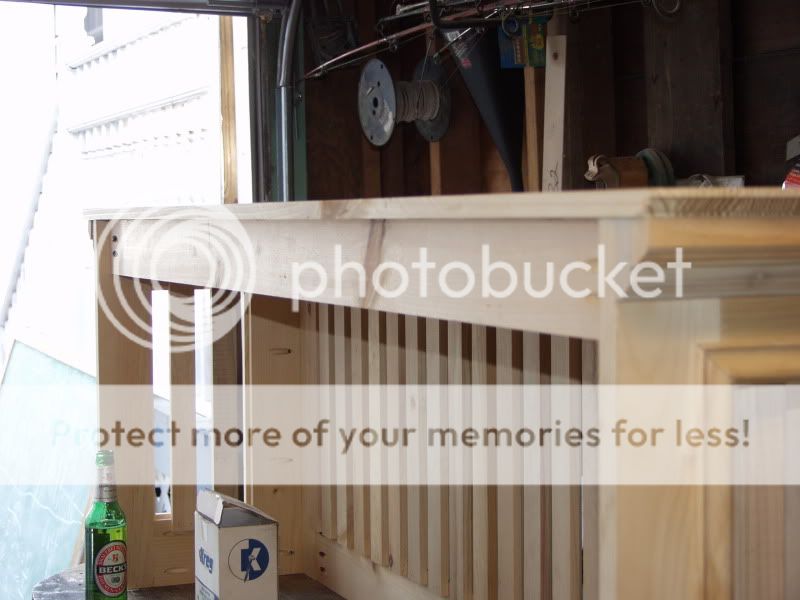
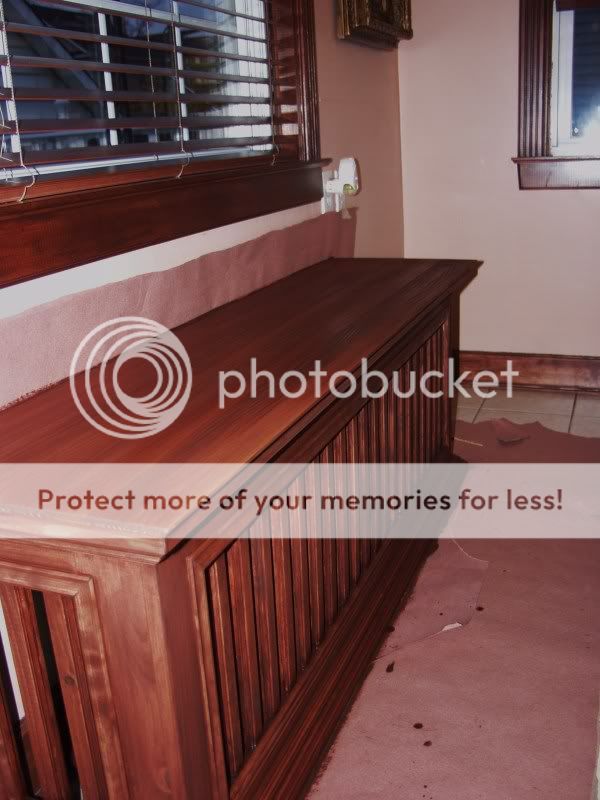
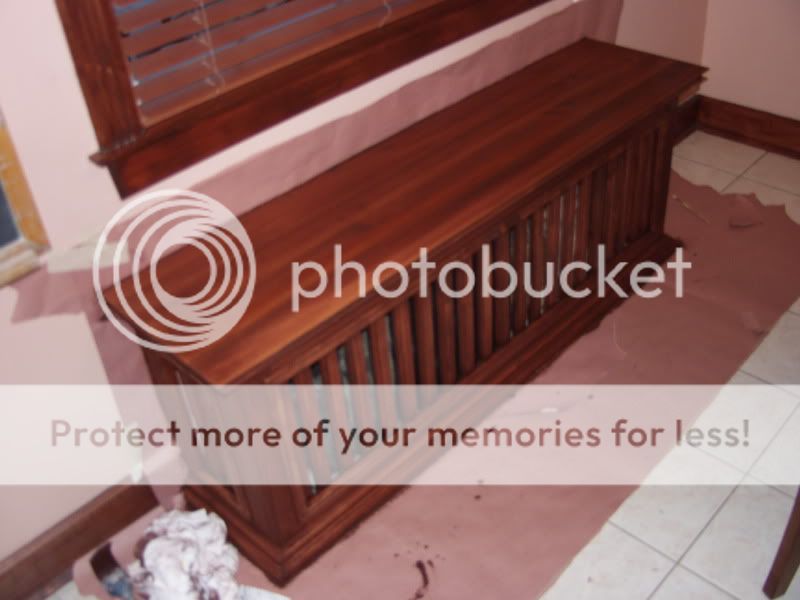
I put the 1 1/2 strips on the frame leaving a 1 inch gap in-between each...GET-R-DUN

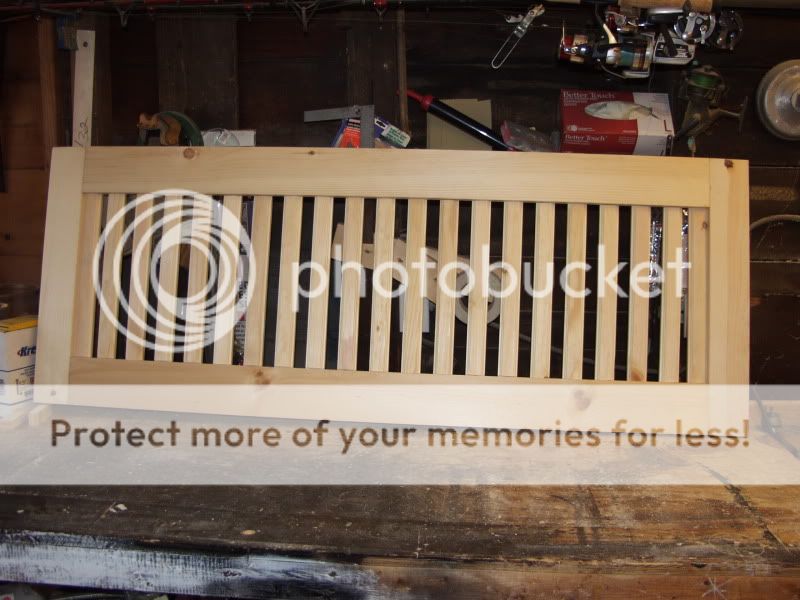
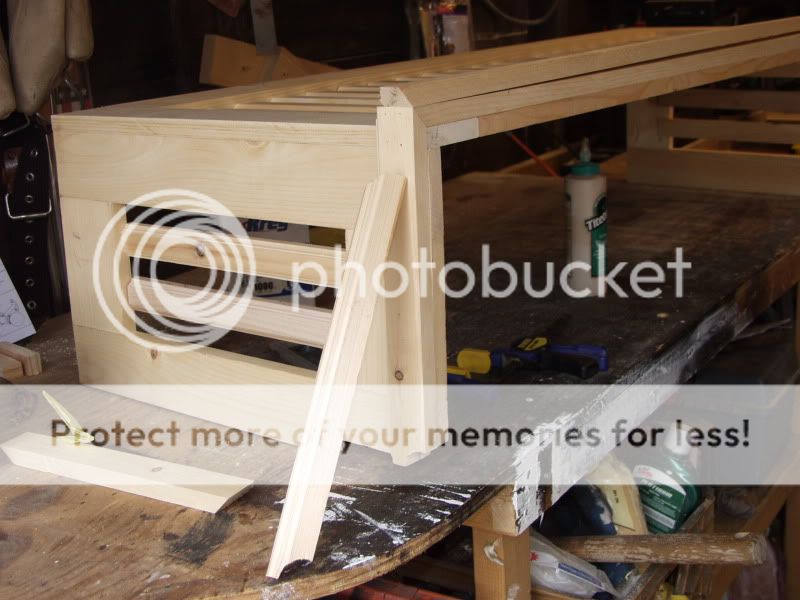
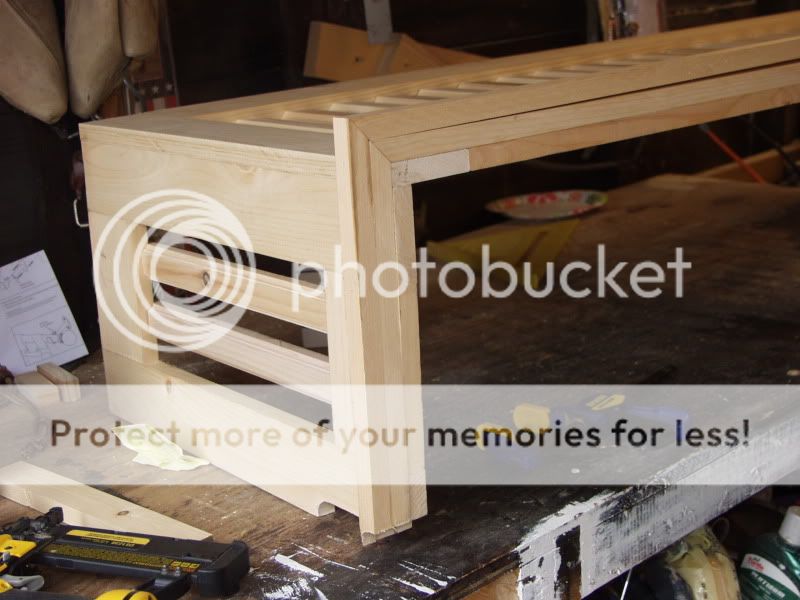
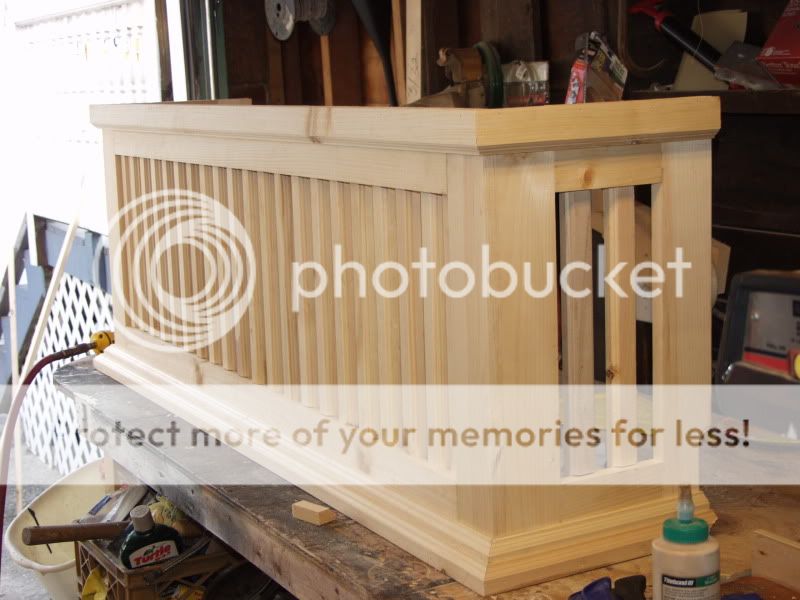
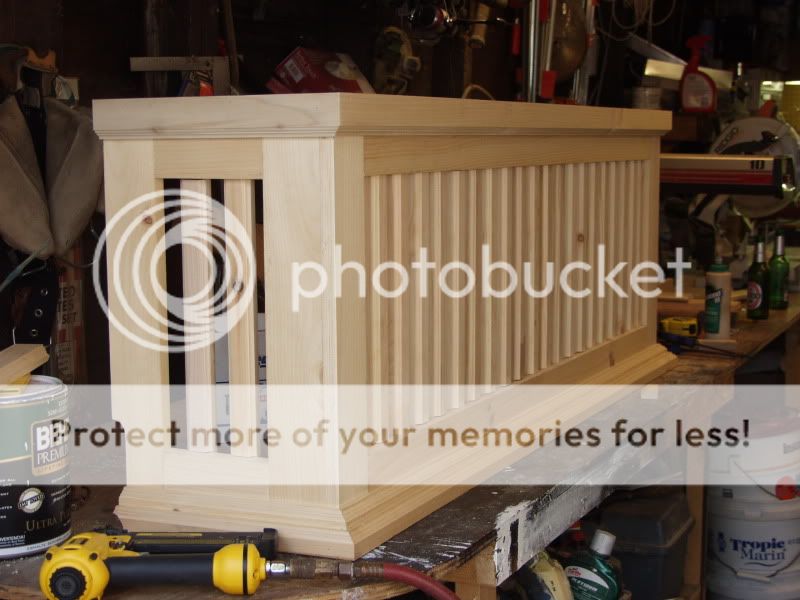
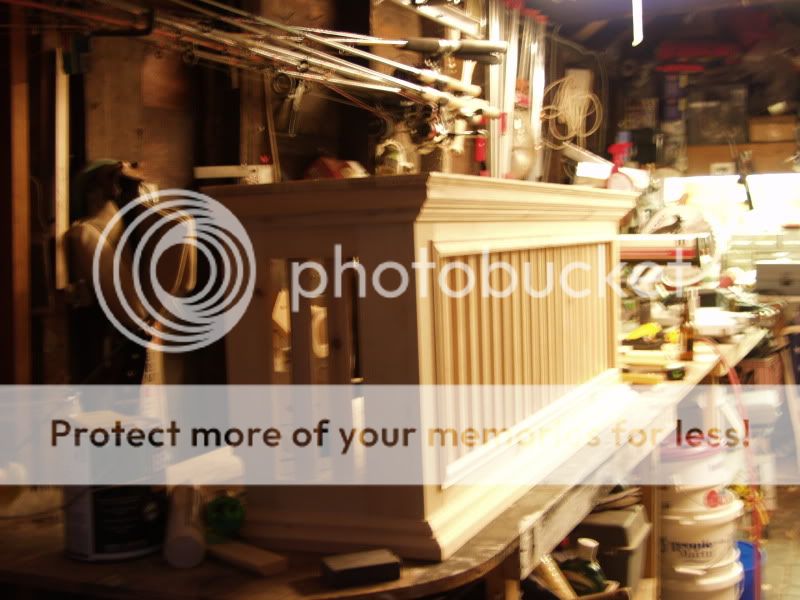
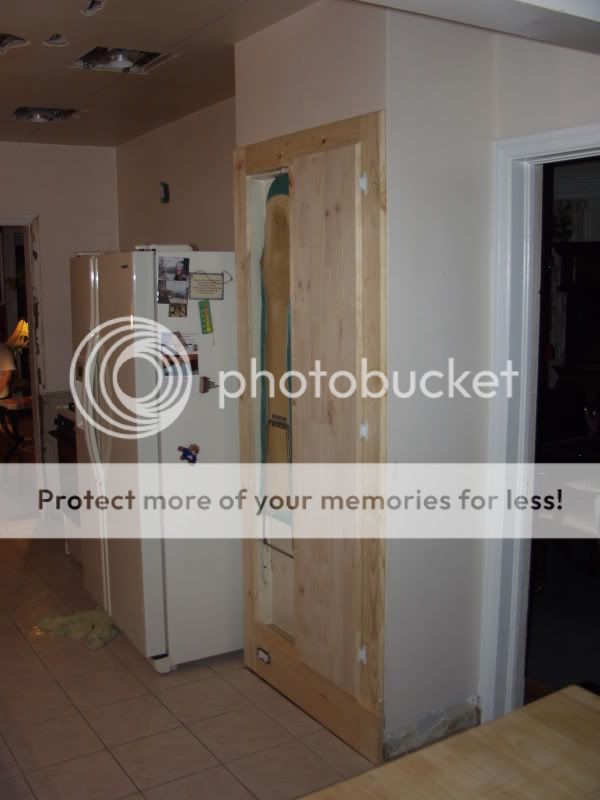
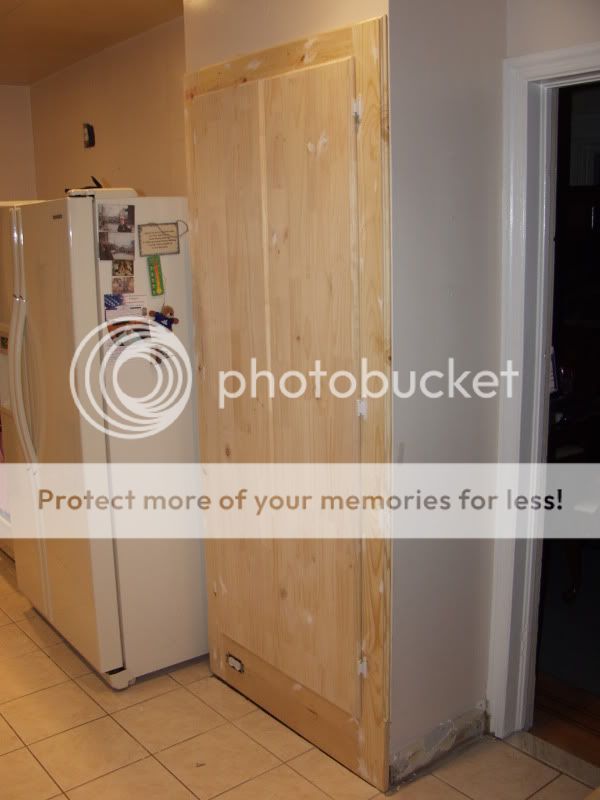
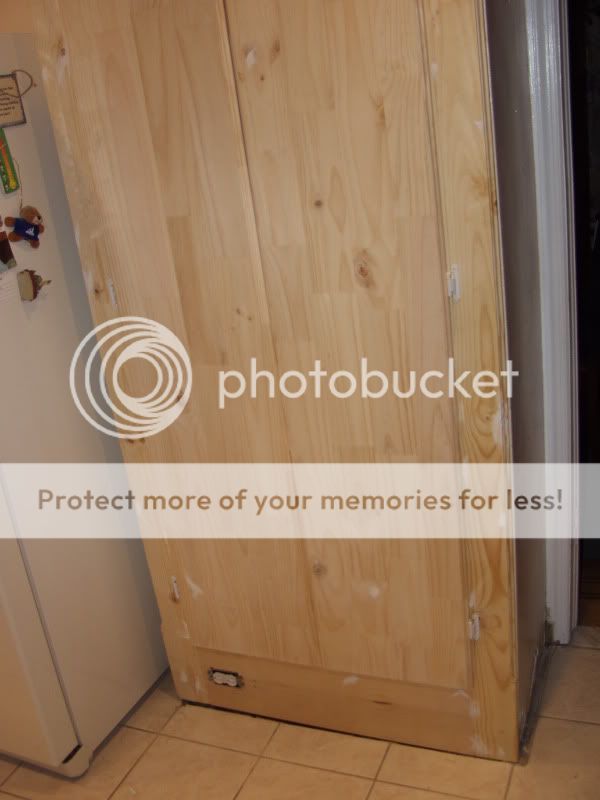
Now, I just needed to attach the sides to the face of the cover:
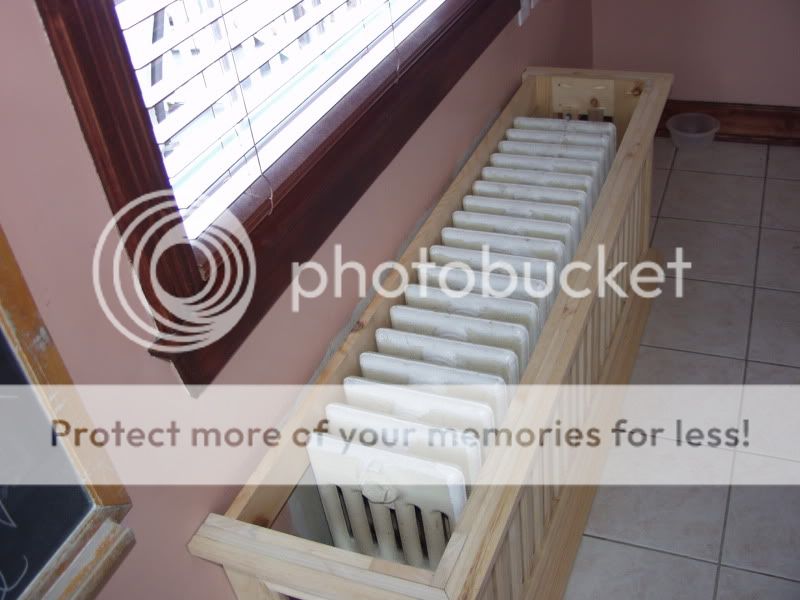
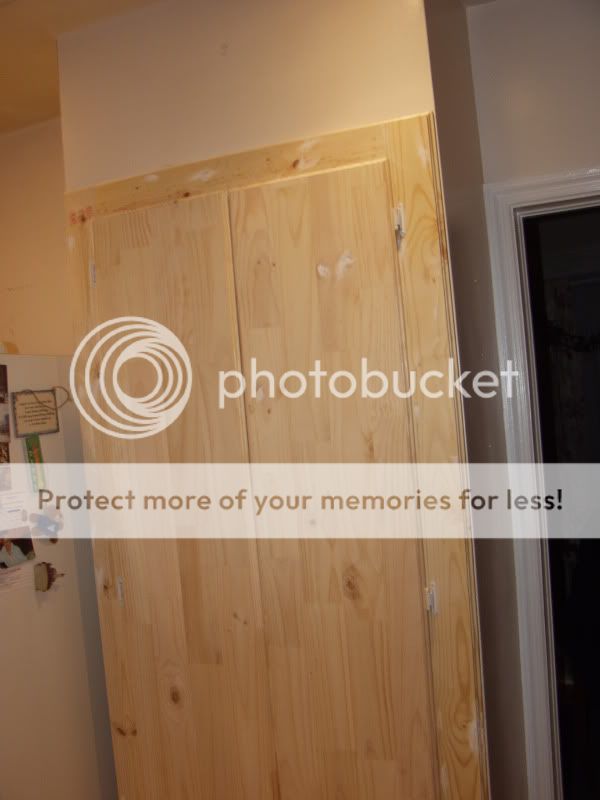
This is what I got done so far... I will post more of the process as i go which will be Quick due to the fact I don't have heat in my Garage...

Didn't know if I should list this under DIY or Nudibar because it isn't fish related... Well... Kinda, it is kinda the same method I use to build Fish tank stands..well anyway. For All of us that have those Old Cast Iron Radiators [ which I love ] and want to cover them up..well here's a Thread for ya...
I recently Just did my kitchen over and this is the last thing that needed to get done...well, My wife has been busting on me to do something about it...LOL
After looking online into custom Radiator covers for my home and seeing the Prices :Yikes: I decided to build one myself and had the camera with me so I thought I would document it so if anyone else wanted to do the same they can check out the thread....Trust me after you go searching for covers and see the prices..you will be willing to try it yourself..
O.K ...Here we go.
I needed to build an opening for 57 in wide[ inside ] , 22 in high, 13 1/2 deep.
I used up all the scrap wood I had laying around to get where I am so far:tongueani which was great on the pocket!!
I ripped a 1x8x8 pine to 4 inches for the top & bottom { STILE } of the face frames and 3 inches for the sides { RAIL } and Kreg them all together:
Here is the Front face frame all together:
I did the same thing to the sides of the cover * NOTE * don't forget to add the 3/4 thickness of the front face frame when you make up your sides for your total depth. My total Depth was 13 1/2 so I made the the sides 12 3/4
Next I had to make a jig to cut the sides so that they would go flush to the wall from the floor molding..here's a picture..You'll get the idea:
SWEET!!! Nice fit!
Next i kreg the sides so I can attach them to the front face frame, Kinda like I would do for a fish tank stand:
NEXT:
I am going for that classic colonial look so I will be going with stright lines
. I decided to go with 1 1/2 strips of pine for the face grill...NICE with an ogee style accent on the face, I am going to router out 3/4 of meat by 1/4 deep top and bottom leaving a total of 14 inches for inside the face frame... Here's a few pictures
then I put the ogee classic profile on the edge:
Looking SWEET to Me..The Mrs is Happy as well & and That's a good thing
NEXT:
I put the 1 1/2 strips on the frame leaving a 1 inch gap in-between each...GET-R-DUN
Now, I just needed to attach the sides to the face of the cover:
This is what I got done so far... I will post more of the process as i go which will be Quick due to the fact I don't have heat in my Garage...
Last edited: