strgazr27

Advanced Reefer
Location
Kings Park, NY
Rating - 100%
123   0   0
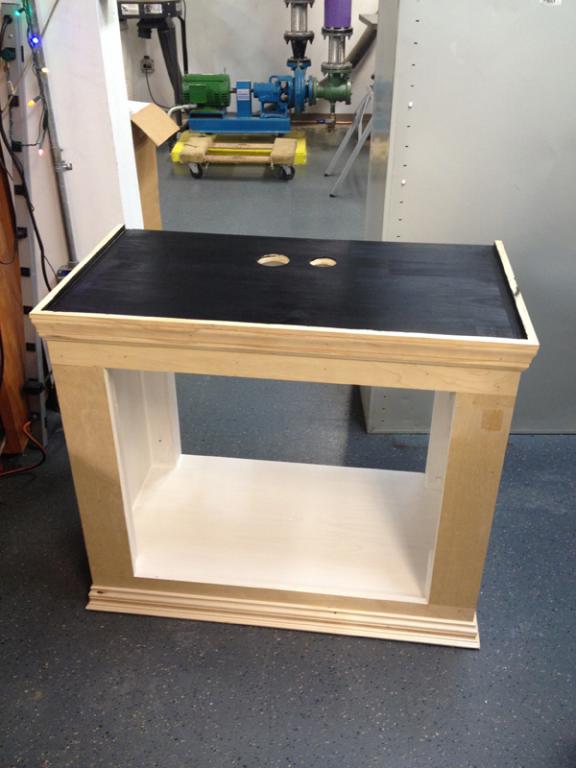
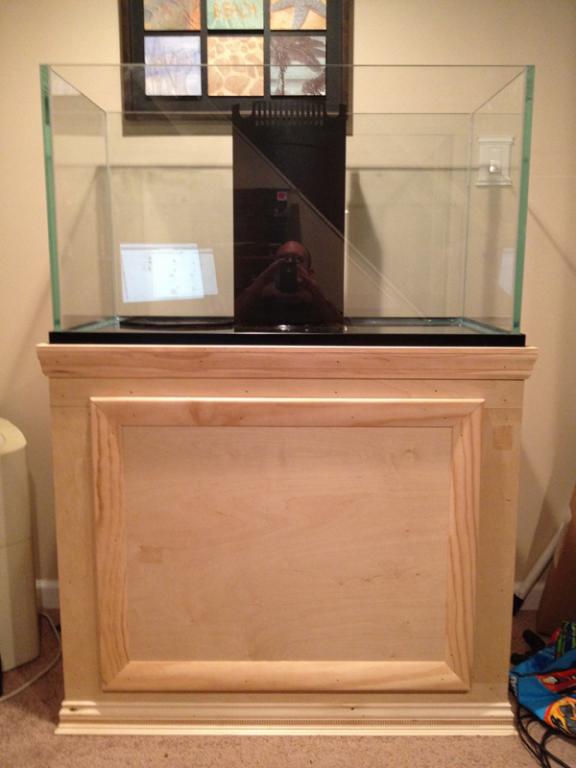
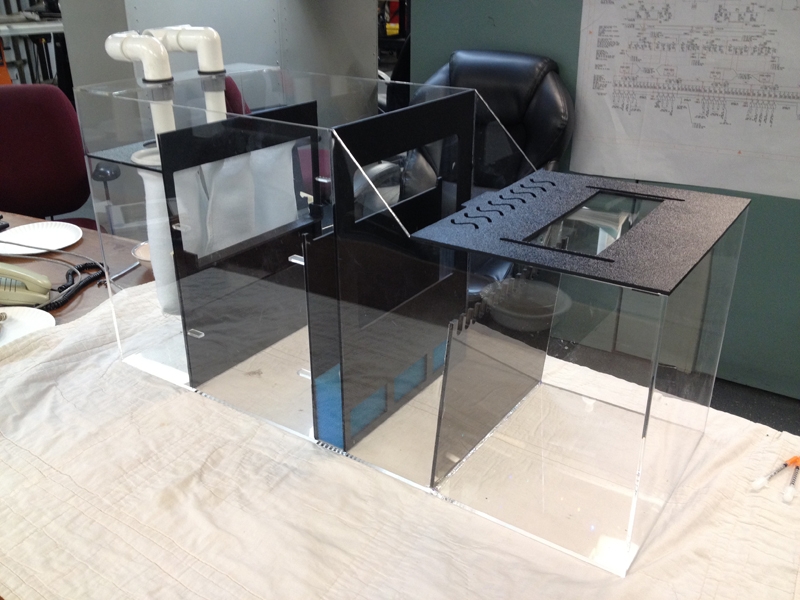
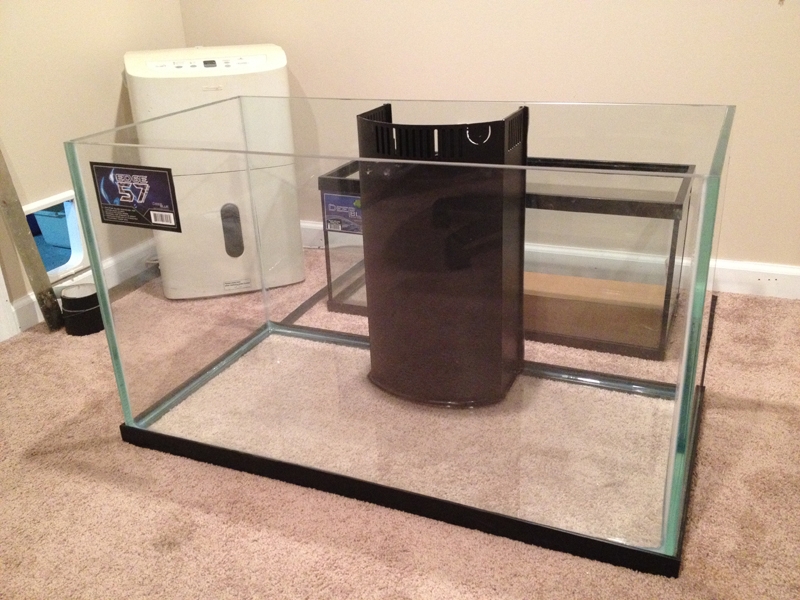
Now that things have settled down at home I couldn't ignore the fact that I NEEDED to get back to this crazy hobby of ours! Thanks to the BEST wife in the world she made it happen by buying me an early Christmas present! A Deep Blue 57 Rimless. This is not going to be a speedy build or done with an unlimited budget but I hope you guys all like it. Comments, both good and bad are welcomed. I need to thank Jeremy (Jerl77), Mike (MBG75) and Kenny (budddman) for pushing me to get this thing filled with water.

So without further ramblings.....

Here's a shot of the tank after getting it home.

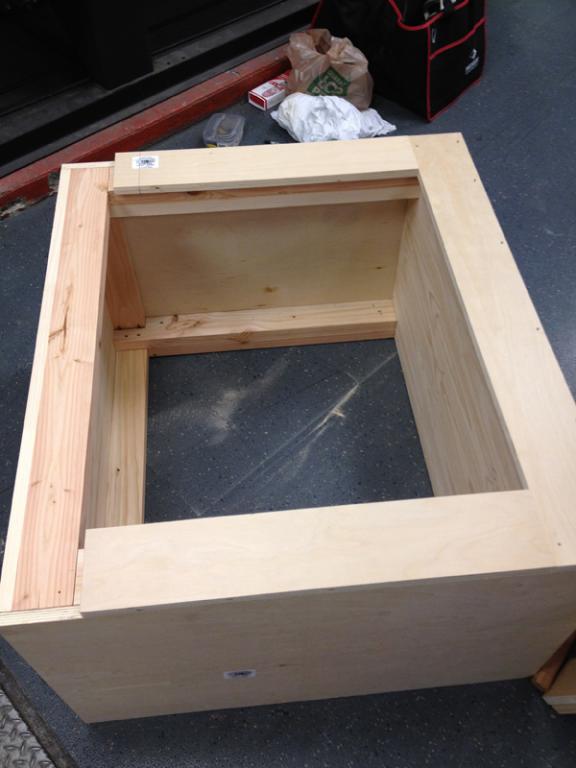
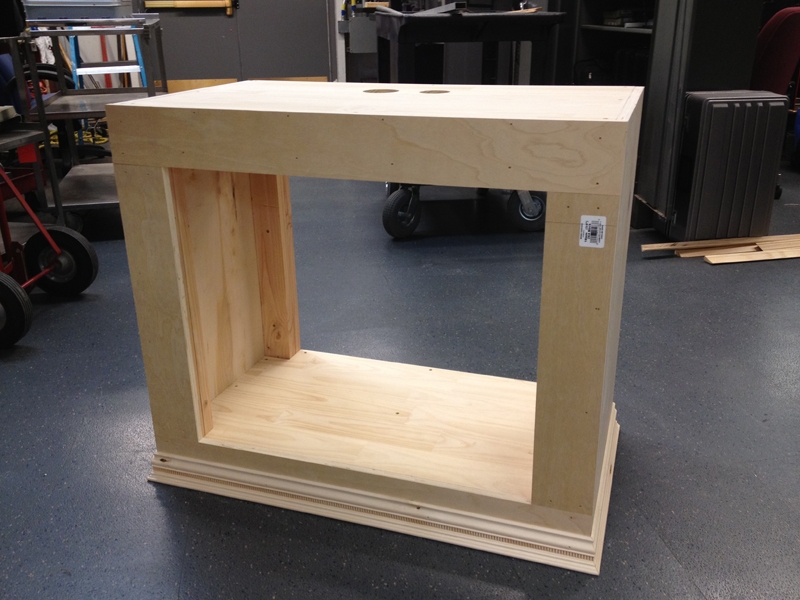
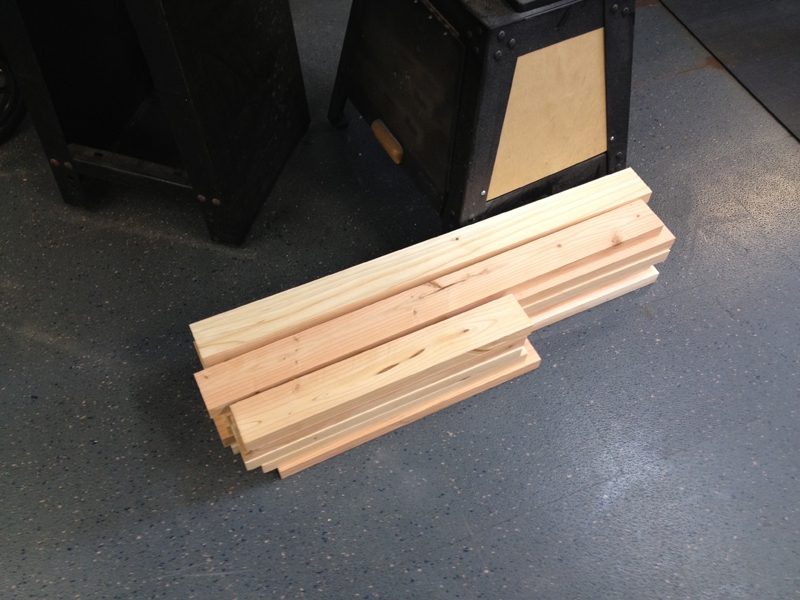
And the pile of wood that will become the stand and possibly a canopy. I know it's a rimless but I'm not sold yet on not doing a canopy....I know I know....:smash:

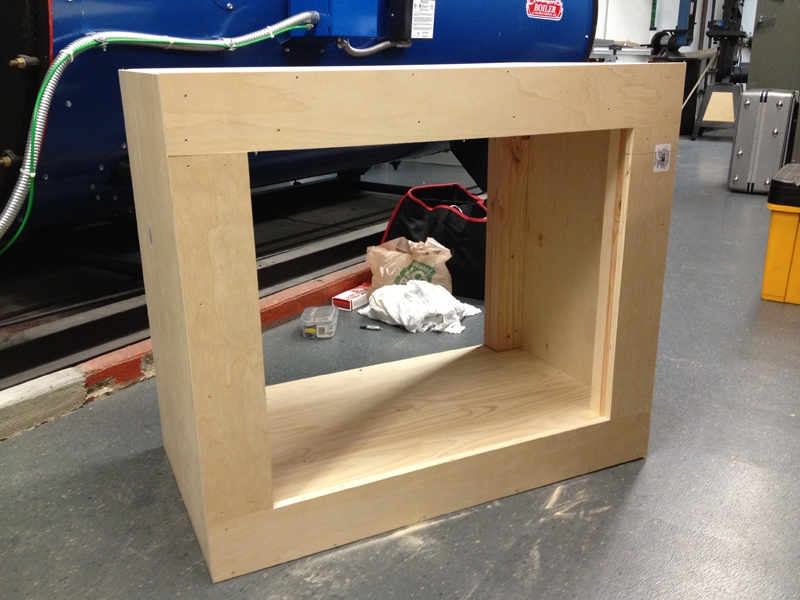
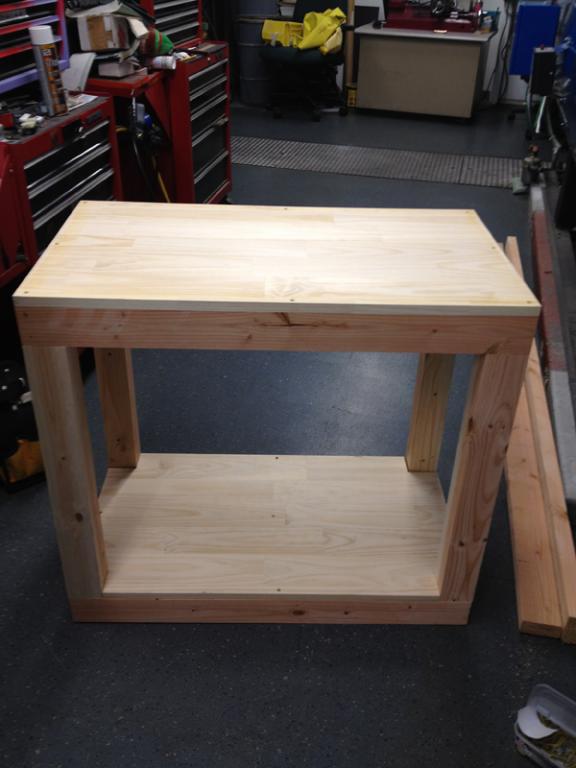
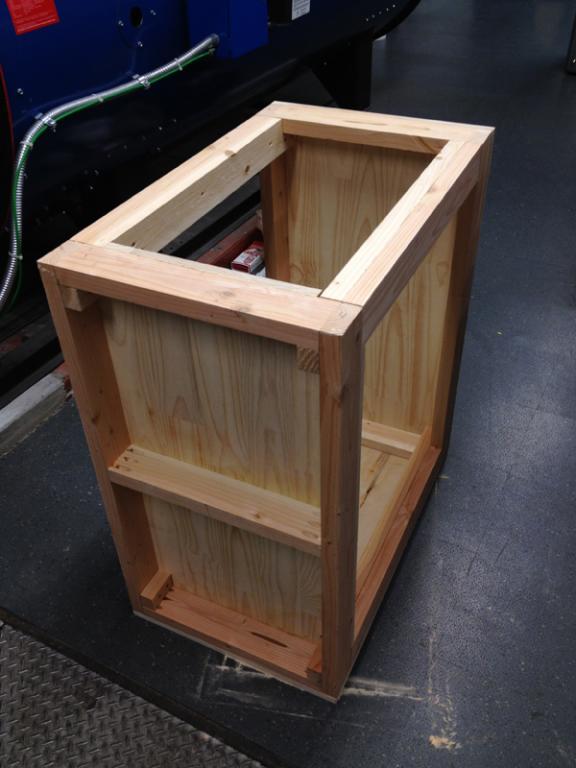
The wood is 2x4's that I ran through a table saw on all 4 sides. I don't have a planer so this worked fairly well. They were all straight but I like working with square corners and smooth sides. Cut to length on my Dewalt Mitre and we're good to go..
 

Attachments

  • photo.jpg
    photo.jpg
    328.9 KB · Views: 1,339
  • photo(21).jpg
    photo(21).jpg
    298.6 KB · Views: 1,321

strgazr27

Advanced Reefer
Location
Kings Park, NY
Rating - 100%
123   0   0
So after a few hours we start to see a stand taking shape. All joints were drilled with a pocket screw jig and glued as well. The top and bottom shelf are both solid 3/4" pine. It could probably hold 3 tanks up but I tend to overbuild :tongue1:
 

Attachments

  • photo(2).jpg
    photo(2).jpg
    43.8 KB · Views: 1,281
  • photo(4).jpg
    photo(4).jpg
    46.3 KB · Views: 1,232
Last edited:

strgazr27

Advanced Reefer
Location
Kings Park, NY
Rating - 100%
123   0   0
Starting to skin the stand with some nice 3/4" Birch ply. I used this as I am still not sure what finish I am going with. I'm leaning towards a satin black finish but won't make up my mind for awhile..Adding trim on the top and bottom. Going with a large single door as originally a 20L tank was going under the stand as a sump but those plans changed for several reasons. A: The I-Tech skimmer I bought wouldn't fit in the sump and my wife asked why I didn't set it up like the 65 I did with the sump in the unfinished part :) She didn't have to ask me a second time Lol...
You can see my "Catfish" in the sump when I was doing some testing of fitment and sizing...That's Mooney. She NEVER leaves my side when I am in the house.
 

Attachments

  • photo(5).jpg
    photo(5).jpg
    42.9 KB · Views: 1,208
  • photo(20).jpg
    photo(20).jpg
    310.3 KB · Views: 1,301
  • photo(3).jpg
    photo(3).jpg
    40.2 KB · Views: 1,267
Last edited:

strgazr27

Advanced Reefer
Location
Kings Park, NY
Rating - 100%
123   0   0
Adding the trim and a shot of the door that I made for the stand. This will be held in place by 4 magnetic catches that will allow the door to be completely removed for access without it sticking into the room. I siliconed all the seams inside the stand and brushed resin on it to waterproof it before 2 coats of gloss white paint were applied. All this wasn't needed really as I am going with an external sump. The stand will only hold food, paper towels etc. I drilled the top for the drain and return bulkheads as well as resin coated and than painted to top portion where the tank will sit.
 

Attachments

  • photo(8).jpg
    photo(8).jpg
    46.5 KB · Views: 1,635
  • photo(7).jpg
    photo(7).jpg
    303.8 KB · Views: 1,216
  • photo(6).jpg
    photo(6).jpg
    282.4 KB · Views: 1,302
  • photo(19).jpg
    photo(19).jpg
    302.7 KB · Views: 1,649
Last edited:

strgazr27

Advanced Reefer
Location
Kings Park, NY
Rating - 100%
123   0   0
Thanks guys! Here it is as of this morning. I'm still not sure if I am going to run a canopy on the tank. I like the way it looks but I also like the rimless look also. The wife, to my surprise actually liked the tank without the canopy! The trim isn't crooked either Lol. Dam camera phone lens Lol.....And yes that's the BEAST of a skimmer sitting in the tank. Although it meant buying a new sump and changing plans, it will be well worth it I think :)
 

Attachments

  • photo(18).jpg
    photo(18).jpg
    40.3 KB · Views: 1,249
  • photo(9).jpg
    photo(9).jpg
    263.5 KB · Views: 1,196

strgazr27

Advanced Reefer
Location
Kings Park, NY
Rating - 100%
123   0   0
Very nice bobby, what happened to the pro flex sump ?

Funny you should ask!

I picked up a Proflex4 from Aquahut last week. I loved a lot of the features but was a bit disappointed in the layout. I spent some time looking at it and decided I could make it work for me with a small modification.
I didn't like the fact that to run a 'Fuge and skimmer you need to place the skimmer in the same section as your return pump. NOT a good setup for several reasons. Even with an ATO the level would fluctuate driving the skimmer nuts as well as possible issues w micro-bubbles.

I decided that if I added another baffle to the right side of the sump I could feed the 'Fuge section separately, keep the return pump in it's own compartment and place the skimmer in the biggest compartment of the sump with a constant level.

I found a piece of smoked acrylic laying around which was perfect. I laid out the spacing and using a jig I made I routed out "Fingers" into it. I trimmed it to size, routed the edges and glued it into the sump. I need to thank Richie for the awesome idea of tilting the baffle back slightly so that the water rolled down it instead of water-falling over it into the return pump section.

The sump came with a cover that originally fit the center section and featured a window for a lamp. As I was using the center section for the skimmer this wouldn't work anymore. What I did was cut it down to fit the new 'Fuge section. I purchased a Lumenbrite LED strip light for the 'Fuge but didn't like the light just sitting on top of the cover. A few minutes with the drill press, a tap and some 8-32 nylon screws and that problem was solved.

I know it seems crazy to spend the money on something and than have to modify it to work but in this case it was worth it. I took a chance and sent a picture of the sump to Aqueon and explained why I did what I did. Likely won't even read the email but what the hay, maybe they listen Lol.
 

Attachments

  • photo(17).jpg
    photo(17).jpg
    40 KB · Views: 443
  • photo(11).jpg
    photo(11).jpg
    34 KB · Views: 439
  • photo(12).jpg
    photo(12).jpg
    279.6 KB · Views: 442
  • photo(13).jpg
    photo(13).jpg
    76.4 KB · Views: 437
  • photo(15).jpg
    photo(15).jpg
    44.9 KB · Views: 435
  • photo(14).jpg
    photo(14).jpg
    331.4 KB · Views: 438

Sponsor Reefs

We're a FREE website, and we exist because of hobbyists like YOU who help us run this community.

Click here to sponsor $10:


Top