- Location
- Greenville, NY
Hello all, I'm new to Manhattan Reefs, but thought I'd share my build and maybe get to know some of you fellow Reefers and maybe get a few ideas from you more experienced reef maniacs! Like I've become...  This will be the start of a continuing series. First - Thanks to masterswimmer for all your help!
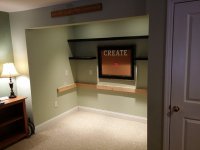
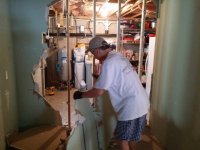
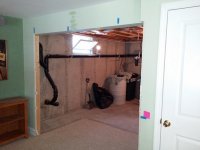
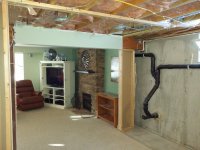
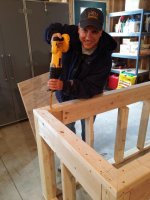
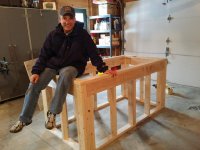
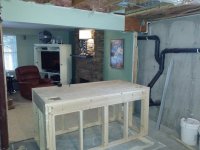
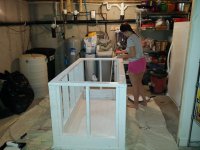
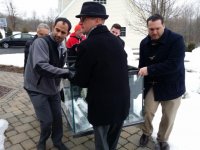
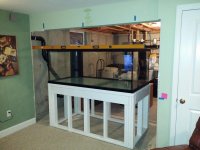
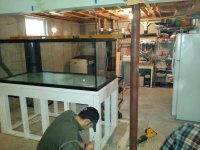
I've been documenting via pictures since the start, but let me first describe my build. I've had a 180G system in my upstairs family room for about 3 years, but got tired of lugging buckets of water up 2 flights of stairs, and dealing with cramped equipment under my stand. So, my wife offered to give up her craft area in our finished basement - so I jumped on that opportunity! The location is perfect, it gives me a 14' X 14' fish room behind the tank which will be built into the finished basement wall. I bought a 300 Gal DD Marineland Glass Aquarium with dual corner overflows. My goal from the beginning was to completely automate this system with top of the line everything so I could actually enjoy the tank, and not worry so much when not home. Full automation meaning auto top off (Of course), but also auto water changes, Auto RODI, and even auto water changes for my 55 Gal quarantine tank. I'm using a 120 Gal glass sump, a 60 Gal Glass Refugium, and a 30 Gal Deep Blue 24"x24"x12" Frag Tank. Now for the real fun stuff. I'm using 2 - 2400 GPH yellowtail external pumps for the return and manifolding off of these for various systems. One is the main, the other is an installed spare that I'll cycle back and forth about monthly. The system will be controlled via APEX Fusion, and is plumbed in such as way to allow me to remotely change pumps (I'll discuss this detail in later posts). I'll also add a no flow indication to send me an email to my smartphone - which would allow me to switch pumps remotely if needed. I'm using a Reef Octopus Regal 300-EXT External skimmer, Reef Octopus RO-CR-5000 Calcium Reactor, 2 NextReef MR-1 XL Media Reactors for Carbon and GFO, the APEX DOS system for auto water changes, and an 80 Watt Aqua UV Sterilizer fed by an external 2600 GPH Snapper/Dart Hybrid external pump. The system will be heated by an in line Aqua Logic HTI 1.5-115 Titanium heater - yes, this is really cool (or warm..LOL). Inside the tank, I'm using 2 GYRE XF-150 Wave Generators from Maxspect, and the crowning Jewell of the system, a Geisemann Moonlight which has 4 metal halides and 4 T-5's suspended on an automated pulley system to put it in maint position. In future posts, I'll start adding pictures and a detailed description of each aspect of the build. It's April 19th, I figure I'm about 4 weeks away from getting the system wet. Be back soon with pics and a description of the display tank stand to start!
I've been documenting via pictures since the start, but let me first describe my build. I've had a 180G system in my upstairs family room for about 3 years, but got tired of lugging buckets of water up 2 flights of stairs, and dealing with cramped equipment under my stand. So, my wife offered to give up her craft area in our finished basement - so I jumped on that opportunity! The location is perfect, it gives me a 14' X 14' fish room behind the tank which will be built into the finished basement wall. I bought a 300 Gal DD Marineland Glass Aquarium with dual corner overflows. My goal from the beginning was to completely automate this system with top of the line everything so I could actually enjoy the tank, and not worry so much when not home. Full automation meaning auto top off (Of course), but also auto water changes, Auto RODI, and even auto water changes for my 55 Gal quarantine tank. I'm using a 120 Gal glass sump, a 60 Gal Glass Refugium, and a 30 Gal Deep Blue 24"x24"x12" Frag Tank. Now for the real fun stuff. I'm using 2 - 2400 GPH yellowtail external pumps for the return and manifolding off of these for various systems. One is the main, the other is an installed spare that I'll cycle back and forth about monthly. The system will be controlled via APEX Fusion, and is plumbed in such as way to allow me to remotely change pumps (I'll discuss this detail in later posts). I'll also add a no flow indication to send me an email to my smartphone - which would allow me to switch pumps remotely if needed. I'm using a Reef Octopus Regal 300-EXT External skimmer, Reef Octopus RO-CR-5000 Calcium Reactor, 2 NextReef MR-1 XL Media Reactors for Carbon and GFO, the APEX DOS system for auto water changes, and an 80 Watt Aqua UV Sterilizer fed by an external 2600 GPH Snapper/Dart Hybrid external pump. The system will be heated by an in line Aqua Logic HTI 1.5-115 Titanium heater - yes, this is really cool (or warm..LOL). Inside the tank, I'm using 2 GYRE XF-150 Wave Generators from Maxspect, and the crowning Jewell of the system, a Geisemann Moonlight which has 4 metal halides and 4 T-5's suspended on an automated pulley system to put it in maint position. In future posts, I'll start adding pictures and a detailed description of each aspect of the build. It's April 19th, I figure I'm about 4 weeks away from getting the system wet. Be back soon with pics and a description of the display tank stand to start!


