JBNY

Reefer
Rating - 0%
0   0   0
Awesome tank and detailed work.

Thanks, my wife says I have issues! I was trying to have fun with the project. Was not in any big rush, although I was working at a pretty good clip for not being in a rush. :)

Nice wood working skills, need a job? I would hire you just the commute to central Nj might be a little much

No job needed here. All skills learned watching TV. Yankee workshop FTW.
 

JBNY

Reefer
Rating - 0%
0   0   0
The next step was to start tackling the sump room located in the basement directly underneath the tank. I wanted to re-do the way it was setup. First off, I wanted to get rid of the carpet that was in that room, it was just terrible for clean up when I spilled water. Next, I wanted to put a fully functional sink in the room so that I would not have to bring up equipment into the kitchen to clean. I also want to put a few dedicated circuits in the room as well.

Lastly I want to wall in that section of the basement to make it a sperate room, I am hopeful that by doing this I will be able to control the temperature and humidity better than having this section open to the rest of the basement.

But first I needed to clean up and remove EVERYTHING in the sump room. Word of advice. If you have your equipment in a different location other than under your tank and you take everything down, with the plan of redo it months later, take the time to clean up and put away everything in the equipment room.

My sump room, when up and running used to look like this.
DSCN5706.jpg


After 9 months of not being used the area starts to get used for storage. Any time I needed something, I never put things back in their proper place. So it ended up being a real mess. So now this is what I started with. This whole area needs to be cleaned up and removed. I was not looking forward to it. :(

DSCN2059.JPG


After a few days, I had it down to this.
DSCN2066.JPG


And after a few more hours, all done and cleaned up. I must have had about 100 holes in the wall that needed to be patched.
DSCN2080.JPG


So with the room cleaned up. I got the carpet out and put down a vinyl floor. Much better for water cleanup.

Before.
DSCN2083.JPG


After
DSCN2087.JPG


:D
 

JBNY

Reefer
Rating - 0%
0   0   0
Next I had an electrician install two dedicated 20 amp quads for the room. That should be enough power! :lol:
DSCN2089.JPG


This last picture is a shot with the molding I am going to use. It is that vinyl wall molding they sell at home depot. After I get it on the wall I will silicone the seam at the floor floor so that any spills will not be able to get under the floor and make there way out of the room.
DSCN2090.JPG
 

JBNY

Reefer
Rating - 0%
0   0   0
Next doing a water test on the tank, using tap water. No leaks!!

Just starting out, things are looking good.
DSCN2068.JPG


Half way there.

DSCN2070.JPG


All full. I stoped the water about 1/8" from the overflows.
DSCN2076.JPG


DSCN2078.JPG
 

JBNY

Reefer
Rating - 0%
0   0   0
I decided to paint the electrical outlets I had put in with rustoleum to help out with keeping them from rusting as time goes on. I used the rustoleum primer then a coat of the rustoleum black enamel. It came out pretty good IMO.

DSCN2094.JPG


Next I finished painting the room. It took a while. I had to fill in all the holes and fix all the wiring that had accumulated down there over the years. All the phone lines terminate in the corner of this room. They had just been tacked up on the wall, and as the years went by it because more and more of an eyesore. So I decided to get some raceway and run the wiring through that. It came out great. After that was done I painted it to match the color of the room. I choose a blue color to go with the water theme.

Room with the painted electrical outlets
DSCN2097.JPG


Corner with the raceways put up.
DSCN2098.JPG


Here is a shot of the splash cover I am going to use for the outlets. You can also see the network jack I put in for my Apex.

DSCN2100.JPG
 

JBNY

Reefer
Rating - 0%
0   0   0
Also got the sink installed. I had to run a pipe from the sink drain to the main exit drain for the house. I hid the pump in the wall, in an area that is easily accessible for when I need to get to the pump for maintenance. I also ran an electrical cutlet behind the wall to plug the pump into.

I've got an extra valve under the sink for hot and cold that I can hook into the RO/DI unit too.

DSCN2095.JPG


Also got around to cutting, staining and finishing the sides to the stand. Two more coats of ploy tonight and I can put them on the stand hopefully tomorrow.

DSCN2101.JPG


I still need to reinforce the floor and wall in the room. Then it's just getting the equipment back in place and then I get to start plumbing the whole thing up.
 

JBNY

Reefer
Rating - 0%
0   0   0
So I framed out the new wall and added a door to the sump room.
Framing was a pain, as the area has the HVAC vents going right above, so there was little to attach the studs to. But I was able to work it out.

DSCN2102.JPG


Then I moved the light switch for the room, added an electrical outlet, and sheetrocked the whole thing. I ran out of the normal sheetrock so I ended up using one sheet of green board.

I still have to tape and spackle.

View from the basement looking at the new room.
DSCN2105.JPG


A view from inside looking out.
DSCN2115.JPG


I'm putting in a window so you can view the room without opening the door. Also added an LCD screen cause I thought that would be cool. :D
DSCN2108.JPG


View looking through the window into the sump room.
DSCN2109.JPG


The LCD readout. I will have it alternate, every 3 seconds, between the tank reading via my aquacontroller and the temp and humidity reading for inside the room. The status shows whether or not the aquacontroller is working properly, date and time is just the current time and date. I have it hooked into a motion sensor so it only turns on when someone is in the area.

Here are the two views. (I still have the plastic film on to protect it from scratches).
Apex
DSCN2117.JPG


Sump Room
DSCN2110.JPG
 

JBNY

Reefer
Rating - 0%
0   0   0
So the last two weeks have been spent finishing the new walls to the fish room and reinforcing the floor. It took a lot longer than I thought. Originally I thought I could just bang out the room in about 3 weeks total. Right now I think it will be 6 weeks to redo that room. So here are some picture of the progress.

Finished taping and spackling.
Here is the inside of the room.
DSCN2119.JPG


Outside.
DSCN2122.JPG


Here I am finally finished with the walls. All done attaching all the molding and painting the trim and the walls.

Inside.
DSCN2150.JPG


Outside. I gotta hand it to the ability of the paint stores to match existing paint from a chip you pull off the wall. The walls in the basement are about 15 years old and they were able to match to the existing paint perfectly.
DSCN2144.JPG


A close up of the LCD screen I attached to the wall. :D
DSCN2145.JPG


I also was able to reinforce the floors. I had spoken to an structural engineer when I first put up my 180 gallon tank and gave him some different weights to work with for different tank sizes. For my 270 I am technically ok. But he said that when I had a bunch of people over, like at a party or something, I might notice a little bounce in the floor. He recommended I attached some plywood on the sides of the trusses to help stiffen them up. So I did that on 4 of the trusses. So now it should be plenty strong.

DSCN2137.JPG


DSCN2135.JPG


All closed back up.
DSCN2139.JPG


So now I just have to tape and spackle the ceiling, then paint the ceiling, and fix all the hanging wires. After that, I am all done and can start building the stands for the equipment for the fish room.
 

JBNY

Reefer
Rating - 0%
0   0   0
Outstanding trend to follow. Totally Awesome.. I knew this was going to be great. By just looking at your 180 gal years ago that this was going to be excellent build. Thanks for sharing looking for more.

Thanks, yeah that 10 was a great tank, sometimes I wish I had it back.

There is a lot of things I did for this, I don't know if this information is helpful if you are doing a new build or terrifying with the amount of work to be done.
 

JBNY

Reefer
Rating - 0%
0   0   0
I closed up, spackled, and repainted the ceiling.

Next I went around and siliconed the nylon molding to the vinyl floor. So now if, and when, I get a flood hopefully it will be contained to the sump room only.

Then I started building the stand for the sump. I decided this time to not use a standard acrylic sump. So I am using a Polyethylene 90 gallon tank. Last time I underestimated my needs for the sump size by about 2 gallons. So if I had a power failure and I wasn't home, I would loose some water to the floor. I try to make sure I can shut down the system without having it flood, so this time with the 90 gallon tank I should have a good 30 gallons or so extra in the sump. So no more floods ever. :)

Anyway here is the first pics of the stand with the sump. I like having the sump up off the ground. It makes it easier to work on and I can start a siphon if I need to.

DSCN2156.JPG


Then added a shelf on top of the sump. I will put the refugium on that. I like having the tanks at different levels if possible, it helps to cut down on the pumps, I can use gravity to feed each of the tanks.

I also put up the shelf that will hold the frag tank. It is screwed into the wall. It will be the same setup as the old system, just a different tank.

DSCN2157.JPG


Then before I went further I put a lip around the back and sides of the stands. Next I siliconed it to fill any gaps, That way if a tank spills some water or overflows I can control where the water will go.

DSCN2173.JPG


For the refugium up against the wall I used silicone as well. That way if the water spills or splashes the water will not run down the wall.

DSCN2175.JPG
 

JBNY

Reefer
Rating - 0%
0   0   0
Here is the main pump plumbed into the sump. Took awhile to get things setup and correct. I have the pump on the bottom and the return line going up through bulkhead and from there it will go up to the main tank.

DSCN2171.JPG


DSCN2170.JPG


I am not using the ball valves from HD or lowes. I had nothing but problems with them last time. They work good for a year or two then they become increasingly more difficult to open and close, eventually then lock and you can't get them to move anymore. These ones from Savko worked flawlessly over 3 years without any problems in my last setup.

Returns from the tank is done. I used cam locks for the bulkheads in the tank. I used them in the past for my skimmer and they were very easy to use. They are a two piece system, inexpensive and well made. They make it super easy if you ever need to remove the tubing.

Looking up at the tank bulkheads, before the cam lock is connected.

DSCN2163.JPG


And after, I am using flex tubing for the drains. They make less noise than hard PVC.

DSCN2179.JPG


The drains flow down into the refugium. In the old setup I had the drains just dump right into the refugium. the 8 foot drop from one floor to the other created a lot of bubbles. So for this setup I am having the drains flow through this.

DSCN2165.JPG


I used similar ones in the old tank. They cut down on the turbulence and bubbles dramatically.

DSCN2172.JPG
Basically the first 90d bend slows up the water a little so it's not rushing into the tank, then the tee pushes it down into the tank. The top of the tee is open and allows some of the air to escape so there are not as much bubbles. I have to play with the length of the air tube. I think I can make it a 1" tube rather than a 1.5" that I have on right now. The 45d cut at the end of the drain just lets me stick it on the bottom of the tank and still allow the water to easily get out.
 

JBNY

Reefer
Rating - 0%
0   0   0
Ok next I finally decided to put sand in the tank. I had great luck with sand in my old tank and I really like the look over a bare bottom.

DSCN2182.JPG


Next I set up my RO/DI with fresh new cartridges and a new RO filter and started filling up the tank. With a 75 GPD unit it takes about 4 days to fill up everything.

You can see how much water is coming out of the hose.
DSCN2185.JPG


After about 1 day.

DSCN2187.JPG


On the 3rd day.

DSCN2190.JPG


On the 4th day it finally started to fill up the tanks below.

DSCN2193.JPG


Finally I turned everything back on. I found a few small leaks where I just needed to put on some more Teflon tape or tighten something up but eventually I ran it with no leaks!

Here are the drains going into the refugium from the main tank. In the past I had used this design on drains without too much height on them. With the water coming down from the floor above I had water coming out of the top of the tee so I just put a cap on it and ran an airline hose to help air escape. Every once in a while I might get a little bit of water out of the airline hose, so I pointed it towards the water. I still get some bubbles but nothing like I had when I had a straight run down to the sump.

DSCN2202.JPG


Put some heaters in the sump and brought the temp up to 78F.
DSCN2204.JPG


Rock is going next. I still have to get the skimmer running.
 

JBNY

Reefer
Rating - 0%
0   0   0
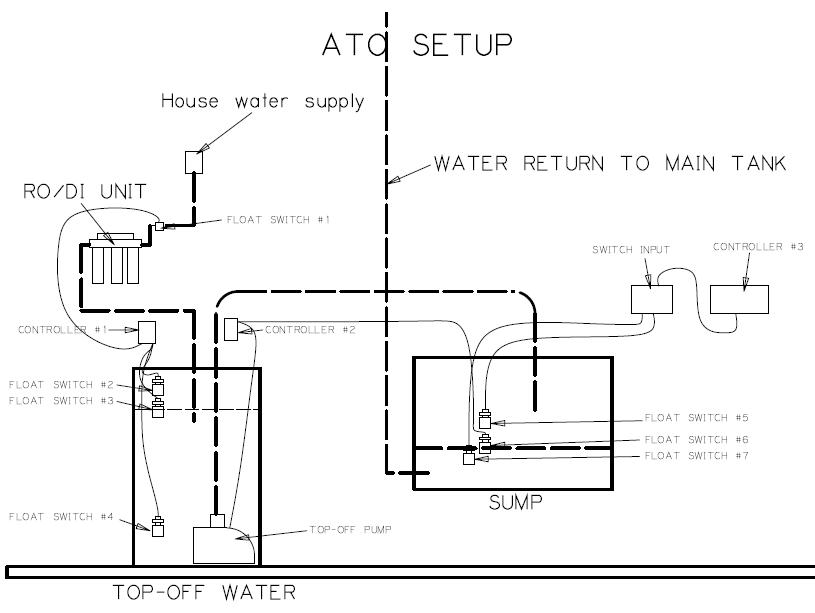
I spent a while getting my ATO set up. For me this was actually one of the most important parts of the tank. Being able to never have to worry about water, in and out of the tank, is a good thing IMO.

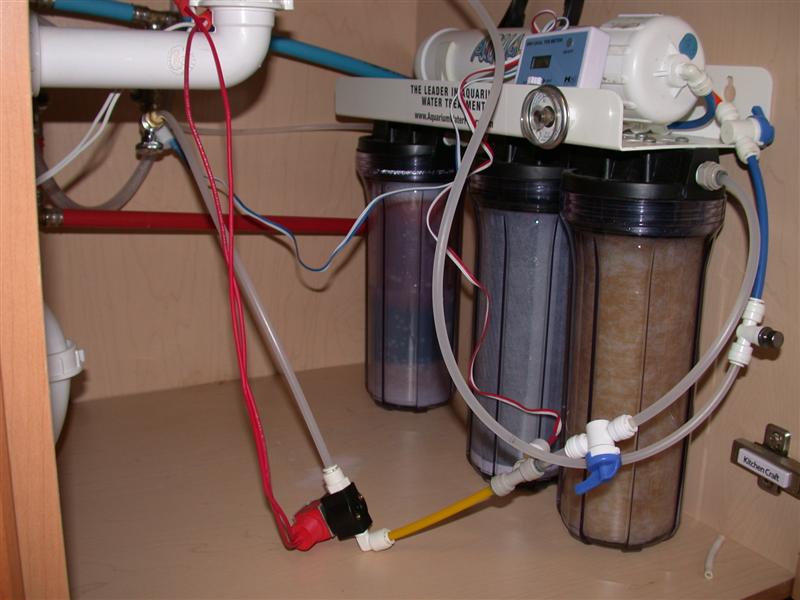
For my top-off and water changes I am using what was an Aqua-FX 4 stage RO/DI unit. I say was, because at this point I have replaced about everything in it so it's not really the same anymore.

Due to my ro/di unit sitting unused for almost a year, I needed to replace all of the canisters, so I am using a new 75gpd membrane, sediment, carbon and DI filters. I also bought an inline TDS meter. I never had one, it's a nice thing to have. My TDS is 157 in and 0 out. :)

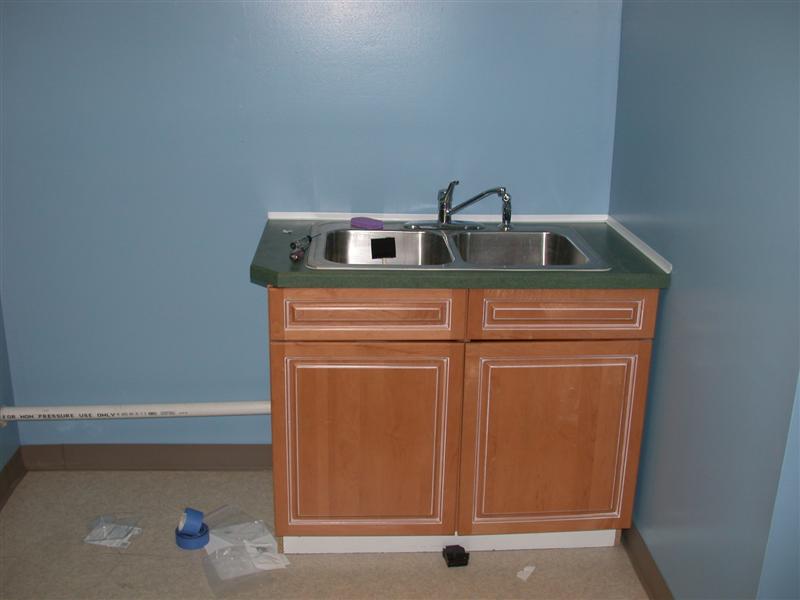
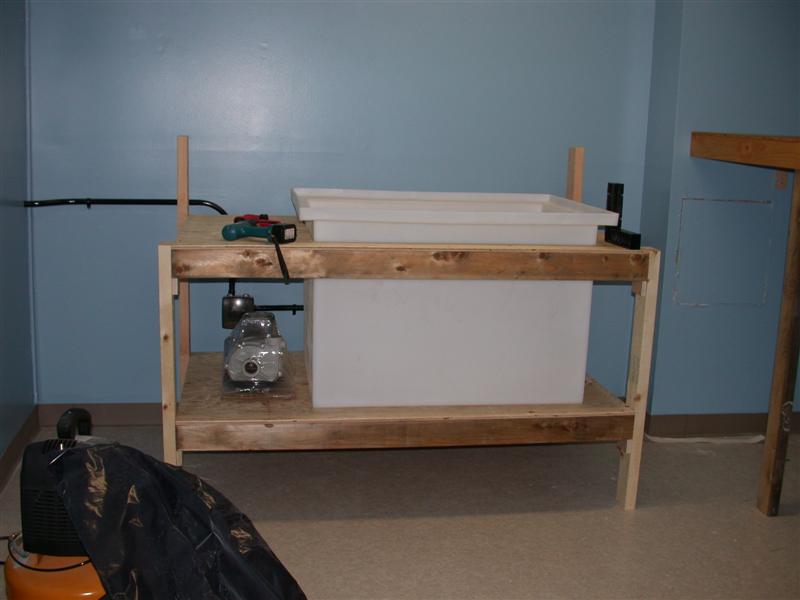
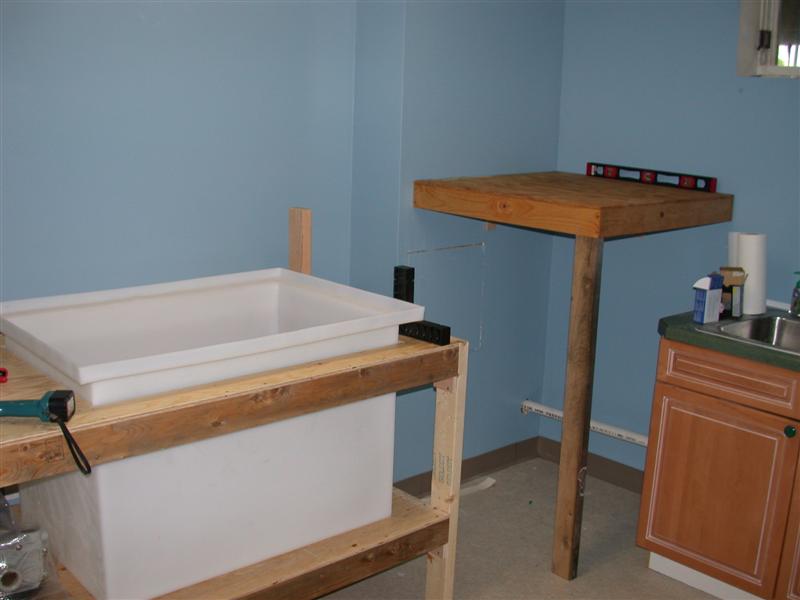
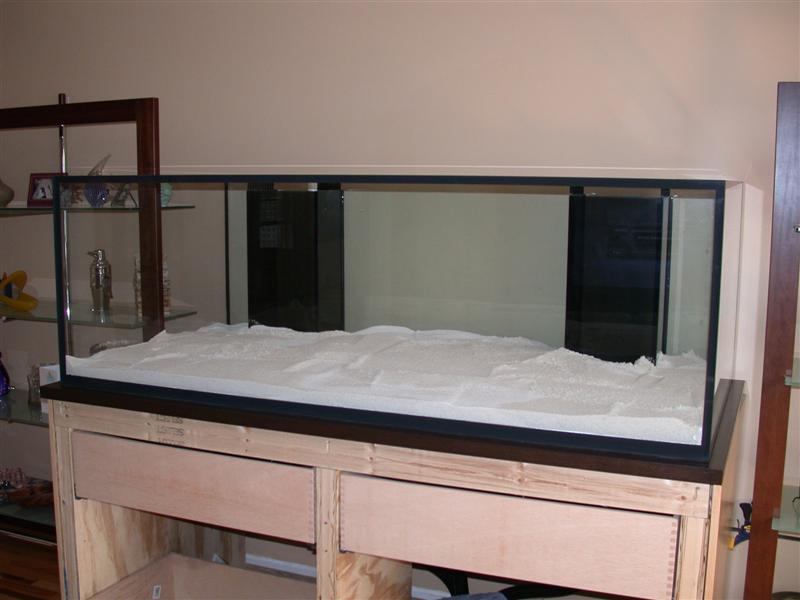
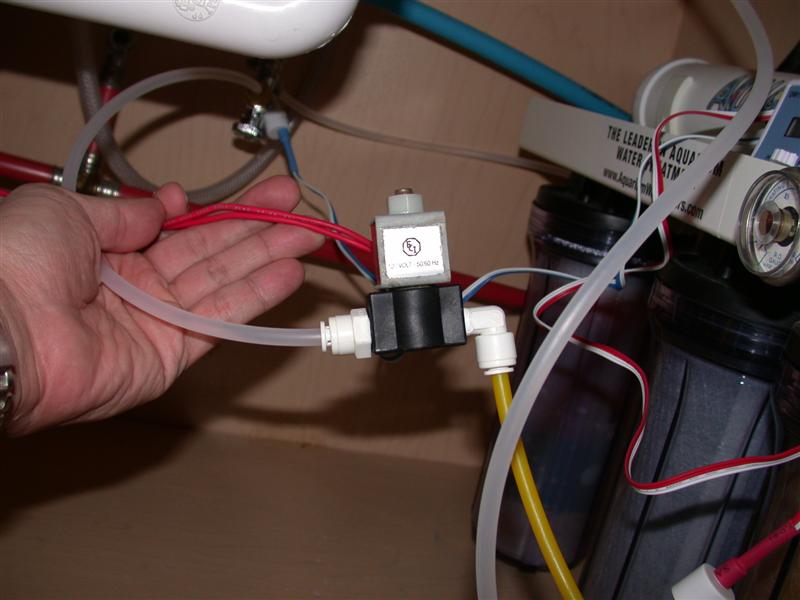
I set up a 55 gallon Rubbermaid plastic container the same as with my old tank. The tank is used for all RO/DI storage. This time I used a low/high float switch, from top-off.com, that I bought at one of the MACNAs a while ago.

It works real well. When the water drops to a set level it turns on a polypropylene solenoid valve I got from mcmaster.com I think it is PN#7877K23. That turns on my ro/di until the top level switch is reached and then turns off. There is a redundant switch above as a safety switch. So really there is no worries about the unit not switching off.

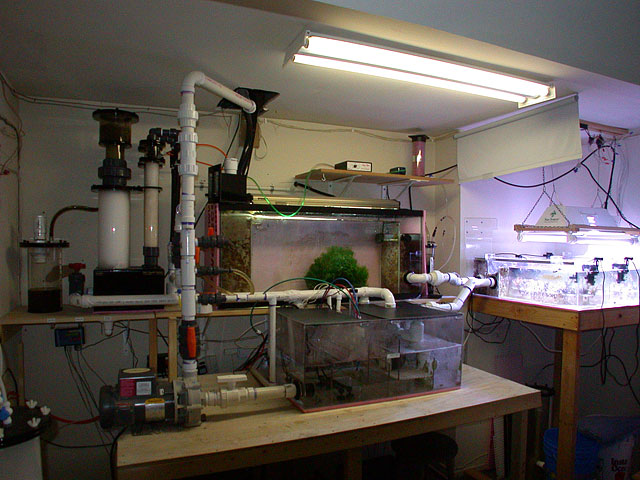
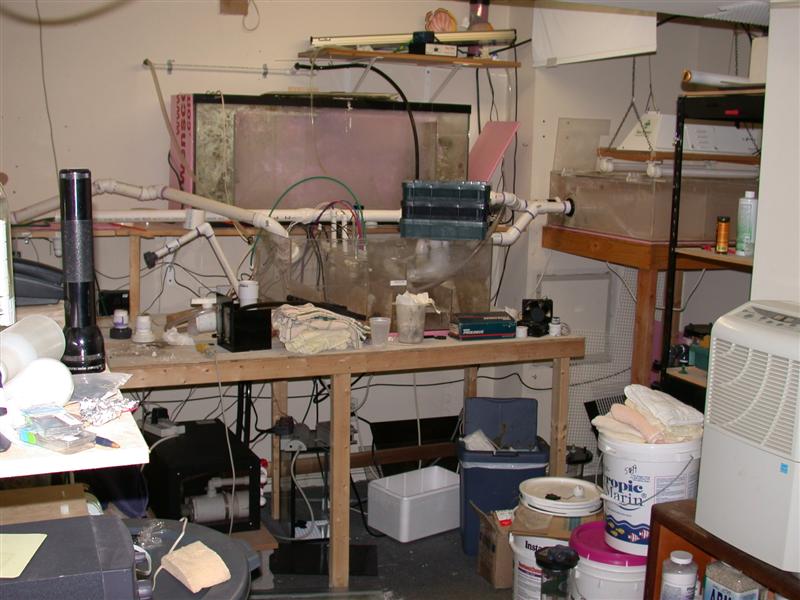
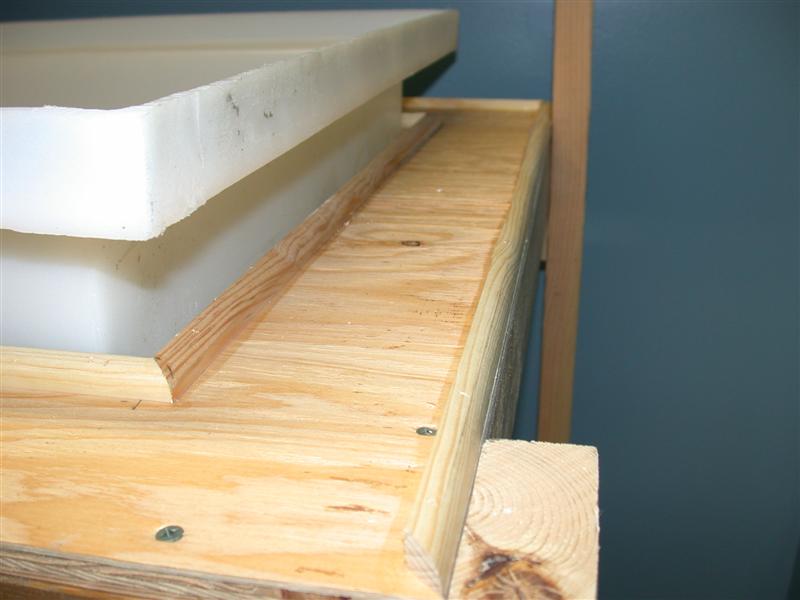
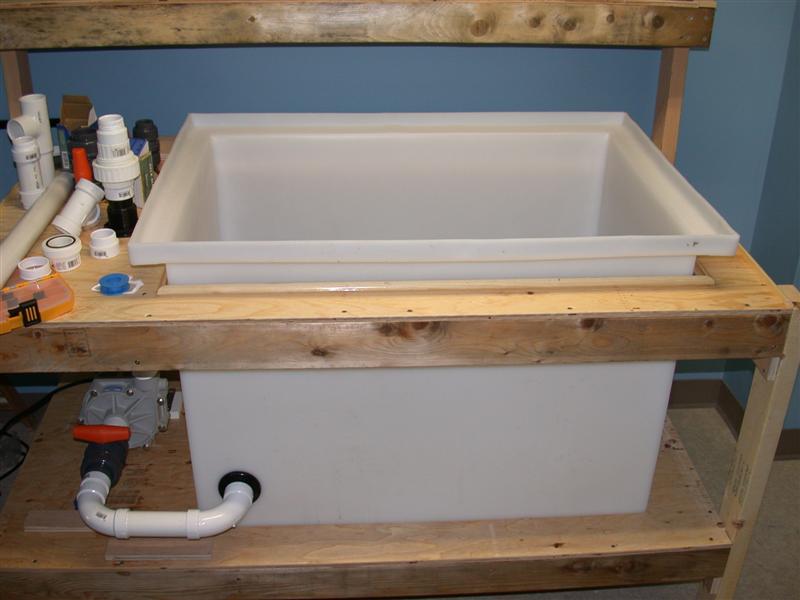
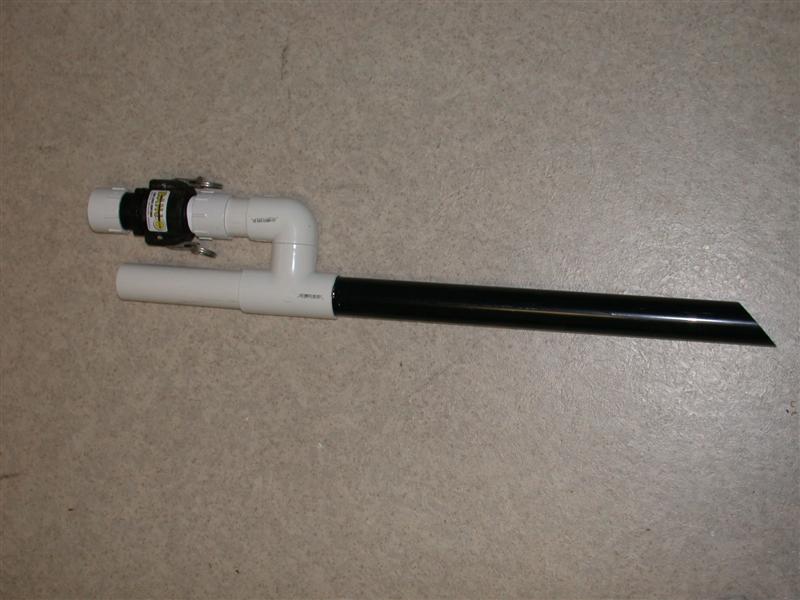
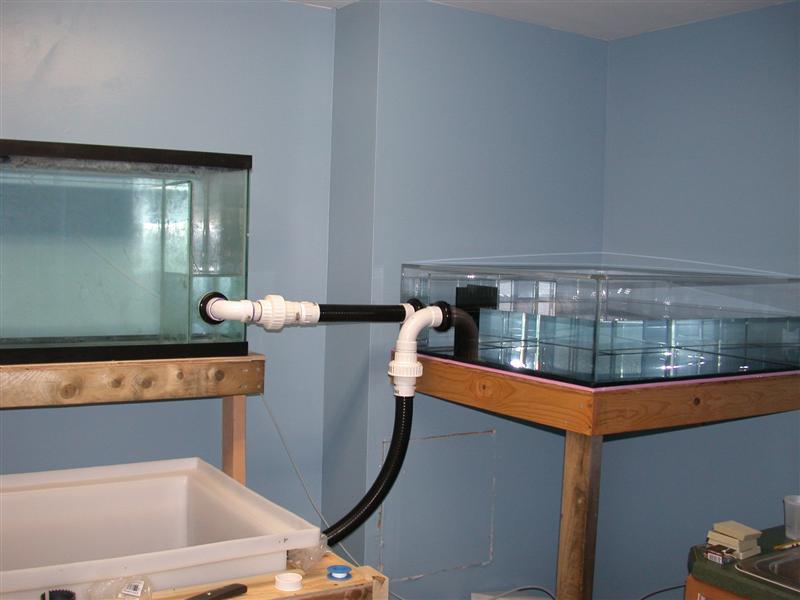
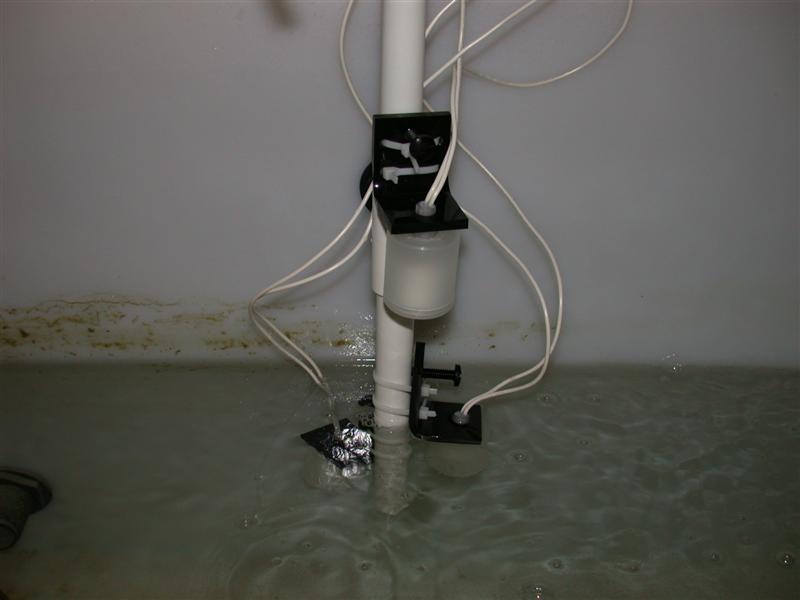
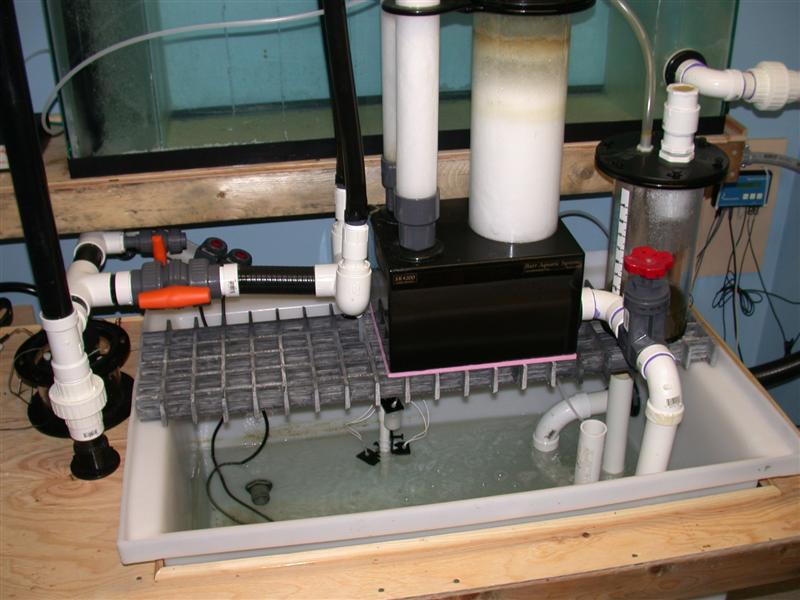
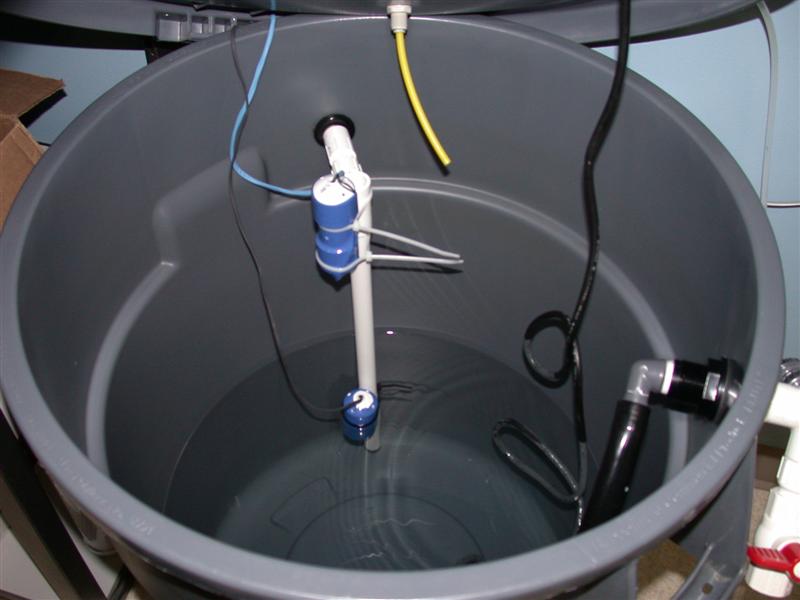
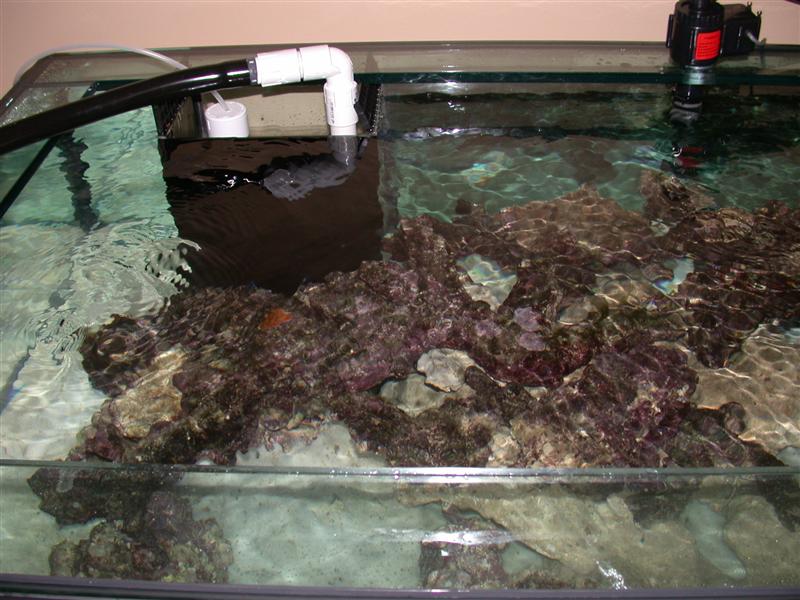
Once I got that all set up I went to work on getting the water into the sump. I am using a large polypropylene tank. Which works well as a sump but I don't have anything to attach stuff to. I drilled out a 1/2" bulkhead and attached a 1/2" PVC pipe so I can attache some float switches to it.

On my last tank I had float switched on a piece of PVC that was cabled tied down. The cables would always move just a little, once in a while, to change the level a bit. This time I wanted to make it was a bit more solid.

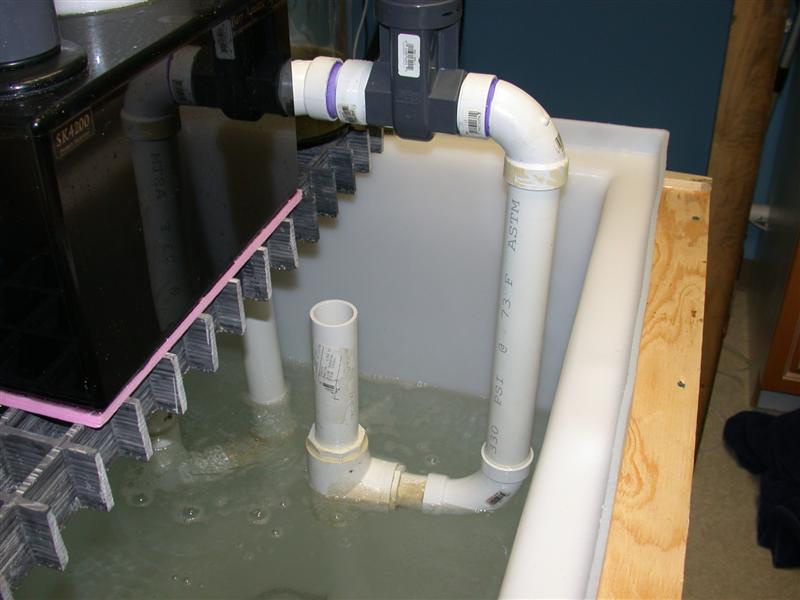
I decided to use three float switches.

1) A low level that would sense if the water level in the sump became too low as to allow the main pump to suck in air. If the low level trips the main pump will get shut down.

2) A high level. That will shut down the power to the top-off pump in case the top-off float were to stick.

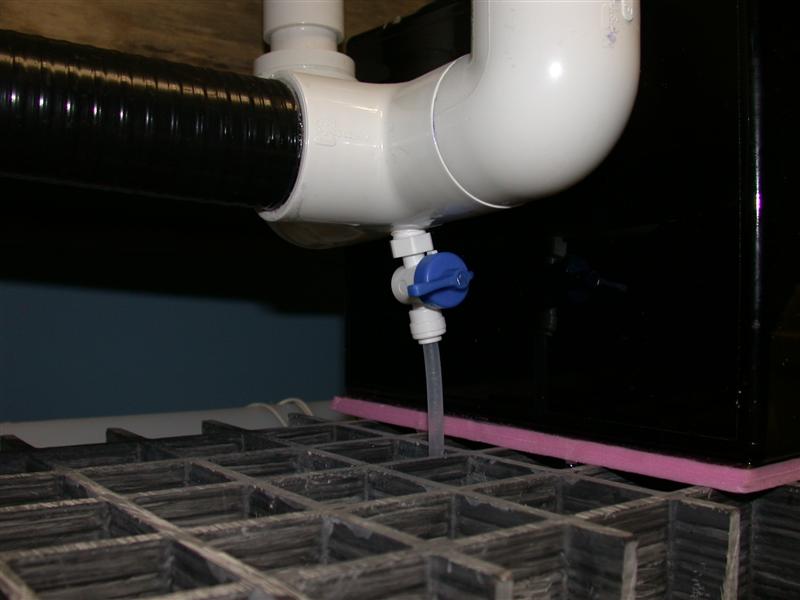
3) Top-off level switch. Just a standard float kicking off a pump in the ro/di reservoir to replace water that evaporates.

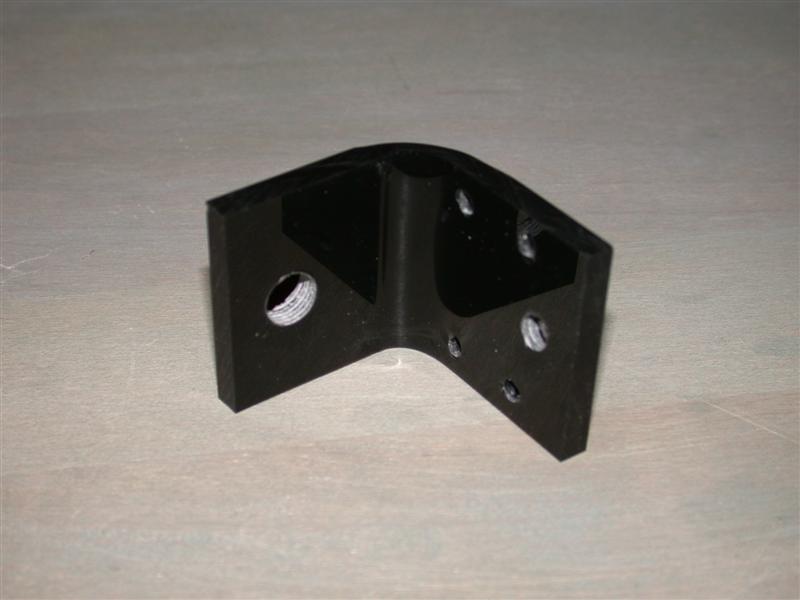
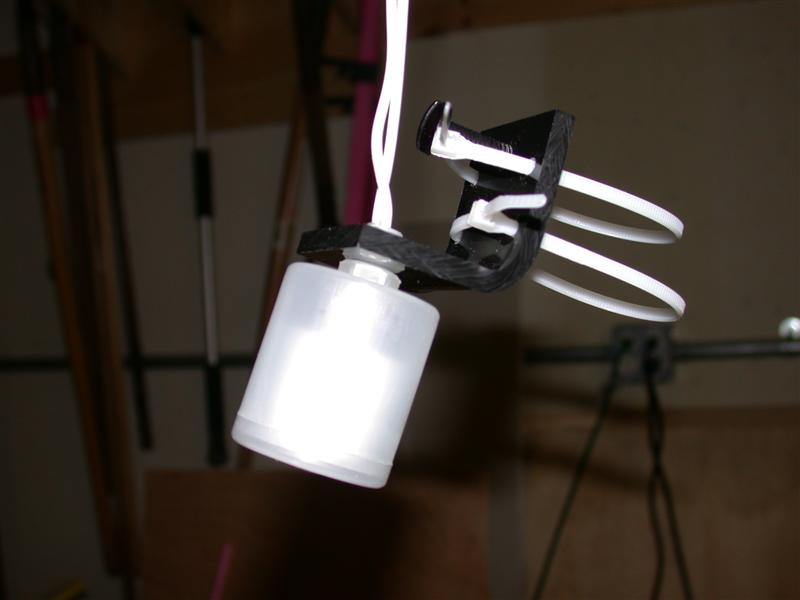
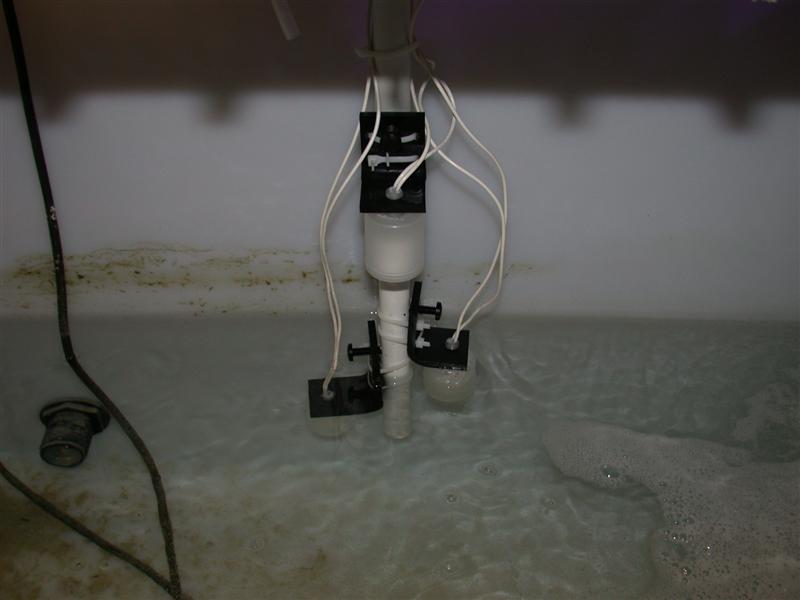
First I cut out a piece of acrylic and used a tap to make a hole to attach the float switch as well as a 1/4" nylon screw. Then I bent it to a 90d angle.

DSCN2220.JPG


Attached the float, the screw, and two cable ties to keep it from shifting.

DSCN2222.JPG


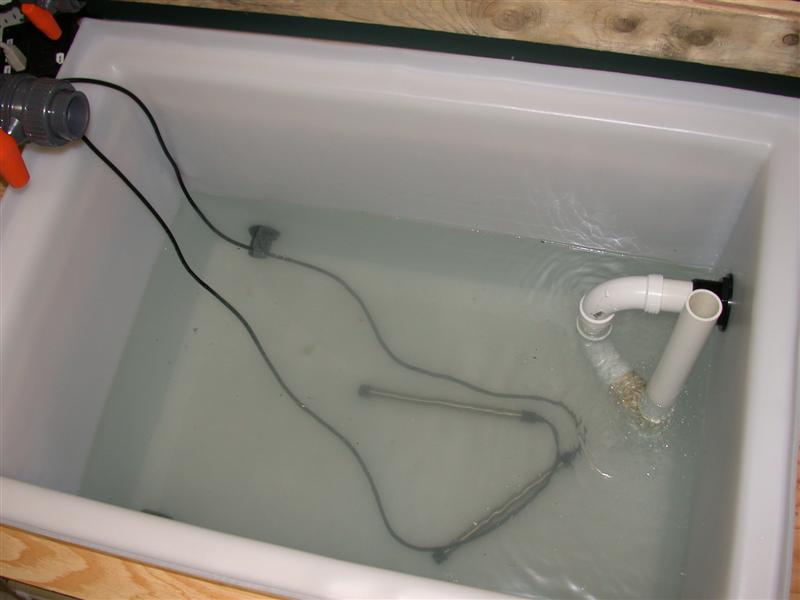
Then I attached them to the pipe. I left everything in place for a day or so to make sure the positions were good. then I pulled the pipe and tapped three holes so I could screw the floats in. Now when I take the floats off to clean them I can be sure I am putting them back in the same place.

DSCN2227.JPG


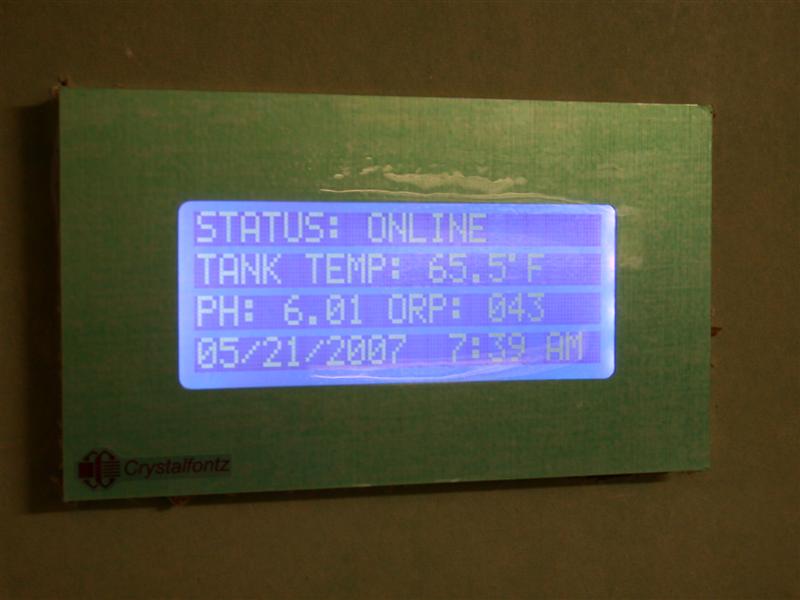
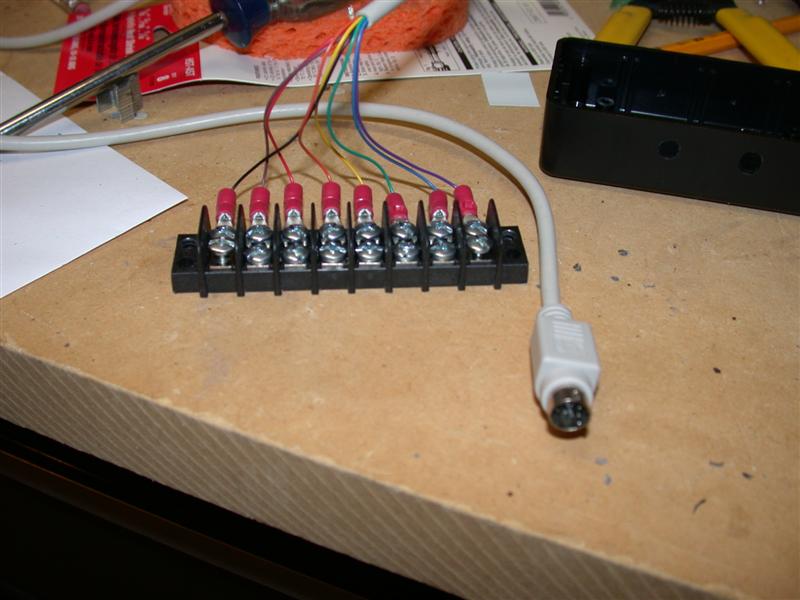
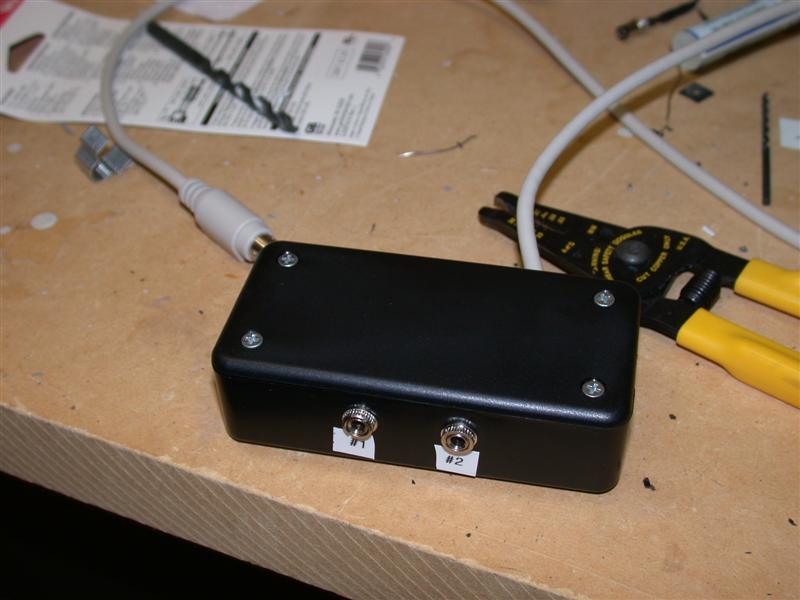
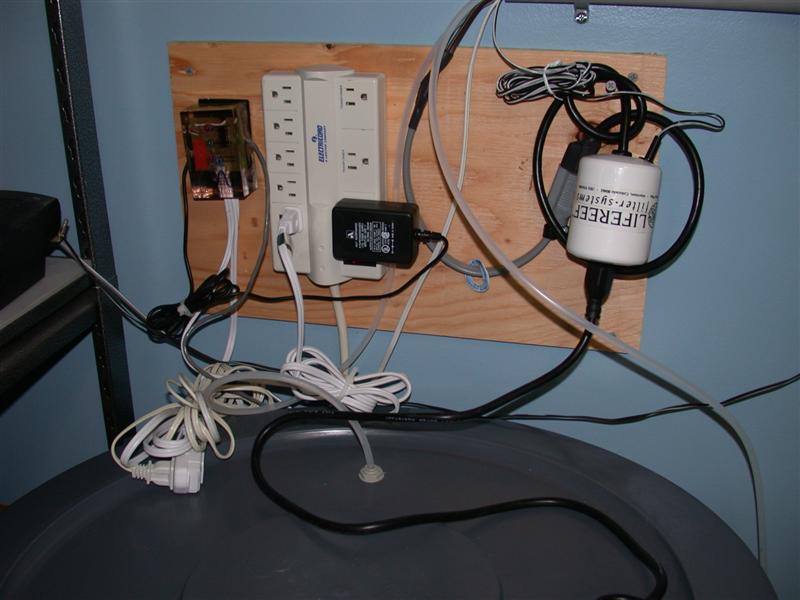
Next I needed to hook up the float switches to my Apex. The controller can take two switches on it's own. On the old tank I had the floats wired into a terminal block, but it was a pain if I need to take them off. So I built a nice little enclosure.

First take the cable and break out all the wires to their terminals on the block.

DSCN2223.JPG


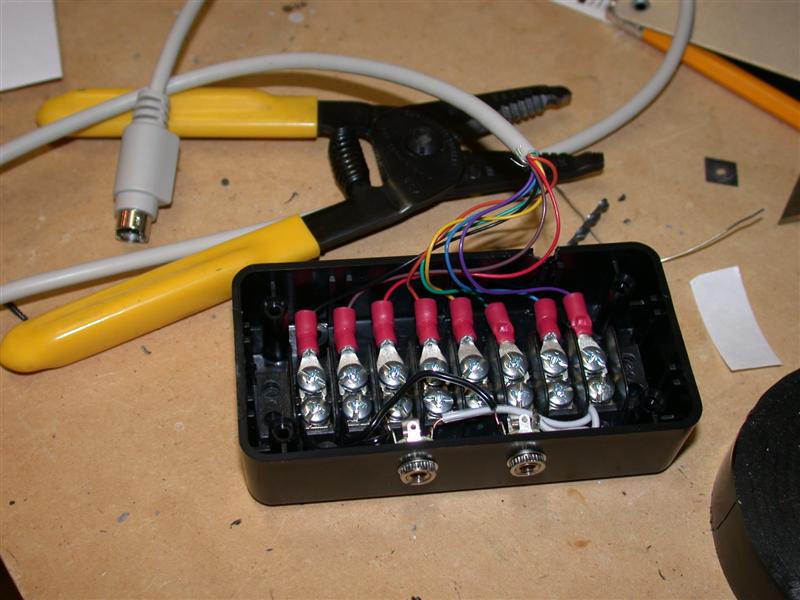
Next drill some holes in the box to mount hardware to plug the floats switched into. Then put in the terminal block and wires it all up.

DSCN2225.JPG


Close it up and I'm all done. Now it will be much easier to add and remove the float switches.

DSCN2226.JPG


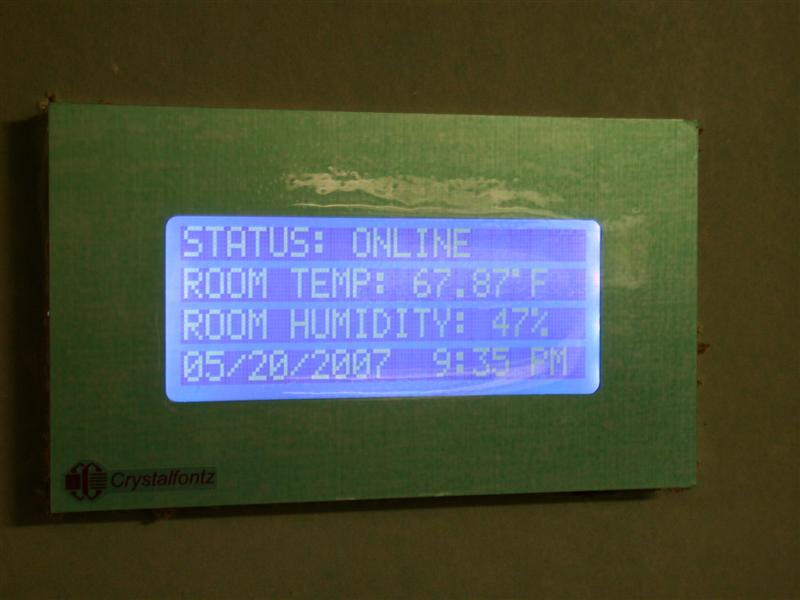
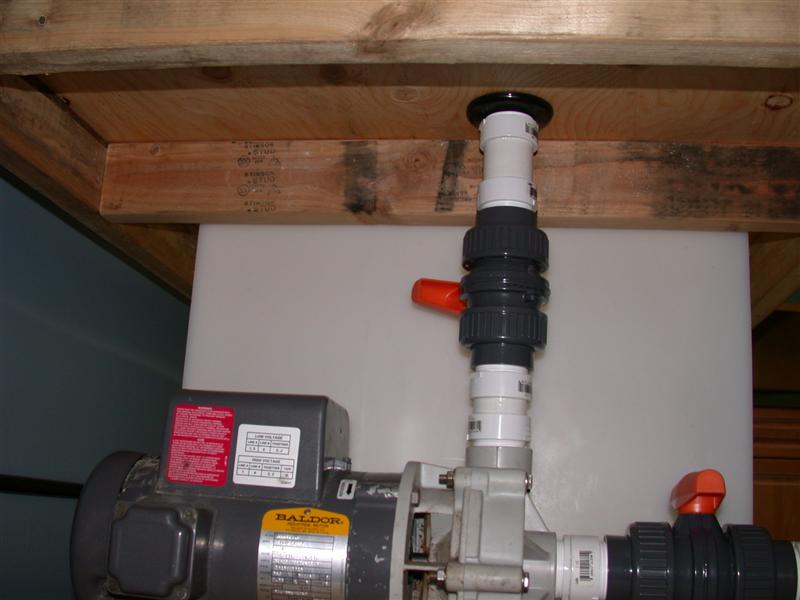
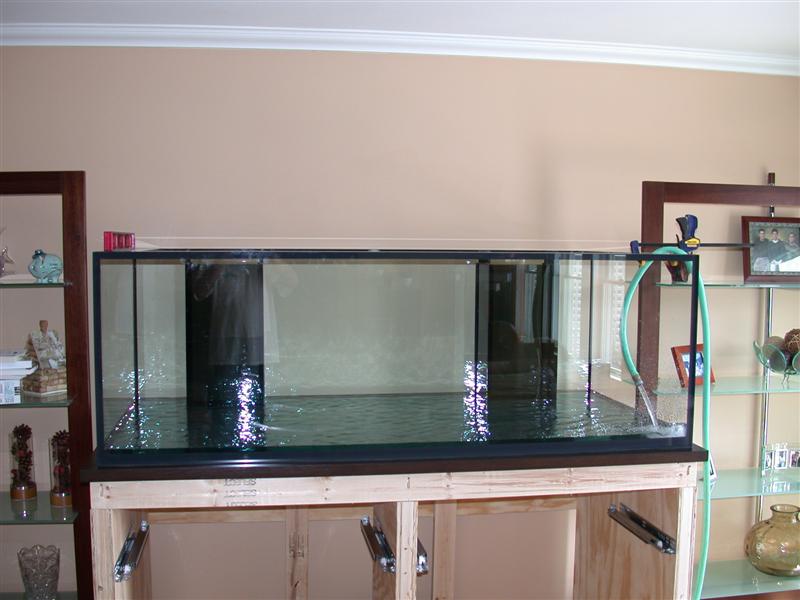
Mounted everything up and tested it. So far it works great.When the top-off float kicks in everything works as it should, the water levels doesn't seem to vary more than 1/2" in the sump. So you really never see a sump level change at all. If the low level float trips, the Apex shuts off the main pump, trips an audible alarm in the house and send me a page and emails a few different accounts telling me the low level alarm tripped and the main pump is on.

If the high level alarm trips the power to the top-off is cut, an alarm sounds in the house, and I get paged and emails sent as well.

Ok, believe it or not this took me like three days to do. :lol:
 

JBNY

Reefer
Rating - 0%
0   0   0
I am using the same skimmer as my last tank. A Barr Aquatic SK4200. 3 feet tall, duel becketts, yeah it's a monster, but it skims the daylights out of the tank. I have it plumbed into my return pump, so it's not taking up much electricity.

It took about two weeks to start skimming anything. I think that had to do with all of the piping I put in, for some reason my skimmer seems to stop working for a week or so especially when I add flexible PVC.

Anyway, I wanted to put the skimmer close to the sump this time. Last time I had the skimmer a few feet from the sump, and a few times I either forgot to plug in a tube or attach a hose and dumped water or skimmer scum all over the place. So I decided to try and put the skimmer over the sump. My first dilemma was what to put it on. Luckily a friend of mine gave me a scrap piece of fiberglass grating that he had. After I cut it to the right size with a saber saw it works get for what it does. Super strong and no worries about salt water!

DSCN2229.JPG


I also tapped a hole at the bottom of the PVC tee that attaches to the skimmer. So when I need to get to the becketts to clean them I am not spilling water all over the place. I can just shut off the skimmer and open the valve and drain the exit water into the sump.

DSCN2230.JPG


Here is the exit pipe for the skimmer, I put the same bend that I did with the return form the main tank. It really works well so you can have a ton of flow coming out and it really doesn't splash around when going back into the sump.

DSCN2232.JPG


I have some more pictures of the skimmer set up that I will post later as I can't find the pics right now. But I also made air values to control the amount of air going into the skimmer as well as a muffler to cut down on the sound and filter the air going into the tank.
 

JBNY

Reefer
Rating - 0%
0   0   0
Here is a diagram of my ATO setup. Description below.

ATO_SETUP_JBNY.JPG


All top-off water is kept in a 55 gallon Rubbermaid brute trash can.

For the Top-Off Container
Controller #1 controls the water level in the top-off container.
When the water level drop lower than float switch #4, Controller #1 energizes float switch #1. Water from the house water supply now goes into the RO/DI unit and then goes into the top-off container.

When the water in the top-of container gets to float switch #3, Controller #1 turn off float switch #1. If float switch #3 fails, float switch #2 will be activated and Controller #1 will turn off float switch #1.

Fr the sump
Controller #2 controlls top-off for the sump, water falls below float switch #6, Controller #2 will activate the top-off pump and pump water into the sump until water is above float switch #6 then Controller #2 will shut the pump off.

float switch #5 and float switch #7 are fail-safes. they are hooked into the switch input box that connects the switches to Controller #3 (aquacontroller3).
If water goes below float switch #7, the main pump is shut off by Controller #3. An alarm sounds, pages are sent to phone and emails accounts.
If water goes above float switch #5 Controller #3 shuts off power to Controller #2 which cuts the power to the top-off pump.An alarm sounds, pages are sent to phone and emails accounts.

Here are a few more pictures of my ATO setup.

Here is the ro/di unit and the polypropylene solenoid valve (Float Switch#1). They are located under the sink.

DSCN2233.JPG


Just the solenoid valve.
DSCN2234.JPG


top-off container controller on left Controller #1. Top-off contoller for the sump top off (life reef controller Controller #2) on right. Need to clean up the wiring.

DSCN2239.JPG


Floats switches in the top-off container. Switches #2, 3 , AND 4.
DSCN2238.JPG


Float Switches in the sump. Switches #5, 6, and 7.
DSCN2260.JPG
 

Sponsor Reefs

We're a FREE website, and we exist because of hobbyists like YOU who help us run this community.

Click here to sponsor $10:


Top