JBNY

Reefer
Rating - 0%
0   0   0
Here are a few more pictures of the Skimmer setup.

Here is the skimmer (Barr Aquatic SK4200) up and running over the sump.I still need to find some place to put the air meter/filter that is sitting on top.

DSCN2241.JPG


Close up of the air meter I made. It uses dyer flow meters, I believe it is the Dwyer RMB-53-SSV Flowmeter that I have on there. http://www.dwyer-inst.com/htdocs/flow/SeriesRMPrice.cfm#CRA The flowmeter allow you to find the best amount of air for the beckett to use. Once you have that, you can easily clean the becketts and always get it back to the same setting you had before.

DSCN2242.JPG


Here is how I set up the back of the air meters. Air is sucked in from the top of the PVC tube. Inside the tube I have carbon sandwiched in between polyfill. This filters all the air going into the skimmer, which is really all going into you tank. It also acts like a muffler for the becketts, effectively making the skimmer almost silent. The air is pulled into the air meters from the tubes on bottom sides, and then the air goes from the meter to the becketts. The tube at the bottom middle is for injecting ozone.

DSCN2243.JPG
 

JBNY

Reefer
Rating - 0%
0   0   0
So here is something I think is pretty cool.

I finished setting up the wall mounted LCD screen for my tank. It pulls information about my tank and the fish room. I have it change from tank to room information every 3 seconds.

When everything is up and running. I get this screen.
DSCN2257.JPG


Room stats are on this screen.
DSCN2256.JPG


When I am doing maintenance (e.g. a water change) I have the heaters and chiller as well as a bunch of pumps turned off. When I am doing that I see this screen. This is to remind me to turn everything back on when I am done. :)
DSCN2253.JPG


If something goes wrong and any alarm on the tank trips I get this screen.
DSCN2254.JPG


Pretty slick, eh?
 

JBNY

Reefer
Rating - 0%
0   0   0
I got the front of the doors finished.

So here is the stand minus the canopy, I'll start that next.

DSCN2275.jpg


DSCN2276.jpg


I'm happy with it, I think it came out pretty nice. I have to re-align the rails on the left side of the drawers. The draw closed slightly askew, but you can't see it in the pictures. But other than that I like it.
 

JBNY

Reefer
Rating - 0%
0   0   0
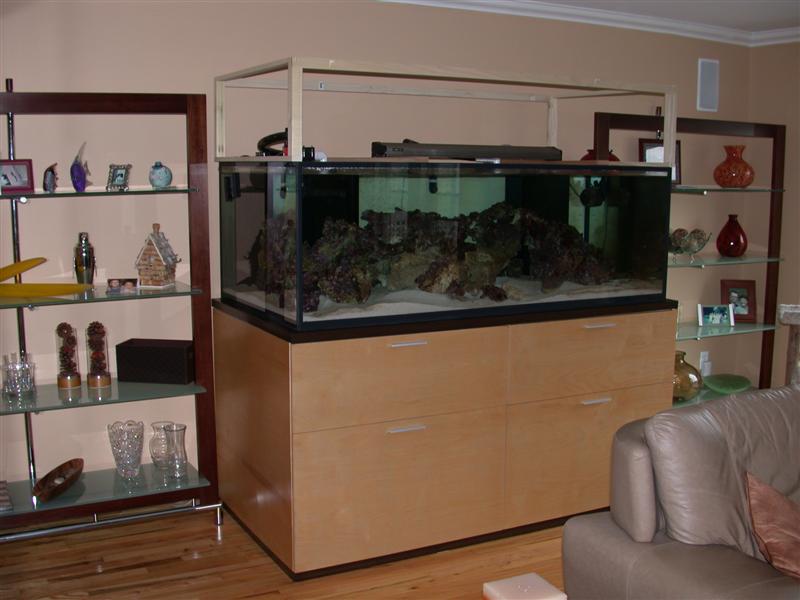
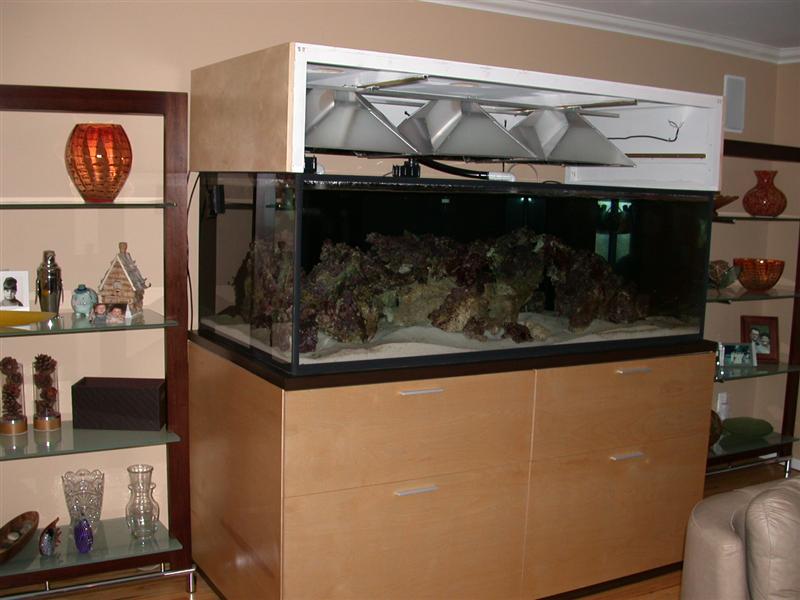
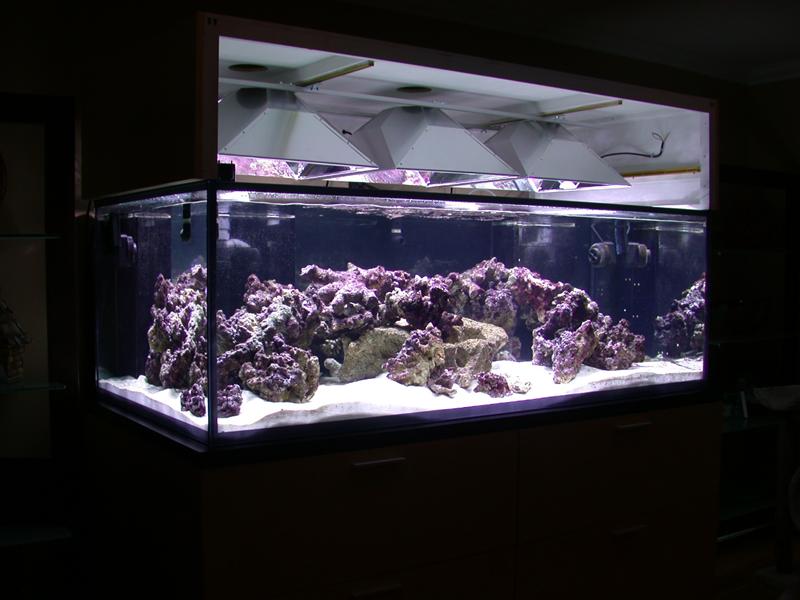
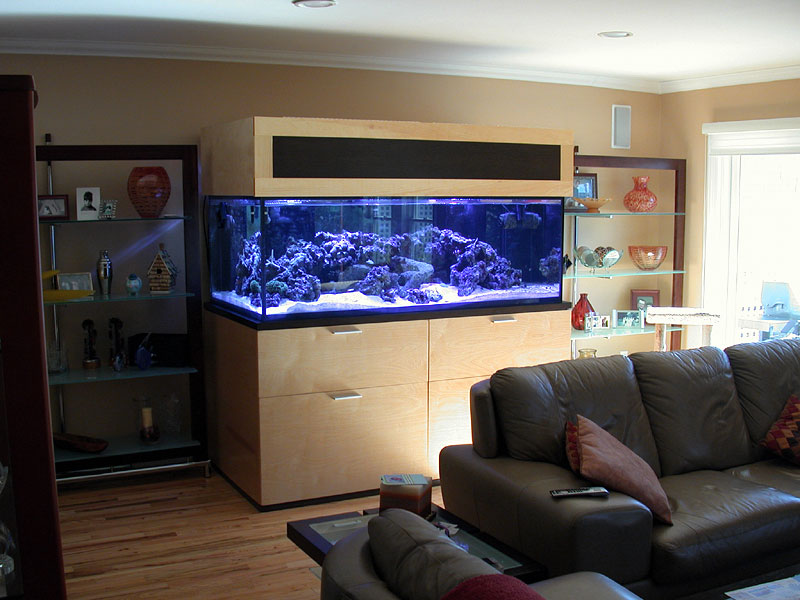
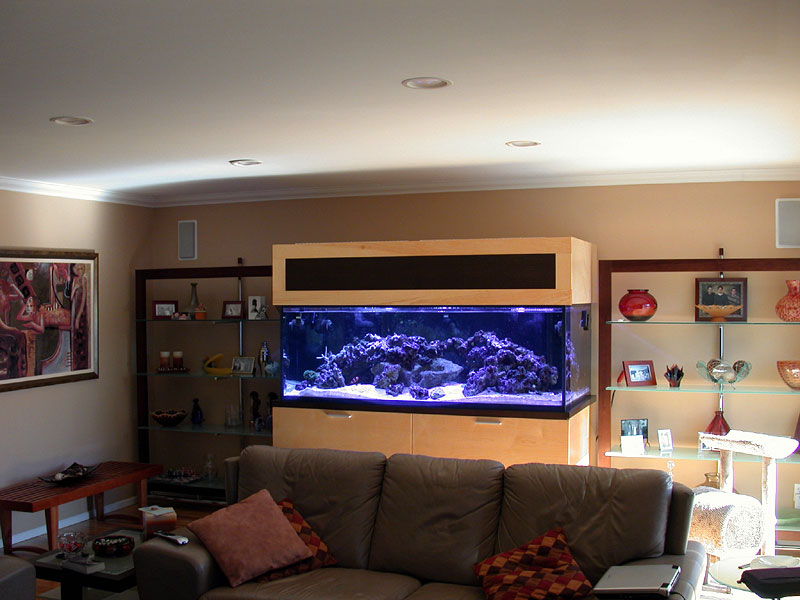
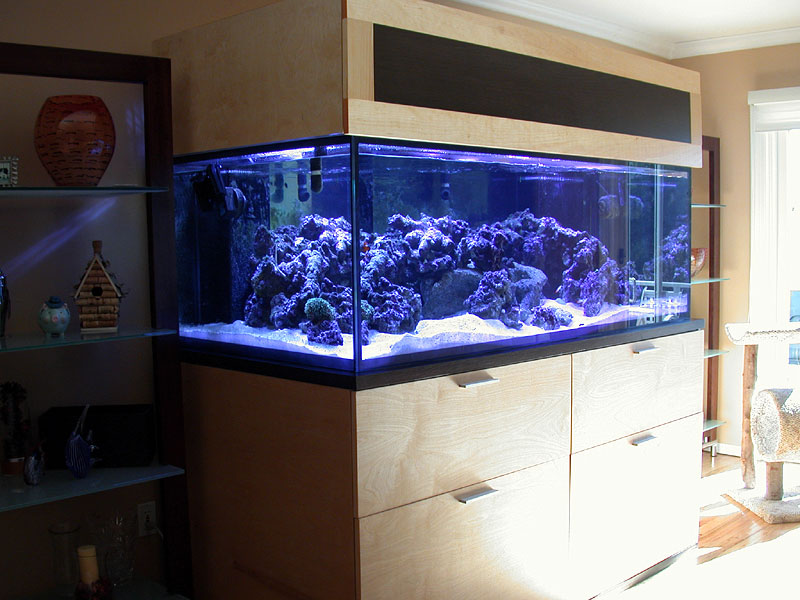
Next I started working on the Canopy..

First I made the frame for the canopy out of 1x2s using pocket holes again. After I made the frame I put it on top of the tank to make sure that everything fits the way I want it to.

DSCN2339.JPG


The canopy will extend out a little bit from the sides like the stand does. 3/4" will rest on the two sides of the tank.

DSCN2343.JPG


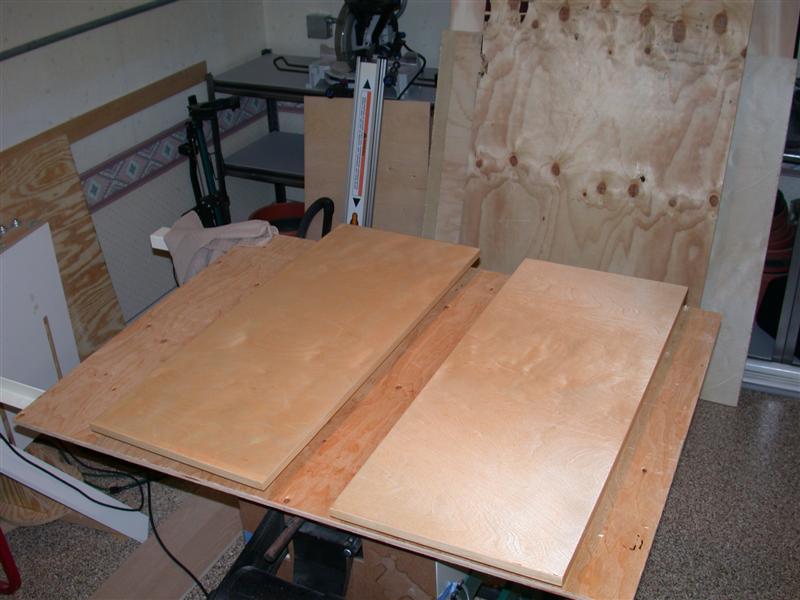
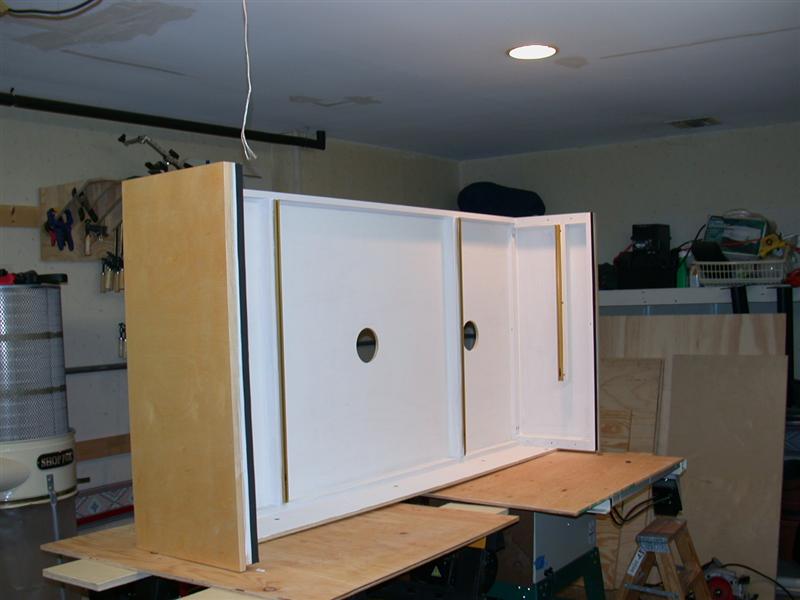
The side panels are birch stained the same as the stand. Here are the panels after they have been cut, veneered, stained and 3 coats of polyacrylic.

DSCN2346.JPG


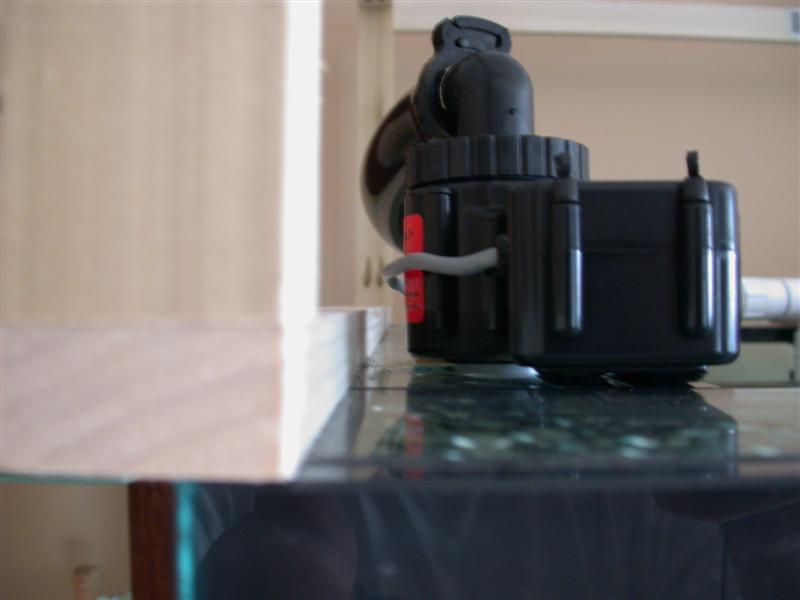
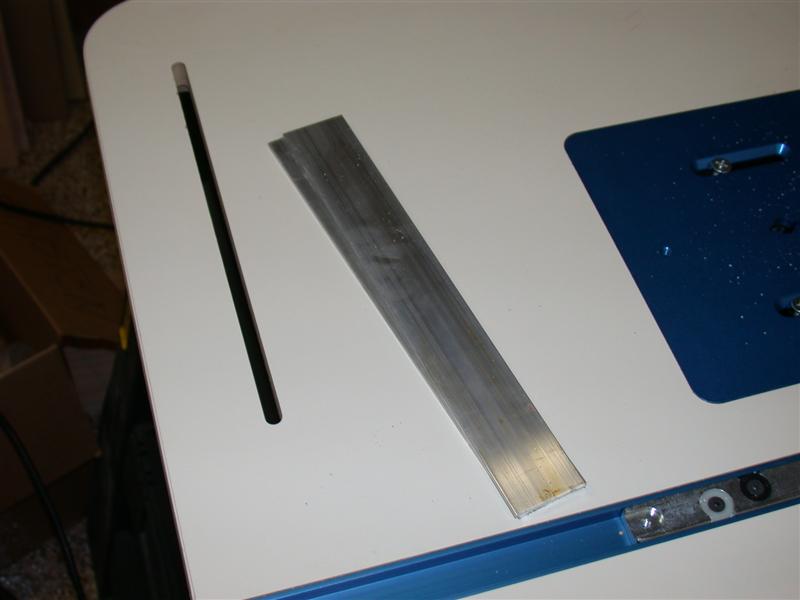
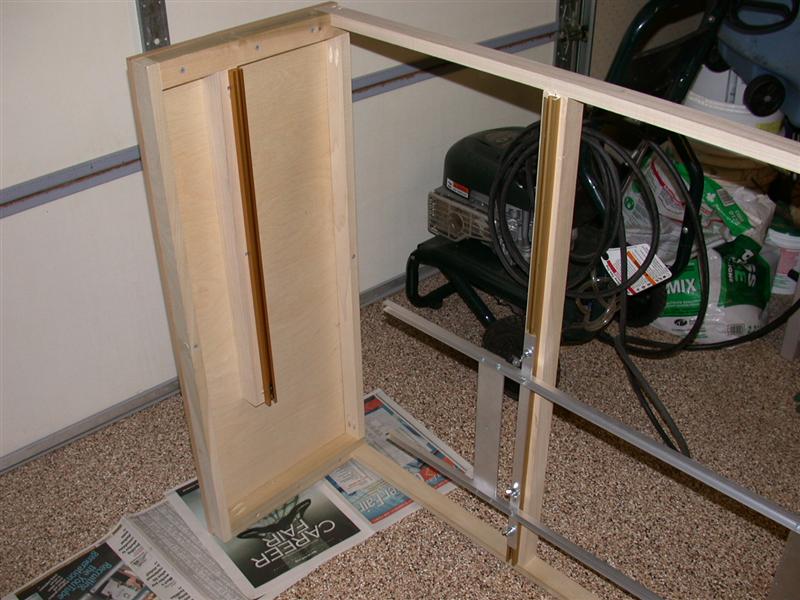
I wanted to make the support frame for the VHO and MH out of aluminum, so I bought all the pieces at the local Home Depot and started measuring and cutting. I used my router table with an attachment for my use my jigsaw. So I was able to cut all the pieces pretty easily.

DSCN2349.JPG


Using the fence with a good stop allowed me to get nice uniform cuts.

DSCN2352.JPG


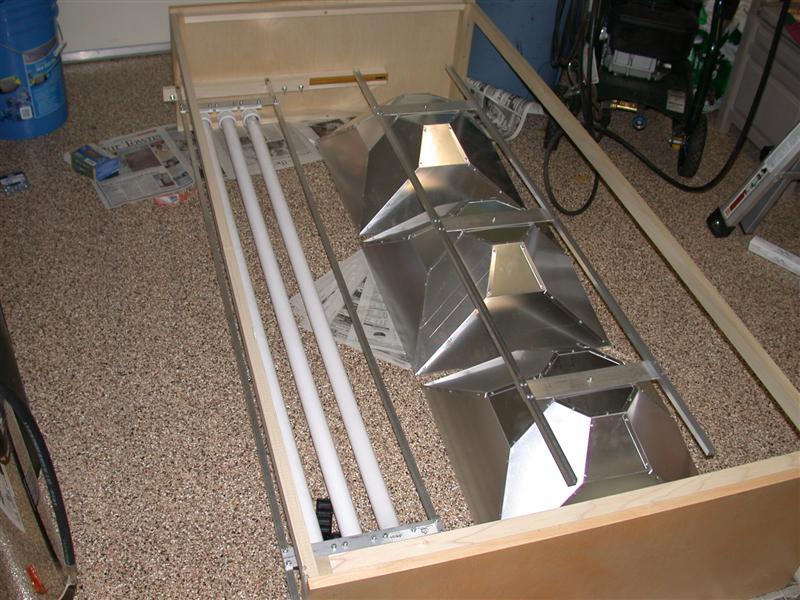
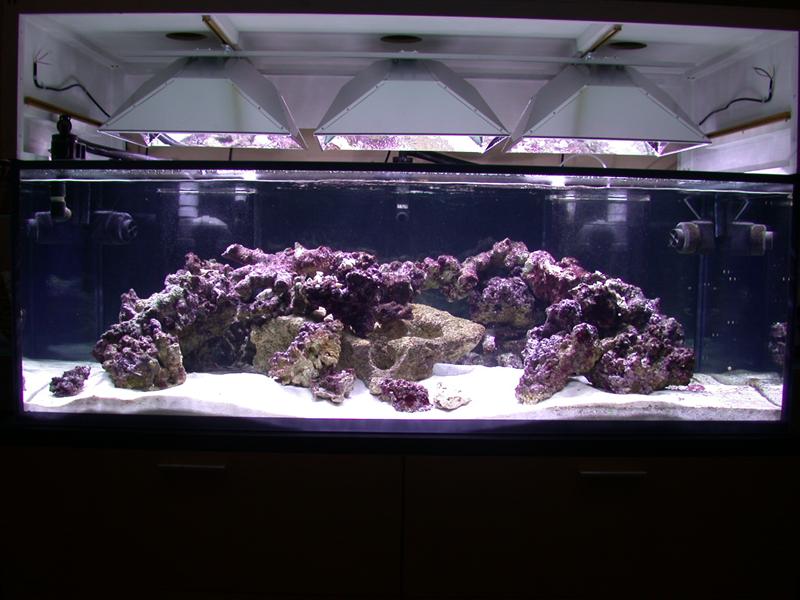
I decided to make two light racks. One for the MH, the other for the VHO. I also wanted to be able to remove the light racks from the canopy if needed. So I had come up with a way to have them slide in and out. I know a lot of people use door slides for the light racks. I thought that over time they might start to rust. So I wanted to use something that was simple and easy to use and easy replace if I needed to.

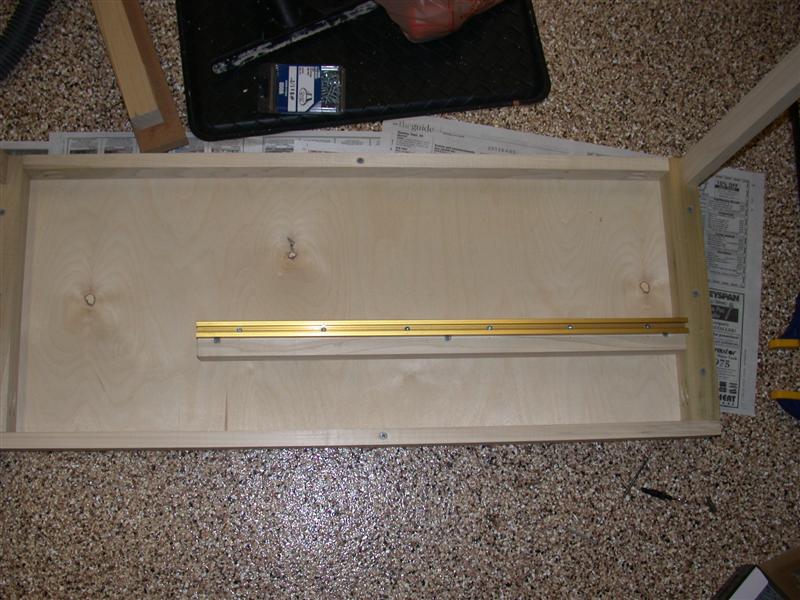
I decided to use T-Track. T-Track is used in woodworking to align tools and jigs so they and easily slide as well as lock them down to prevent movement.

So here is the t-track installed on the side panels for the VHO lighting.

DSCN2355.JPG


Here is the VHO light rack in the t-track. Works pretty good. I can move the lights back and forth and lock them any place in between. There are stainless steel bolts that, using wingnuts, fit into the track. opening the wingnut loosen rack so it can move, tightening the wingnut keeps the light rack for moving at all.
DSCN2356.JPG


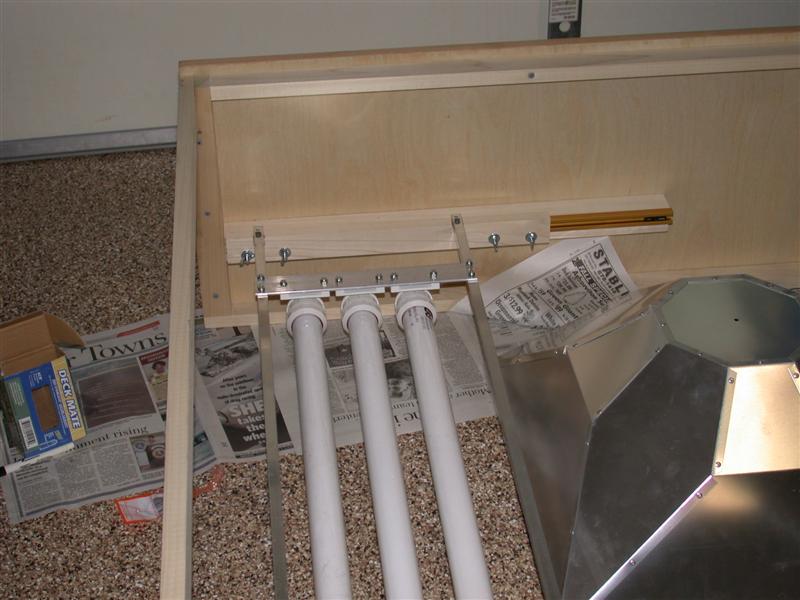
Here everything placed in the canopy with the light rack for the MH, before the top track is installed.
DSCN2360.JPG


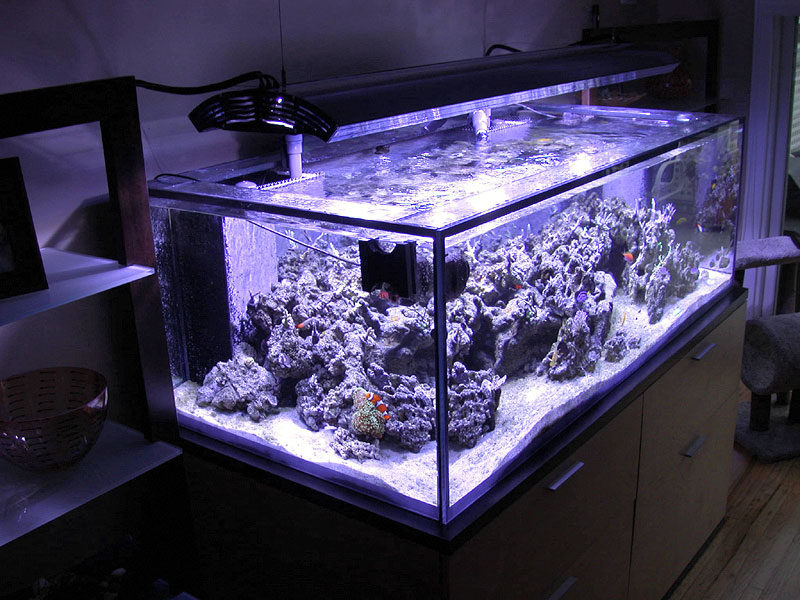
Here is the MH light rack with the reflectors removed so I could attach the rack to the t-track. I also have small stop block that sits at the end of the track to prevent the light racks from going too far back in the track. The MH will be set up so the the MH bulb is about 8" form the top of the tank, about 10" from the water.

DSCN2363.JPG


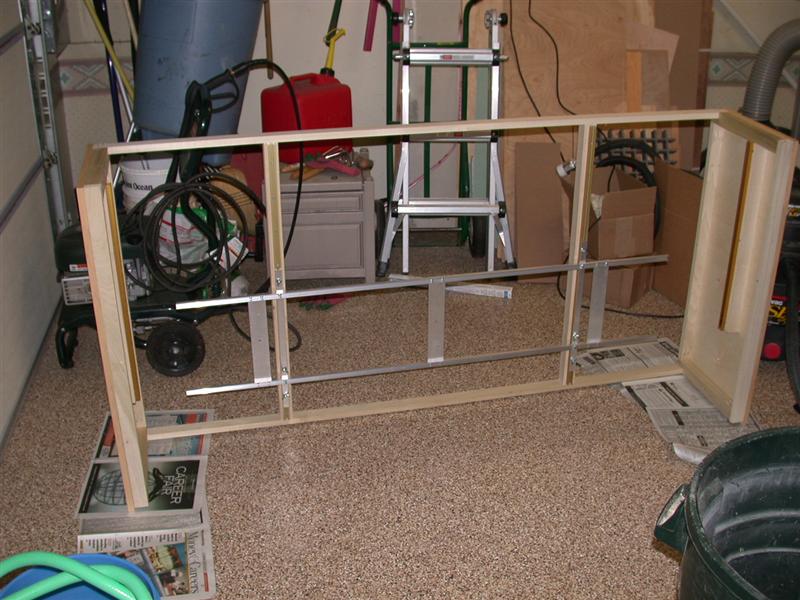
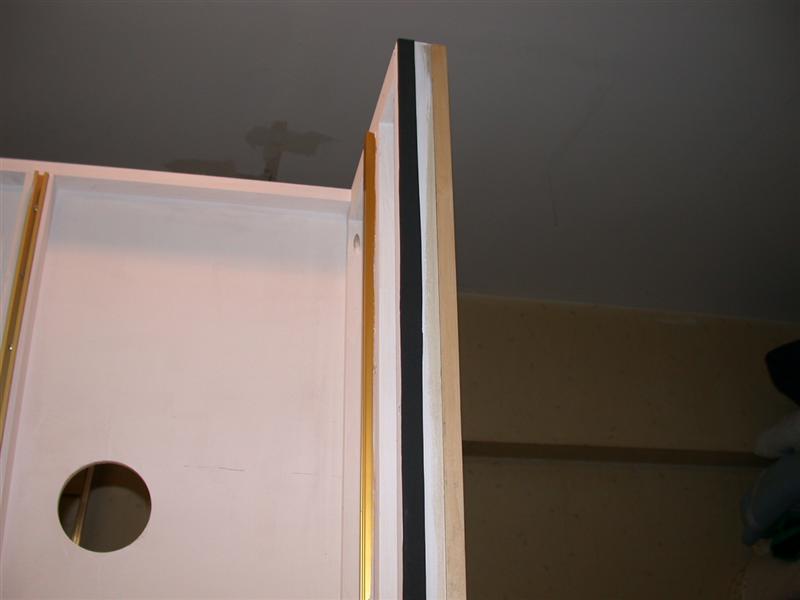
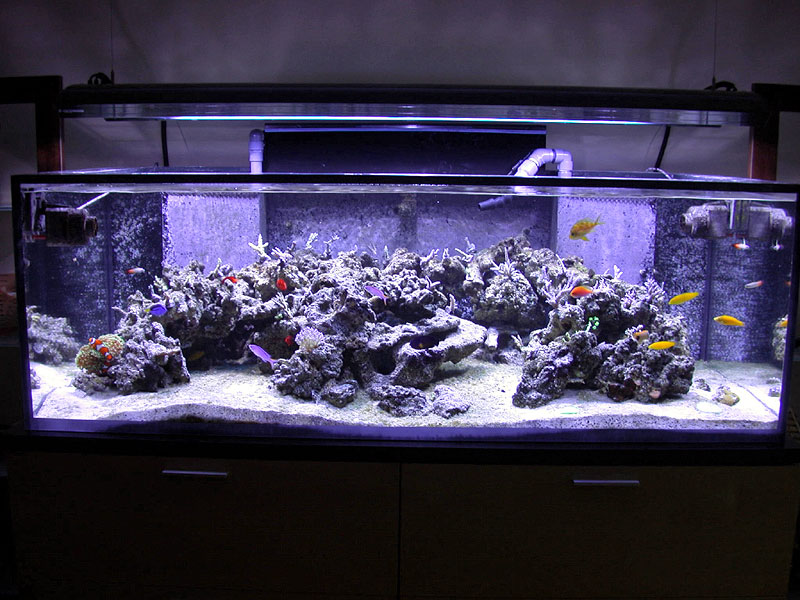
Another shot of the side and top tracks.
DSCN2364.JPG


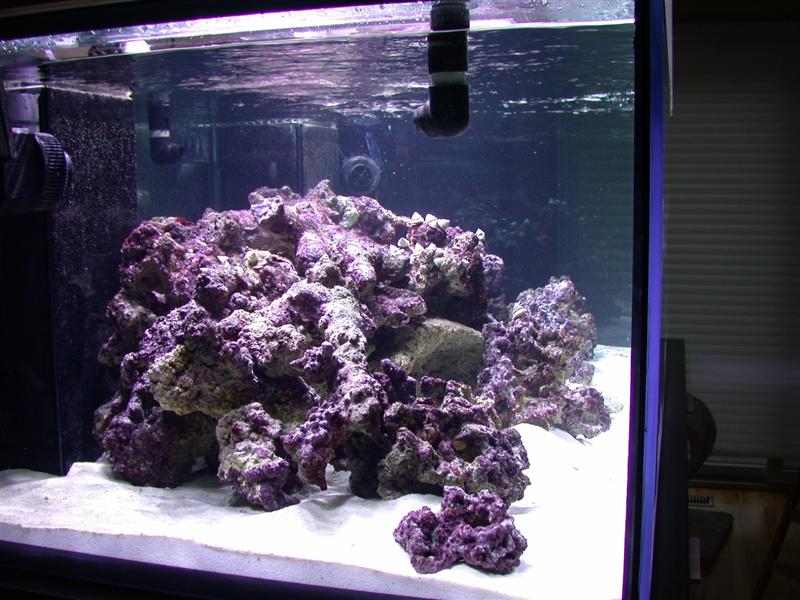
Finally took everything out, caulked the inside seems, and painted the inside of the canopy white.
DSCN2365.JPG
 

JBNY

Reefer
Rating - 0%
0   0   0
After painting the inside. I caulked all the inside seems with silicone to keep any light from escaping any gaps. Then I added a strip down the sides of the bottom of the canopy to cushion the canopy against the tank as well as cut down on any vibration. I used some of the left over neoprene.

DSCN2368.JPG


DSCN2369.JPG


I attached the neoprene with some 3M spray on adhesive, the stuff works great. I let that sit for the night and the next day I had a friend help me move the canopy onto the tank. I have not made the front door for the canopy yet, it will have to be open for a few days.

DSCN2372.JPG


Then I wired up the MH and stuck in some spare XM 10K bulbs. I'll wired the VHO later.

Bam!
DSCN2373.JPG


DSCN2374.JPG


DSCN2375.JPG


DSCN2376.JPG


The right side gets full sunlight for about 5 hours in the day. I let the tank sit with just water and rocks for two months so there is a little algae on that side of the tank. But not bad for two months and no snails or crabs and no water changes. I just put the snails in about ten minutes before I turned the lights on.

I was super happy to see coralline algae growing on the side of the glass already!!!
 

JBNY

Reefer
Rating - 0%
0   0   0
The canopy is almost done, well the outside anyway. I did swap out the XM10K for some helios 20K that I had lying around just to see what it looks like.

Anyway, here are some pictures of the tank stand and cap finally done.

DSCN2388.jpg


DSCN2386.jpg


DSCN2402.jpg


Close-up of the oak stained inlay.
DSCN2398.jpg
 

JBNY

Reefer
Rating - 0%
0   0   0
Here are some of the sump room all done, going left to right.

DSCN2891.jpg


DSCN2890.jpg


DSCN2889.jpg


A few other shots of the sump room.

This one is with the frag MH on, and you can see the sink I put in.
DSCN3055.JPG


Here is the other side of the room, with some racks to put stuff on as well as the brute rubbermaid container to hold top-off water.
DSCN3064.JPG


I also put in an exhaust fan. Wow, what a difference that made! I have it set up to go on at 78F and off at 76F. It is just a 110CFM bathroom exhaust fan, but it pulls the temperature down, when the chiller is running, 7-8 degrees in 45 minutes.
 

JBNY

Reefer
Rating - 0%
0   0   0
So a few months after I finished the canopy, I started to feel that it looked too big and imposing in the room, and start to realize that I really liked the look of the tank when the top was open before I put the canopy on. So I pulled off the canopy and put in a Giesemann Spectra. My wife though after all the time I put into making the canopy that I was crazy to get rid of it. But I really like having an open top and liked the look the Gieseman brings to the room much better. So after spending more time to disassemble remove and hang the new unit I had this.

:D

DSCN3119.jpg


DSCN3117.jpg


DSCN3115.jpg


DSCN3122.jpg


DSCN3129.jpg
 

JBNY

Reefer
Rating - 0%
0   0   0
So that's my build!! I think it took me about 8 months, including a few large breaks from the project, to do everything.

So from there I grew out the tank from frags donated from fellow reefers. I'm pretty patient and besides really like watching the tank go from little frags to big colonies. To me it is the best part of having a tank. A whole tank with nothing but full colonies is never as much fun as when it is young and still growing.

So I started with some frags.

DSCN2709.jpg


1 month

DSCN3122.jpg


And over the new two years grew out the tank.

4 months
DSCN3476.jpg


To this at 10 months

DSC00479.jpg


Finally to this

18 months

DSC_1843_.jpg


DSC_2064.jpg
 

JBNY

Reefer
Rating - 0%
0   0   0
That last pic is from 4/2010 when the tank looked the best it will for the next few years.

So after great success for a numbers of years, the next 4 years were an extremely difficult and frustrating time for reef keeping for me.


  • 11/2010 A sponge called Collospongiais sp is growing in my tank. This sponge slowly grows and kills everything, nothing eats it, getting it out is very difficult and it easily rips apart, but it grows and covers anything, I had found it earlier but thought I had it removed. Due to the amount of coral in the tank I did not see it in places that were not accessable.
  • 03/2011 Not getting anywhere with the sponge, start to bring in some reef friends with ideas, using muriatic acid works the best, inject it under the sponge and it will kill off the area, have to use that method carefully though, try that for a few months.
  • 06/2011 Oh great just what I need, Bryopsis starts to show up in the tank.
  • 08/2011 Bryopsis starts to choke off the growth of lots of SPS. Coral die off begins
  • 09/2011 Bryopsis gone and lots of coral too, the die back of SPS reveals that the sponge is just all over the rockwork. Give up the fight, I have to remove all rock from the tank and start over. Keep some coral, the sand, and the fish.
  • 10/2011 buy new rock (Marco rock), needs to cure at a friends tank.
  • 03/2012 due to issue outside of my control new rock doesn't get into a tank to be cured until March, leave it there for two months.
  • 06/2012 Old rock gets removed new rock goes in. Let the tank adjust for the summer.
  • 08/2012 start with new corals things are looking better.
  • 10/2012 Hurricane Sandy hits the area, lost power for three days, have a generator but due to my own mistakes have issues with temperature.
  • 12/2012 Most of my new corals die off from problems from the hurricane.
  • 01/2013 While putting some new corals in the tank, notice that two fish have ick pretty bad no new fish have been added in years, also have not had any disease in my tank in years and years.
  • 02/2013 losing fish due to what is either ick or velvet, fish get some ick then eventually turn very pale and then die. Over the next two months I lose more than half the fish, two fish that I have had for over 12 years die. Sad times, not adding any coral to the tank during this time while things work themselves out.
  • 04/2013 Let the tank go for a month or so to make sure nothing is still going on in there.
  • 06/2013 Tank looks better no fish are dying, start adding fish but no corals.
  • 07/2013 Decide to leave the tank alone for a while, I am remodeling our Kitchen in a few months (ripping the whole thing out), the tank sits right next to the wall I am going to remove as part of the kitchen remodel, no point in doing anything with the tank until after the remodel is done, in case construction dust gets in the tank and causes problems.
  • 10/2013 Start remodel. Tank stays covered for a good part of the construction, wow is there dust everywhere!
  • 12/2013 Done with kitchen, will start getting the tank back after the new year.
  • 02/2014 Got some more fish in the tank and getting tank in better shape.
  • 03/2014 Tank is in good shape will start putting corals in.
  • 05/2014 Corals are not doing well. SPS RTN in a few weeks, LPS wither a way after a month or two.
  • 06/2014 Paameters look ok, fish are doing fine no corals are makingit in my tank.
  • 07/2014 I have had enough and just leave the tank be and feed the fish, enjoy my summers.
  • 11/2014 Stopped carbon dosing and using GFO. Perform about 400 gallons of water changes over a few weeks. Tank looks much better corals, SPS and LPS seem to be doing ok in the tank.

So that's the short version. I am used to occasional setback, but this just seemed to be a never ending series of bad luck that lasted years. I am hopeful that this year it will all come back.

So here is what I did to hopefully and finally get thing moving. Over the summer I had tried to put some SPS frags in the tank, and they looked great for the first week or so. But then in a few weeks they start to brown out, bleach, polyps retract and eventually RTN one day. LPS would start out great and by about the 3rd week they don't show as much polyp extension, eventually retract and receded only to die maybe a month later.

Three months ago I was getting ready to just rip everything out, bleach the whole system and start again.

Then after speaking with a few friends who had remarkably similar issues with their coral when carbon dosing, I decided to stop carbon dosing and using GFO. I also decided to switch salt. I had been using Oceanic for something like ten years, but for some reason the last year or so, the animals didn't look better after a water change, they looked a little worse. Corals just seemed a little more retracted from what they had been in the past. I changed my salt to Red Sea Coral Pro.

So I pulled off the doser and did a few water changes and low and behold things looked better. Polyps were out a little more.

So at this point encouraged by the first glimmer of hope, I go all out. I start performing water changes twice a day for the first two days and then every day for a week. I was making so much ro/di water I killed my RO module in the middle of it and had to buy all new DI resin and a new RO filter. So after I changed out about 450 gallons of water, then I dropped back to twice weekly water changes and now I am doing once a week. Boom! tank looks great. I now have about some SPS and LPS frags and they all seem to be doing good.

So in the first post I stated that I was restarting the tank. So now I am back to square one. I'll post some tank pictures so you can see what it looks like now. I'll also go over changes in the system I have made over the years.
 
Last edited:

JBNY

Reefer
Rating - 0%
0   0   0
Where are the reefbrites?

I'll post an updated pic with the reefbrites. :D

Awesome build
Awesome tank

Thanks I'm really happy with the build, looking back it was a ton of work if I knew how much work it would have been I probably would have made some shortcuts. Ignorance truly is bliss.

Tank of month and tank build of year. Can you tell us do you feed coral or supplement amino acid Etc.....if so how much and what you use. Enjoyed your journey build.

I only used Salifert Amino acids. Other than that just light.

Awesome build just my opinion good choice without the canopy looks great.

Thanks, I agree I like it much better, no regrets pulling off the canopy.

Joe glad to see it back up and running again...looks great

Thanks Mike, Hopefully the tank will do great going forward.
 

piranhapat

Advanced Reefer
Location
Westchester, N.Y
Rating - 100%
13   0   0
Sorry to hear the road blocks that you faced. Hearing your set back is a reality that happens to all of us big or small. We try to learn from all the information thats out there. You gave us alot of information and really enjoyed it.
 

Sponsor Reefs

We're a FREE website, and we exist because of hobbyists like YOU who help us run this community.

Click here to sponsor $10:


Top