xxxAngeloxxx

Advanced Reefer
Location
New Jersey
Rating - 100%
121   0   0
I am choosing option number 2 for mounting and making a deal on a pair of lightly used Sol Blue's with controller, they should be with me in a week. Thanks guys! Ken are you getting rid of those brackets or re-using them in the new build? ANxious to see your new mounting solution.

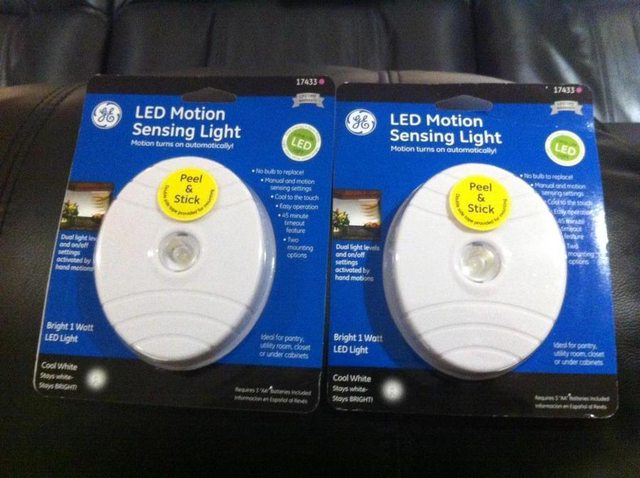
In the meantime I picked up some cabinet LED motion lights to help me out in the stand.

T6tfol.jpg

I'm loving how you have everything set up in order and well too. But my question is where and how much weight does those led holding thingy lol hold up too?
 

twan

Junior Member
Rating - 0%
0   0   0
xxxAngeloxxx, those LED lights in that picture are going on the underside of my stand to light the way while doing tank maintenance. They will be held on with magnets and will not be my fuge lighting just light to see by.

Macropora, thanks for the compliment.
 

twan

Junior Member
Rating - 0%
0   0   0
Trying to get a E-Marco-400 5 Lb Kit ordered but Marco has not returned email from yesterday or phone call from this morning yet.
 

twan

Junior Member
Rating - 0%
0   0   0
Spoke to Eddie at Cadlights today. The tank is drilled and overflow built.
He will send me pictures tonight.

As for the stand, they do not anticipate to have them in stock till between March 9th and 12th.
If I wanted them to custom make me a stand it would be $350 instead of the $200 I already paid for the regular stand. Problem is this would cost me more shipping since the custom stand would come assembled.

Maybe its time to have a stand built locally and just tell them to refund me $200 and ship my tank now.
I have to think about this.
 
Location
Howell, NJ
Rating - 100%
64   0   0
with the controller im pretty sure the usb goes from the 8 port power center to the black box you plug in your ph/temp and ethernet to.

with plumbing the tank i would use sch 40. ive always used that and it will always be A ok :) if you where doing extreme high water pressure then i would use sch 80 but u will be fine.

i dont think there is a need to use a skimmer (some will say to use it but i wouldnt) while its cycling and lighting you can put on for an hour a day but you really dont need it either. but i would def. give it some light thats just me :biggrin:
 
Last edited:

twan

Junior Member
Rating - 0%
0   0   0
Thanks Tonyscoots84.

You are right, the unit gets its power via USB through the EB hookup on the aquabus.

As for the skimmer I will run it here and there after week 2 of cycle to start dialing it in.
 

twan

Junior Member
Rating - 0%
0   0   0
I think I am going to call Eddie back today and have them ship the tank and the skimmer only.
The refund on the amount for the stand should be $200.
I should also be entitled to cheaper shipping.
The skimmer is listed as free shipping on their site so thats a moot point.
The tank and stand I have already paid $200 to ship together and now eliminating the stand the freight will come down by 50lbs.
It should not cost $200 to ship the tank alone.

I am then going to get in line for my local stand guy and maybe have a stand in a month. Wish me luck.
 

twan

Junior Member
Rating - 0%
0   0   0
Looking @ Cycling

I gave the rock a rinse last night only.
In light of not having a stand possibly for another month it is time to get moving.
I am going to make a tank model out of cardboard this weekend and start doing an aquascape with just zip ties to see if I can get it where I like without having to use mortar.
I will then throw the rock into two 20g rubbermaids with a heater and powerhead and let it get going.
I will not have room for the skimmer in either container.


  • [li]Should I leave the tops of the containers open?[/li]
    [li]What temperature should I keep them at?[/li]
    [li]When should I do water changes on them?[/li]
 
Last edited:

twan

Junior Member
Rating - 0%
0   0   0
Making water now for the cycle to begin in the tubs.
Stand order cancelled. $200 refund being processed.
Tank and Skimmer should ship next Wednesday 2/29/12 according to Eddie.
 

twan

Junior Member
Rating - 0%
0   0   0
Looking @ Model

Tonight I cut up some cardboard to mimic the 36x18x18 footprint of the tank and the overflow portion.
The whole model is 1/4" off front to back but it got the job done.
The overflow is 3.5"x5.0" which I still do not have final confirmation of.
The rock is not zip tied or mortar'd at all. It is just wedged together at the moment.

Be kind, I thought it would be easy to integrate Pukani and Tonga but I was wrong.
This was put together then 20 minutes.
Now that I look at it I would move the whole layout to the right to hide the overflow more and leave open sand space on the left side instead of the right.
Enough talk onto the pics.

J5NaG.jpg


JmNyY.jpg


pqiP9.jpg


ejzqd.jpg


PMpyA.jpg


GfvKh.jpg


rMYoB.jpg


fishman1069

Advanced Reefer
Location
Sound Beach,LI
Rating - 100%
40   0   0
I like the rockwork! As far as cycling your rock, you dont need to skim it or use a light. The light will just cause premature algae growth. I wouldn't do any water changes until you are completely cycled. Btw, this is the most well documented tank build I've ever seen! Great job
 

twan

Junior Member
Rating - 0%
0   0   0
I flipped the islands to hide the overflow better.
I then tossed it all into the containers to get it cycling.
I thought about trying to zip tie the rocks together to preserve the 'scape while cyling but my containers are not large enough.
I will have these pics to go by when setting up again.

It is about 30lbs pukani and 6 lbs tonga.
I still have 10lbs of pukani that I did not use and will use in the sump.
 

twan

Junior Member
Rating - 0%
0   0   0
Looking @ Equipment Panel

Just like Viewpoints delays in my tank / stand have allowed me the time to flesh out an equipment panel. He did a marvelous job on his here & here. The idea for this came solely from him. I was not planning on this.

What I will be changing however is the panel will be bolted to an unfinished wall in a crawl space behind the tank (and not inside the stand). My approach to this is to have all water on one side of the wall with the tank and sump but all electronics on the other side. I have a 3'x3' area to work with. The space where the panel will go is here:

c51Xz.jpg


Equipment that will go on the panel:
Tunze Osimolator Unit.
Apex Lite Unit.
Apex EB 8.
Sol Blue Power Packs (2).
Ecotech Battery Backup.

The AI controller, Apex head unit and Ecotech 10mpw controller will not be on this panel. They will be tucked away on the side of my stand for easy access.

I purchased two panels to fill the area. To start I may only need one but I figured I would install both now to have future real estate if I need. Pieces will be mounted with spacers to allow for heat dispersal. Cords will run along backside of panel just like Urbaneks' equipment board. Another tip I took from his is use color coded tags on outlets and the correct cord to be plugged into them. I am using colored electrical tape to accomplish this.

When all components arrive I will mount them to the board, snake the wires, then mount the board to the existing studs.

Both Panels
l3Gav.jpg


Tape and Apex
trCNi.jpg


Mounting Mock-up with Spacers
gonj0.jpg


Color Coding
I1TWm.jpg


Sponsor Reefs

We're a FREE website, and we exist because of hobbyists like YOU who help us run this community.

Click here to sponsor $10:


Top